How to Grow Perennials With Cedar Mulch

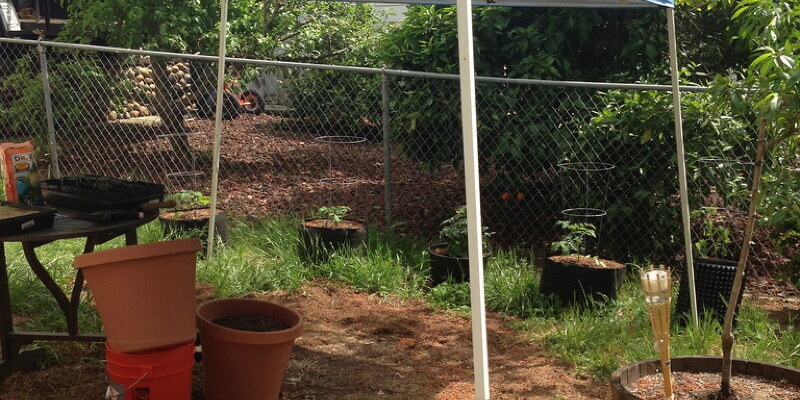
Like Mary Poppins’ magical medicine which adjusts its taste to please the individual carrying it, mulch offers benefits according to the plant’s profile. For annuals, planted to last 1 season, a layer of mulch keeps down weeds and cools the ground. Perennial plants — including many flowering favorites in addition to shrubs and trees — last at least a few years from the garden and obtain far more advantages from mulch. A natural, impartial mulch such as cedar chips keeps the cold from chilling perennials’ origins in the winter and leads nutrients to the soil as it decomposes gradually. Reasonably priced and simple to employ, chipped cedar is also a present to your perennials that keeps giving.

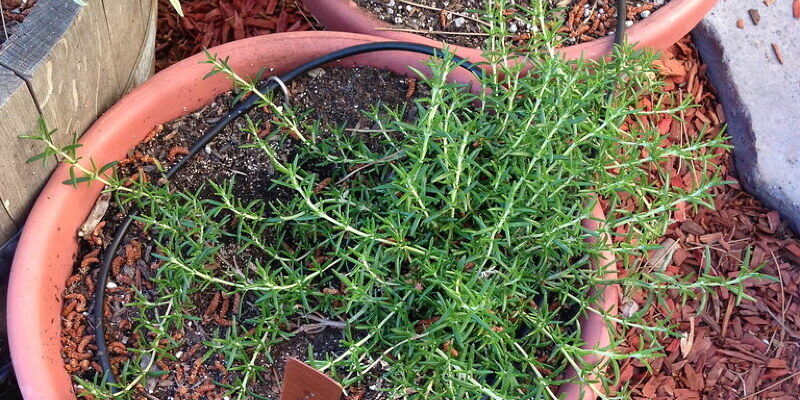
Apply a layer of cedar mulch to the root zones of plants that are perennial, or cover the dirt throughout the flower bed. Use 3- to 5-inch layers; this is going to settle to some level of 2 to 4 inches. For container plants, use 2 ins for quart pots and 2.5 ins for gallon containers.

Apply 4 to 5 inches of mulch around the base of shrubs or trees. Boost the amounts slightly if you select large-size cedar chips. Cover the whole root area of the tree or tree, typically the region directly under the plant’s canopy.

Move the mulch away from the foundation of perennial plants, including the trunks of trees. Keep the mulch about 3 inches from flowering plants and about 6 inches away from a tree trunk. Mulch mounded against the plant can cause basal decay.

Examine the mulch layer every year. When it is reduced by about 2 inches, replenish it. Put new cedar chips right on top the existing layer, but maintain the whole quantity of mulch in the guidelines.

See related

Optimum Conditions for Orange Trees

Orange trees (Citrus sinensis) are indigenous to northeastern India but develop worldwide in regions with the ideal climate and conditions. Growing oranges gives you your own tree-ripened fruit at little if any cost. Orange trees are reliably hardy and do well in U.S. Department of Agriculture plant hardness zones 9 through 11.

Climate

Orange trees are climate-sensitive plants which have quite definite temperature conditions. When they are actively growing, they do best if temperatures range from 55 to 100 degrees Fahrenheit. They become dormant in winter and require temperatures no lower the 35 F or higher than 50 F during this period. Orange trees can also be extremely frost-sensitive, although some varieties can survive short periods at temperatures at or below 25 F. You can minimize frightening of your tree if you live in a cool place by putting it in the warmest portion of your landscape, such as near the south side of a building.

Water

Oranges trees do best in regions that have 40 to 45 inches of rainfall yearly, but can endure up to 60 inches of rainfall if they are in places which don’t remain saturated for extended periods of time. They generally endure drought quite well and can produce more intense color in the peels of the fruit when grown under partially dry states. But soil that is dry for extended periods can reduce the number and magnitude of a tree’s fruit.

Soil

Orange trees prefer sandy soil, especially of a type known as high lens or high pineland soil that drains well and does not hold water for any period of time. They also need good soil depth to adapt their extensive root systems, doing poorly in regions where soil is shallow and sits on rocks or gravel. Ideally, the water table in a planting area ought to be more than 30 inches below the surface for the best root growth and tree vigor.

Sun and Nutrition

Orange trees make the very fruit when grown in full sun, although they can tolerate partial shade. They do quite well in locations that have lightly filtered shade, such as in shade produced by neighboring tall trees, including pines or oaks. Since they’re generally strong divers, orange trees need regular fertilizing, requiring about 1 cup of high-nitrogen formulation for every year of tree age, implemented three times every year, in February, May and September.

See related

The way to Tighten a Nut Under a New Sink Fixture

Sink fixtures come with everything you need to attach them securely into your sink, except instructions for tightening those hard-to-reach nuts. If you are putting in a new sink, you can put in the fixture until you put in the sink, while the nut remains readily accessible. Once the sink is, however, you normally have to crawl under it to tighten the nuts, and there is seldom room to get a wrench or a pair of adjustable pliers. Do what plumbers do and use a basin wrench to make the task all but effortless.

Clear off the shelves under the sink to give yourself more room to function. If the sink P-trap is in the way, remove it by unscrewing the nuts holding it into the sink tailpiece and wall drain, using adjustable pliers.

Insert the fixture into the right hole in the sink, middle it and align it with the back wall. Have a helper hold it steady while you fasten the retaining nut out from under the sink.

Wear a headlamp and place your head so that you can see the nut readily. Screw the nut and tighten it as much as possible by hand.

Use a basin wrench to tighten the nut the remainder of the way. A basin wrench includes jaws that clamp on the nut along with a long handle so that you can reach it easily. Fit the jaws of the wrench across the nut and rotate the grip. The jaws automatically tighten when you do this. Keep turning the handle until the nut is tight enough and the fixture is stationary.

See related

Lighting for Over the Stove

Kitchen lighting may wear numerous hats, while it’s needed as general lighting, task lighting or accent lights. But form must follow function; particularly in regards to lighting places such as cookers, sinks and kitchen islands, where jobs such as cleaning, food preparation and cleaning require plenty of decent lighting. Although many range hoods include some kind of lighting, these lights often fall short of supplying adequate task light. Therefore, an additional light source could be needed when using the cooker.

Recessed Lights

1 solution for decent stove lighting would be to install a recessed downlight above or near the stove. Recessed lights may also be set up in a soffit, if one exists within the cooker. This type of lighting has three parts: the housing, which holds the electrical wiring and socket for the bulb, the trim, which is the only visible component and covers the edges of the hole where the housing sits, and the arc, which must be built to fit and work with the housing. When thinking of a lighting type, halogen and compact fluorescent are more energy efficient than incandescent and are both excellent choices for task lighting.

LED Lights

LED lights have become one of the top choices for home accent and task lighting. A narrow, aluminum strip of LED lights can easily be set up with screws or magnets above the cooker. The lights may be permanently connected to a 120V AC power line or could be plugged into a nearby wall socket. Individual, circular under-cabinet LED lights may also be set up over the cooker. Among the benefits of an LED lighting solution is the low cost. The lights are very long lasting and highly energy efficient, which makes them a green lighting alternative. Additionally, LEDs have hardly any heat output. LED lights make amazing job lights, as a well-designed LED lighting could be directed exactly where it is necessary.

Hanging Pendants

Many modern homes have already stoves built into kitchen islands. This kind of kitchen design allows for more decorative lighting options over the cooker such as hanging pendants. Low hanging pendant lights may provide consistent task lighting when positioned directly over the cooktop surface in addition to providing overall lighting for the whole room. But pendant lights that hang over a kitchen island are usually not the sole light source for the space. Recessed lights or other types of ceiling fixtures usually accompany kitchen island pendants.

Track Lighting

Another lighting solution for a poorly-lit cooker shirt is track lighting. A strip of track lights strategically installed together a portion of the kitchen provides a foundation where personal lighting fixtures could be positioned to shine light directly where you want it. Besides adjustable ceiling fixtures, hanging pendants may also be included in a track lighting set-up. Whether your cooker is located from the wall or built into a kitchen island, a track lighting system can provide the job lighting you will need for cooking. This handy versatility makes track lighting an superb option for general, task and accent lighting in the kitchen.

See related

DIY Decorative Bed Crown

A decorative bed overhead, also called a “wall teester,” adds an elegant touch to a nursery crib, daybed or conventional bed. While store-bought bed shingles can be quite pricey, making one yourself by a decorative shelf is less expensive. Look for ornate, semicircular shelves or a rectangular shelf with ornate detailing underneath. The shelf has to have a hollow pocket supporting the ornamental embellishment so you have a place to attach the cloth canopy.

Hold up the shelf to the wall and then mark the spot for each hanging screw with a pencil. Check your marks with a level to guarantee the shelf will hang straight.

Put in the drywall screw anchors. Insert the screws, letting them stick out far enough to hang the shelf on.

Fold the queen-size sheet in half lengthwise. Cut the sheet in half along the fold. Fold a 1-inch seam together each cut side of this two panels, and pin in place. Press the folded seam open and remove the pins.

Together with the pressed seam open, add the 3/4-inch hem tape into the crease. Fold the cloth back over the surface and press again to seal the hem.

Fold the cloth near the top of each panel, going back and forth between each fold to create accordion-style pleats. Use the iron to press the cloth after each fold.

Put a small piece of 1/2-inch hem tape measuring 2 inches long inside each pleat at the top of each cloth panel. Press with the iron to strengthen each pleat.

Cut the self-adhesive hook-and-loop tape into many little 2-inch patches. Adhere one aspect of the tape patches to the interior hollow region of the shelf. Adhere another side of this tape patches to the top of each cloth panel. Reinforce the patches with fabric glue if desired. Attach the fabric panels to the underside of the shelf, one on each side. Drape the cloth panels over each side of the headboard or bedposts.

See related

The way to Fix a Leak at a Wall from the Bathtub

It’s possible for bathtub plumbing pipes to leak, and when that happens, you may not know it till you see water pooling on the ground under the wall or the wall itself becoming moist. Pinpointing the source of the leak is of prime importance, but that isn’t always simple, because the water may be coming from somewhere over the restroom. You may realize that the water is coming through a wall or the roof, or even from the tub enclosure itself. If the latter, you will want to fix the tile, then re-caulk joints in the fence, or even replace the fence altogether.

Where the Water May Be Coming From

The most vulnerable joints in the tub and shower plumbing are those around the valve. These comprise the water inlet connections as well as the nipples that connect the tub spout and shower head, and other connections in the water pipes can also flow. Because water tends to flow across the framing, water behind a bathtub wall can also be arriving from a leak from the shingles or the roof. Moreover, because bathrooms in apartments along with multi-story dwellings are often stacked to make plumbing installation easier, the water in your toilet may be arriving out of a leak in a toilet on a ground above.

Use the present Access Panel or Cut One

If the person who constructed your bathroom thought ahead, you will get an entry panel, either behind the wall which comprises the pipes or within a wall in an adjacent room. Otherwise, you either need to cut one yourself or cut through the wall over the bathtub faucet. That can be troublesome if the wall is tiled, and to prevent having to destroy the shingles, look for a wall in a cabinet or an adjacent room whereby you are able to get the pipes. Cut a big enough hole in the drywall to permit you to view from the ground to the ceiling using a torch.

It’s a Plumbing Leak

Once you’re inside the wall, then it is usually easy to spot the issue. You’ll see water near the ground, naturally, and it’ll most likely be running along a pipe. Simply follow it to it’s origin. If you do not see any water spraying or dripping, turn on the tap; it might be arriving from a leaky tub or bathtub nipple. If so, you’re in luck, because you can remove and replace both of these nipples from away from the wall by unscrewing them using adjustable pliers. Stopping Water spraying in the tub or shower valve is more complex, and might involve removal of this valve, which is usually a job for a plumber.

Mystery Leaks

Leaks that you can not pinpoint can be troublesome, but pinpoint them you must, because water can quickly damage the framing and create a mold-promoting surroundings — if it hasn’t already. In case you have access to the upstairs toilet, try running the water to determine whether the leak gets worse; the issue might be a leaking valve or drain. If the leak isn’t coming from an upstairs toilet, inspect the siding and search for signs of leaking in the attic. You can usually fix siding leaks with outside caulk. In case you trace the leak into the roof, then find the point where water is entering and patch the roofing in that point as required.

See related

Wall Color Ideas for a White and Blue Bedroom

A white and blue bedroom may appear cold, childish or dated with a third or fourth colour to rev it up or tone it down, based upon your style objective. Among the best approaches to inject a burst of design into a color-challenged bedroom is via the wall colour, whether it’s paint or wallpaper.

Wish List Background

Whatever your design needs, the perfect wallpaper may be the bedroom’s starting point. Consider hanging mid- or light-blue-and-white wallpaper to offset dark-blue-and-white linen and accessories. The bigger and bolder the background design, the more modern it appears. Choose white and blue wallpaper that includes a third shade to become the room’s accent color — green for a beach theme or crimson to get a sandstone scheme, like. Regardless of what colour paper you choose, copy its pattern — swirls, leaves, stripes or geometric shapes — once or twice at the room, such as in the art, a lamp base or a chandelier, for visually motion.

Color Punch

Orange is blue’s complementary shade; by matching shade opposites, you produce a balanced and interesting bedroom. Orange walls keep a white and blue space from seeming too tired or stark, but select that energizing shade carefully. Warm purple or orange is visually quieter than bright orange and form of the adult version of pink. If pink is your preference, choose a dusty hue instead of something which resembles antacids, candy or infant blankets — unless you’re decorating a child’s room. A few blue-and-white wallpaper stripes behind the bed split the wall colour and form the concept of a headboard.

Light and Airy

A light blue or gray blue and pure-white bedroom may appear glaringly cold. Simply take the space from stark to airy with creamy white walls. Yellowy white is like a buttery and blissful mediator between white and blue. Infuse the space with cream-colored accents, including lush draperies, velvet throw cushions and a shag area rug for much more toasty softness.

Dark and Dreamy

Brown walls highlight white or blue bedding and window treatments, but they also wrap around the room with cocoon-like relaxation, taking the visual chill from the trendy tones. Upsurge the warmth provided by brownish walls by integrating a reclaimed-wood focal wall behind the bed. The wall acts as a textural headboard; dress it with blue-and-white artwork or a mirror to reflect the room’s trendy colors for equilibrium.

See related