What Vining Vegetables Not to Plant Together

Crisp green beans (Phaseolus coccineus L.), sweet peas (Pisum sativum), crunchy cucumbers (Cucumis sativa) and sweet tomatoes (Lycopersicon esculentum) all grow on vines. You might not consider zucchini squash (Cucurbita pepoas) since a vine but following a long summer’s increase, the plant may be up to 6 ft long. To get the most from your garden, whether you live in a foggy coastal place or dry inland place, certain vines should not be implanted together for the best outcomes.

Disease Prone

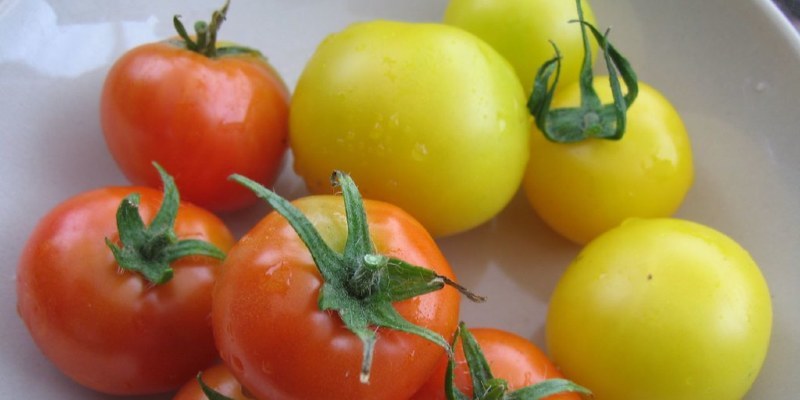
You say to-mah-toe, ” I say po-tay-toe. However you pronounce it, both tomato and garlic are vines from the nightshade family. The leaves and vines are toxic. The fruit of this potato (Solanum tuberosum) is toxic as well. The edible portion is the underground tuber. These cousins should not be implanted together or even near each other because they are prone to similar diseases such as blight. If one becomes infected, the other will too, and you’ll get rid of both crops. You also need to rotate the planting area so neither plant is increased in exactly the exact same place for over 1 season in a row.

Different Seasons

English peas grab onto a trellis with tendrils, while green beans twine round the trellis. That might look as though they could develop with each other, making one trellis do the work of 2. The problem is that peas are cool-season vegetables while beans are warm-season. If you plant them at precisely the exact same time, another will not boom. The cool temperatures that peas like will cause the beans to decay instead of germinate. If you plant the peas when it is warm, they will sprout, but subsequently perish from the warmth.

Growth Pattern

Delicate vines such as green beans will not compete with vigorous, fast, large-leaved squashes such as pumpkin (Cucurbita pepo) if the beans and pumpkins are grown on the ground. The growth pattern of the beans is upward, while the pumpkins sprawl. The pumpkins will crowd out the beans. 1 way to get around this — and make the garden twice as productive — is to plant the beans at which they could climb upward such as about a corn stem (Zea mays). The squash may then clamber among the corn.

Myths

Growing a cucumber beside a melon will not make the cucumber sweeter or the melon less flavorful due to cross pollination. Those two do not cross pollinate. However, cucurbits of the very same species may pollinate each other. Pumpkins, gourds and zucchini are all of the same species and will cross pollinate. The fruit that includes the cross-pollinated seeds will probably be accurate to its own parent plant. The next generation may be different, true to parent or something halfway between.

See related

The way to Revitalize Wicker Chairs

Whether they are comfy old hand-me-downs or even dumpster-dive treasures, revitalized wicker or rattan chairs may look like new or better. From the cleaning into the mending to the color and cushions, provide your woven-reed chairs some special focus every now and then they will provide you years of fashionable comfort.

Cleaning Wicker

It’s alright to wipe down wicker with a solution of 1 tablespoon ammonia mixed with 1 gallon of warm water and a soft cloth for everyday cleaning, however once or twice a year provide your rattan chairs a comprehensive overhaul. Bring out the vacuum cleaner also, with the upholstery attachment, suction the overall surface and each nook and cranny. An old toothbrush can loosen caked dirt that is becoming lodged in the crevices. Simply take the chairs out to the lawn and use the garden hose to provide them a shower, then immediately dry them so that the reeds don’t become loose, having absorbent towels plus a few hours in the sun.

Mending Holes

With appropriate maintenance, wicker furniture can last for decades, but in the real world, injuries occur. If one of the chairs has a small damage, such as a broken or out-of-place reed, mend it. You can soften the reeds with a warm, damp cloth to bend and sprinkle them back into position. When there’s a broken reed or lost section, you can soak a replacement in water until it’s pliable enough to weave it in the chair’s design. Wood glue can secure the piece.

New Cushions

Replacing your wicker chairs’ seat or cushion fabric is most likely among the best methods to revitalize them. When you utilize the rattan set exterior, choose weather resistant fabric — it’s heavier than conventional material and treated to withstand fading. When the chairs are kept inside, use conventional, upholstery-grade fabric to update their appearance. You’re able to restuff the cushions for outdoor or indoor pieces if needed. When recovering an outdoor piece inspect the filler to be sure it isn’t moldy. If it’s seen better days, replace it. The old cushion cover can function as a template to produce new ones from fabric in a colour and style that rocks along with your decor, such as paisley or polka dots.

New Color

All materials fade overtime — inside or out — and washed-out color make furnishings look tired and old. A fresh coat of paint may bring them back to life and add a designer touch to the space they inhabit. Planning is the trick to a professional-looking paint job. Flaking paint, dust and grime needs to be eliminated prior to spray painting. Use any colour that suits your house and goes with the cushions, from crisp white to sage green to stunning black.

See related

Fun Facts About Persimmons

Persimmons (Diospyros spp.) Grow nicely in U.S. Department of Agriculture plant hardiness zones 7 through 10. The trees may reach 25 feet tall and wide with drooping branches with 7-inch-long shiny green leaves. The brightly colored fruit is filled with beta-carotene and vitamins A and C. Some fun facts about persimmons make these fruits more interesting to grow and eat.

History

Persimmons originated in China, where over 2,000 different cultivars were developed. Eventually the tree spread into Korea and Japan. By the middle of the 1800s, the persimmon tree made the journey across the Pacific Ocean to California. The seeds came in 1856 with Commodore Perry from Japan, and entire trees were imported to California in 1870.

Flowers

Persimmon flowers appear in the spring to one-year-old growth. Cream-colored flowers are female while male flowers are pink. Many persimmon trees are either male or female, but there are plants with both female and male blossoms. Several persimmon cultivars are parthenocarpic, which produces seedless fruit without pollination.

Two Main Types

Fuyu persimmons are a non-astringent selection, which is eaten fresh. This kind of persimmon stays fresh for up to three weeks when stored at room temperature. Hachiya persimmons are soft to the touch when ripe and are astringent, and they are used for cooking. This astringent variety only stays fresh for a few days.

Utilizes

Unripe Japanese persimmons are filled with tannin, which is used to brew sake and maintain wood in Japan. The little, non-edible fruit from wild persimmon trees in Japan are crushed and mixed with water. This solution is painted on paper to repel insects. This solution is also considered to give cloth moisture-repellent properties.

Curing

Persimmon fruit need curing before they are edible. Purdue University notes that in the Far East, persimmons are commonly covered with bamboo mats and left to chill in near freezing temperatures. Another method is to put the fruit in covered seams and smoke them with burning animal dung. For your little home grower, put the newly selected fruit in a sealed container for a couple of days with apples or bananas. The ethylene gas created by the bananas and apples cures the persimmons.

American Persimmon

The American persimmon (Diospyros virginiana) is also known as possumwood. The little fruit produced by this tree is simply edible after exposure to a hard freeze in the fall. American Indians would dry and pick the wild persimmons, later baking the dried fruit into loaves of bread.

See related

Plants of the Pea Family With Showy Flowers

The pea family Fabaceae would be the beans, which comprise over 18,000 species of flowering plants. Members of the family have been located in every continent worldwide except for Antarctica. The main identification for pea family members is the frequent appearance to the seed pod, which is altered in various ways to allow the seeds to disperse. A number of these plants enrich the earth around their roots with the addition of nitrogen to the soil. Members of the plant family produce a variety of showy blossoms which range from butterfly-shaped into puffballs.

Trees

The pea family contains some very big plants reaching tree-like proportions. 1 example is the purple orchid tree (Bauhinia purpurea) using exotic orchid-like purple flowers blooming from the start of summer to the winter in U.S. Department of Agriculture plant hardiness zones 9 through 11. This plant remains evergreen unless exposed to freezing temperatures, reaching 20 feet high with branches spreading 25 feet and covered in light green leaves. Western redbud (Cercis occidentalis) is a deciduous tree using reddish-pink blossoms in the spring before the circular green leaves appear. In USDA zones 7 through 10, this redbud tree reaches up to 16 feet tall and wide, attracting butterflies and birds into the yard. The leaves turn red in the autumn and reddish-purple seed pods develop after the flowers die back.

Shrubs

Shrubs are usually more compact than trees, but a few can achieve tree height. Several pea family member with showy flowers grow as shrubs. African scurf pea (Psoralea pinnata), in USDA plant hardiness zones 9 through 11, create green feathery leaves using lavender-violet and white flowers covering the bush in late spring. This 6- to 10-foot-tall shrub emits a grape soda aroma while in bloom. “Petite Butterflies” sweet pea shrubs (Polygala fruticosa “Petite Butterflies”) develop evergreen in USDA zones 9 through 10, reaching 3 feet tall and wide covered using gray-green leaves. The purplish-pink butterfly-shaped flowers last from spring through summer.

Perennials

Pea family perennials climb during the warmer months before entering a period of dormancy during the winter. Blue false indigo (Baptisia australis) grows blue-green leaves and spikes of indigo-blue pea-shaped flowers from late spring through the first of summer. In USDA zones 3 through 9, this North American indigenous reaches 4 feet tall and wide. Crown vetch (Coronilla varia) sprawls along the ground reaching 12 inches tall and creeping 15 feet wide with feathery leaves 12 inches long composed of little leaflets. This summer bloomer is available in white, purple or pink in USDA plant hardiness zones 4 through 9.

Annuals

Yearly members of the pea family behave enjoy the garden pea, completing their life cycle in one summer before dying. Sweet peas (Lathyrus odoratus) develop in USDA zones 2 through 11, reaching 3 to 8 feet tall and spreading 2 to 3 feet with colorful flowers blooming from spring through summer. The highly aromatic flowers are available in blue, orange, pink, purple, red, purple and white. This yearly enjoys cooler weather and also creates ornamental seed pods. Tangier pea plants (Lathyrus tingitanus) use tendrils to climb up to 10 feet tall with stems covered with lacy green leaves and reddish-purple pea-like blooms during the summer. This heat-tolerant pea plant grows in USDA zones 2 through 11.

See related

How to compute Grass Seed Per Acre

A well-established and maintained yard leads to the general aesthetic of your home’s landscape. Preparing the site well and applying the appropriate amount of seed enables you to ensure that the bud grows in densely without purchasing and applying any more seed than is needed. Often, seeding rates are specified concerning pounds per 1,000 square foot; if you’re covering a huge area, you will need to convert the speed to pounds per acre.

Select the bud seed you will use to establish or overseed the turf area. The seeding rate varies depending on the cultivar or mix and is generally specified from the seed provider or on the bag of seed. As an instance, if you wish to plant a fresh Kentucky bluegrass lawn, the seeding rate is just 2 to 3 pounds of seed per 1,000 square foot. If you’re planting a tall fescue lawn, the suggested speed is 8 to 10 pounds per 1,000 square foot.

Convert the seeding rate for the selected grass cultivar or mix from pounds per 1,000 square feet to pounds per acre, if necessary. By way of instance, if the recommended seeding rate for a particular mix of grasses is 6 pounds per 1,000 square feet, then multiply 6 by 43.56 to get 261.36. Thus you’d need only over 261 pounds of seed for 1 acre.

Measure or estimate the dimensions of any non-turf areas in the landscape, then calculate their areas and include the square footage of all of the non-turf areas together.

Convert the square footage of any non-turf regions to acreage and subtract the non-turf areas from the acreage of the whole site. As an instance, if you’ve got a 1-acre lawn where the house, driveway, flower beds and other landscaping produce a combined area of 20,000 feet, divide this amount by 43,560 (the amount of square feet in an acre) and subtract this amount from 1 to determine the acreage of this planned landscaping is all about .54.

Calculate the amount of seed needed by multiplying the seeding rate in pounds per acre from the estimated acreages. As an instance, if the magnitude of this planned turf area is .54 acre, multiply this by the ascertained seeding rate per acre, like 261.36, to compute a total of 142 pounds of seed.

See related

The way to Find Bed Bugs in a Mattress

Bed bugs are small, but they’re not invisible to the naked eye, and they leave evidence of their existence in particular places on a bed. If you are buying furniture or waking up to discover bites you did not have if you went to sleep, then inquire into the bed and box spring carefully to make sure that you don’t have an infestation. Because not everybody reacts to bed bug bites, it doesn’t hurt to inspect your mattress periodically even in case you have no reason to suspect a problem. The sooner you find the bugs, the better your odds of controlling the infestation.

Strip the bedding off the bed so that you can see the creases and seams. Pull the bed away from the wall so that you can view behind the headboard. Peel back sections of this paper or fabric protecting the wooden frame of the box spring so that you can see the joints between wood bits.

Look in these areas for live bugs. Usually, the adults hide during the day, but you may spot a few; they’re reddish-brown and about as big as apple seeds. Start looking for smaller, pale, translucent bugs as well, which are bed bugs in earlier stages of their life cycle. Bed bug eggs are the size of pinheads and white; once they hit five days old, they develop visible red spots where the bugs’ eyes is likely to be. Search for them using a magnifying glass to make the job simpler.

Study the bed seams and the area behind the headboard for cast-off exoskeletons. These are as little as the bugs themselves and somewhat translucent, so they might just look like thick dust unless you look closely. If you are not sure whether you are looking at these discard skins, look through the magnifying glass.

Examine the bed seams and the joints in the box spring for fecal spots. These are little black spots that appear in clusters whenever you have a large infestation and individually whenever the pest population is modest. On the bed, the spots bleed slightly to the fabric as they are fluid when the bugs excrete them.

See related

Can Steel Wool Be employed on Glass Shower Doors?

The Clorox Company advocates super-fine steel wool pads for cleaning your glass shower doors, but not everyone agrees. Their synthetic activity may scratch the glass or even dull the finish of the metal frames. When it comes to deep cleaning, you can find safer and more efficient options.

Steel Wool? Yeah…Probably Not!

Clorox recommends with its brand of steel wool soap pads to be used on shower doors, however Dauphin Revenue, a distributor of glass inside design goods, advises staying away from steel wool in general. Even ultra-fine steel wool can etch glass and dull metallic finishes. The exact same is true for abrasive cleaners, like scouring powder and — arguably — the soap that’s from the steel wool pads advertised by Clorox.

Safe Alternatives

The clouding and frosting in your own shower doors is caused by soap scum or hard water deposits. You can often take care of soap scum by wiping the glass down with shampoo and with a squeegee after taking a shower. Spray hard water deposits liberally with full-strength vinegar. Allow the vinegar to dissolve the salts for about 10 minutes; then rinse with clear water and squeegee dry.

See related

How to Remove Old Food and Grease Stains From Table Linens

Food and grease produce awful-looking stains on tablecloths and cloth napkins, and they’re usually noticeable after you clean the blankets from meals or celebrations. Stains that have set to the fabric are more difficult to remove, but if you’ve got the patience to expend a little bit of extra effort, you can remove old food and grease stains from the favourite or hand-me-down table linens.

Using Pretreatment Methods

Scrape off any hardened food debris with a butter knife and then discard the debris in the trash.

Find all of the old spots on the table linens and implement one of several solutions: Spray with an enzyme or petroleum-based pretreatment product, or work a little bit of undiluted detergent straight into the stain. Rub the cloth together so that it consumes the selected treatment process a little. Let the fabric sit with the solution about the stains for around 15 minutes.

Fill a washer with hot water along with your enzyme, alkaline or heavy detergent. Put the table blankets to the drier.

Permit the linens to soak as many as eight hours or overnight at the drier.

Wash the linens after soaking as recommended by running via a normal warm or cold-water clean cycle.

Inspect the blankets once you clean them, to verify the stains are gone. Otherwise, repeat as needed. Hang the linens outside to dry, or set them in the dryer with a very low heat setting. Once you’re assured the stains are gone, then add a softener sheet into the linens; this adds a residue that can keep the fabric from absorbing liquid spills.

Grease-Busting Dish Detergent

Squirt a blob of grease-busting liquid dish detergent directly onto the stain once you scrape off any hardened food debris. Massage the stained area between the folds of material.

Let the dish detergent work its magic to get as many as 15 minutes.

Wash the blankets at the washer on the warm or cold atmosphere, as you normally would.

Remove the tablecloth and napkins from the drier to check them for stains.

Repeat as necessary until the stains are gone. Hang the linens outside to dry, or use the lowest heat setting to dry them in the dryer.

See related

How to Use Apple Cider Vinegar and Baking Soda to Clean a Tea Kettle

Heating water in a tea kettle contributes to a chalky mineral buildup in the kettle over time, left behind when water evaporates. When soapy water isn’t potent enough to remove the residue, there’s no need to resort to chemical-based mineral removers. Rather, use apple cider vinegar and baking soda — the vinegar consumes the mineral deposits while baking soda acts as a gentle abrasive to remove stubborn buildup.

Swish-and-Swirl Cleaning

To get a small mineral deposits within the kettle, limited to the bottom and reduced regions of the sides, pour several tablespoons of baking soda into the kettle; subsequently insert 1/4 inch or so of apple cider vinegar atop the powder, sufficient to cover the stained area. Allow the mixture to bubble for at least 30 seconds; then swirl the kettle around a little to enable the mixture to rub a few of the vitamins away. Dump the solution down the drain and rinse the kettle thoroughly, using a clean dishcloth to wipe it out. If any vitamins remain, put more vinegar within the kettle and allow it to soak for at least 5 minutes before rinsing. White vinegar might be utilized in place of apple cider vinegar for kettle cleaning.

Steam Cleaning

If mineral deposits influence the entire interior area of the kettle, a good steam cleaning may resolve the problem. Pour 1 part apple cider vinegar and 4 parts water from the kettle — sufficient to fill it with an inch or two of total liquid. Heat the kettle and allow it to create steam for several minutes — boiling isn’t vital. If the whistling is a little too much to handle, turn down the heat so the kettle still creates steam while making little noise. Swirl the kettle around; then enable the liquid to cool to room temperature. Dip a dishcloth into the liquid, then sprinkle baking soda on the dishcloth. Dump the liquid down the drain and use the soda and dishcloth to wipe off any remaining residue. Rinse the kettle thoroughly.

Super Soak

If the kettle is caked with fragile mineral deposits inside, a mixture steam cleaning and soak helps eliminate the stubborn residue. Pour 1 cup all apple cider vinegar and water into the kettle, along with 2 tablespoons of salt. Swirl the kettle around; afterward heat and allow the liquid to boil for 15 minutes, checking the kettle during that time to ensure the liquid hasn’t disappeared entirely. Allow the liquid to take a seat at the kettle overnight or all day; then pour the liquid down the drain. Wipe the interior of the kettle with a damp dishcloth, adding a little baking soda to the fabric in case some residue remains in the kettle. Rinse the kettle thoroughly.

Clean and Shine the Outside

The outside of the kettle gets dirty too — splatters from boiling and standard dust build up only from leaving the kettle sit atop the cooker. Spritz the outside of the kettle with apple cider vinegar. Sprinkle baking soda on a soft, damp cloth; subsequently rub the kettle down with the cloth. If the outside of the kettle is brushed steel or a metal that resembles it has a texture or “grain” for it, follow the direction of the marks to avoid scratching the alloy. Rinse the cloth and rub off the baking soda deposits in the kettle, or rinse it under tap water. Dry it immediately to avoid mineral buildup from evaporating water.

See related

Identification Guide for Different kinds of Canna X Generalis

Funding a daring, tropical appearance to the yard, cannas (Canna x generalis) top broad leaves with sturdy blossom stalks bearing colorful, sometimes almost orchidlike blooms. Garden cannas are the result of hybridizing about nine wild species of cannas with each other, then crossing those hybrids with one another. They develop in U.S. Department of Agriculture plant hardiness zones 8 through 12. Countless varieties exist, with a wide assortment of plant heights, leaf colors, blossom shapes and flower colors. Use these features to help identify the type of canna.

Plant Size

The extent of a mature canna plant helps identify it again. Four major categories of cultivars group cannas with their height. Pixie cannas grow from 1 1/2 to 2 feet tall. Dwarf cannas reach heights between 2 and 3 feet. Medium cannas vary from 3 feet to 5 feet tall, and tall cannas grow from 5 to 6 1/2 feet tall. When you know what height category to look under, use additional features, such as leaf and blossom shade, to further identify the plant.

Dark-Colored Foliage

Many canna cultivars have green leaves, but a few varieties have leaves tinged with darker colors, such as bronze or purple, especially in the fresh leaf. The older leaves generally revert back to a shade of green. An old favourite that originated in 1902, “King Humbert” contains dark, bronze-purple foliage and reddish flowers. Dark maroon leaves and red blooms look on “Black Knight.” Narrow, purple-bronze leaves and deep gold blooms identify “Semaphore,” dating from 1895. “Shenandoah” bears deep pink blossoms over burgundy leaves. Pink blossoms top 3-foot-tall reddish-black foliage of “Zulu Pink.”

Patterned Foliage

Several cannas have variegated leaves marked in green, yellow or white. An older range from 1923, yellow-flowered “Bangkok” has green leaves with thin white stripes. “Bengal Tiger,” also known as “Pretoria,” bears yellow- and green-striped leaves with wide-petaled, yellow and orange blooms. The real rainbow colors come in newer varieties such as “Tropicanna,” with orange blossoms against leaves striped with burgundy, gold, yellow, green and pink. Not quite as colorful but still stunning, “Pink Sunburst” leaves have wide, reddish-pink strips contrary to dark green.

Flower Color and Shape

Canna identification depends heavily on flower color and shape. The most frequent canna flower colors are yellow, orange and red, although the flowers may be any color except for blue, black or green. Some blooms have two different principal colors, or are rimmed or edged with another colour. Others have blotches or speckles on the petals. Flower shapes are of two primary types. Canna flowers with wide petals that are closely spaced on flower stems are called gladiolus-type flowers. Cannas with thin petals spaced more broadly about the flower stalk are termed orchid-flowering cannas.

See related