How to Clean Candle Drippings

Candle wax spills and drips occur — the taper candles around the dinner table have been made to burn while you’re in another room; a guest moves a lit candle, spilling molten wax onto the table or carpeting. Wax drippings do not have to be catastrophic. Oftentimes, the wax can be removed from hard surfaces and materials alike, returning them to their own original wax-free condition once more.

Freeing Wax From Fabric

Candle wax left onto a fabric-based belonging — if a tablecloth or tunic — renders the material temporarily unwashable, because washing can create multiple oily spots resulting in spots. Bend and Lay the fabric back and forth beneath the darkened areas to decode the waxsome pieces can fall away or could be scraped off easily with a fingernail or a plastic knife or scraper. Freeze the fabric for some time to harden the wax more, and repeat the process. Remove remaining wax by putting the fabric between two sheets of thick plain paper, such as panels of a brown purse, and ironing on low heat. The wax melts as the paper warms, moving the wax into the paper. Keep ironing with fresh pieces of paper until no wax is left.

Rug or Carpet Wax Removal

A zippered sandwich bag filled with ice cubes hardens candle wax when you leave it to sit over the affected area for several minutes. Rub the edge of a plastic scraper back and forth over the hardened wax to chip it away. Remove remaining wax by putting a brown paper bag over the place and ironing at a low heat setting. Lift the paper every couple of moments to see if the wax has transferred onto the paper. Use fresh paper every time the paper absorbs wax to prevent the wax from moving back into the carpet or rug fibers.

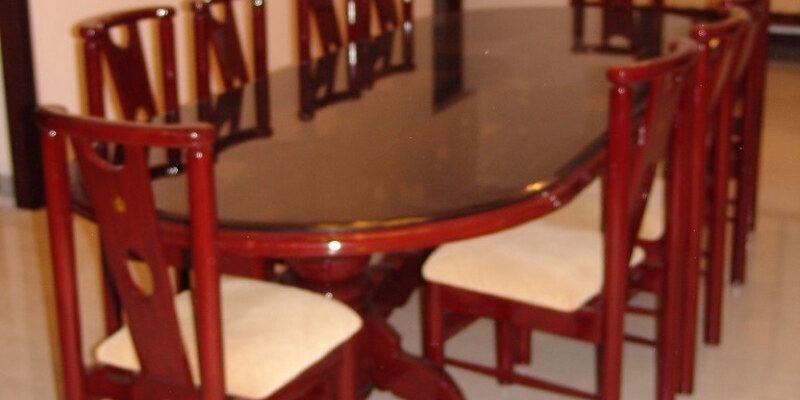
Floors and Furniture

The ice-cube treatment removes wax from hard surfaces such as furniture and wood or tile flooring. Keep the ice cubes in a zippered bag to keep the ground or furniture from getting wet. After a few minutes, lift the ice bag away and scrape the hardened wax together with the edge of a plastic scraper or jar with a plastic spoon. For vinyl floors, hot water onto a cloth or hot air from a blow dryer softens the wax; blot up the wax with paper towels.
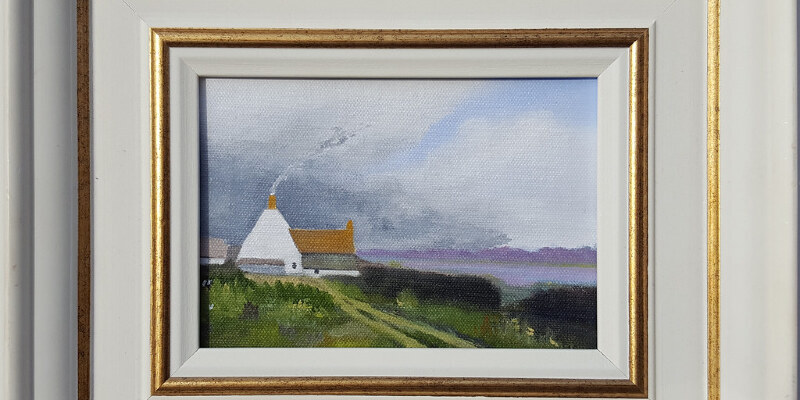
Candle Holders

Metal candlesticks or glass candle holders become coated with hardened candle wax even when you’re careful. Remove hardened wax by picking off as much as possible with your fingers before putting the item in the freezer for an hour or so. Freezing occasionally divides the wax from the candle holder enough that the wax simply pops from or from the holder. Gently or pry the suspended wax away with a plastic knife or your fingernail. If the candlestick or candle holder is made of combined substances, such as wood and metal, do not freeze it the substances can expand or contract at different rates, damaging the item. Remove wax from the exterior of a glass candle holder, or any glass surface, by heating the wax with a hair dryer and then dabbing up the wet wax with a soft cloth or paper towel.

See related

How to Remove Fingerprints From Dark Furniture

Particularly types with a high-gloss end, black furniture, tends to show fingerprints than finishes such as white paint or a varnish that is basic. On some finishes such as lacquer that is black, fingerprints stand out so much you can practically see them from across the room. The secret to wiping those fingerprints away would be to use a cloth . Similar to fingerprints, scratches show up quite a bit more on a few furniture finishes that are black compared to on furniture of colours that are lighter.

The Gentle Touch

Before tackling the fingerprints, dust the furniture lightly using a feather duster, as this wipes away particles that could scratch the end if rubbed with a cloth. Wipe fingerprints away with a cloth that is moist soft and lint-free, then blot with a soft and dry cloth to avoid moisture damage. For a single that otherwise does not evaporate with a moist cloth alone or a fingerprint, dab a little bit of oil soap on the moist cloth and gently wipe it. Follow up with a moist cloth, then blot the moisture away.

See related

How to Keep a Shower Stall Clean

Shining, streak-free glass brightens a bathroom and leads to a warm environment, while soap scum, fingerprints and mineral residue left behind from the attractiveness of your bathroom. Furthermore, debris which collects in the shower course encourages the growth of mildew and potential dangerous mould. A composite of cleaning that is routine and upkeep helps keeps your shower stay.

Squeegee Habit

With a squeegee is the best protection against the accumulation of shower stall filth. Hang a hook and utilize it to wick away moisture after every use. If you don’t have a squeegee handy, a microfiber fabric cleans without hurting. Mold and mildew thrive in damp conditions so by eliminating water droplets you also help to prevent the growth of bacteria that are harmful.

Vinegar Works

White vinegar includes from cooking to deodorizing many applications, but it’s also a household cleanser that is handy. Mix equal parts vinegar and warm water, and put it. Coat the surface of the shower stall, and then vigorously shake to combine. Wipe with a microfiber fabric. One fast swipe of a baby wipe removes stubborn stains, if time is of the essence. Follow up by employing lemon scented furniture polish after cleansing. This provides clean, invigorating scent, but also prevents soap scum buildup.

The Baking Soda Option

Baking soda is just another natural and effective cleaning product. Add only enough water to baking soda to make a paste. Apply to areas where soap scum sponge and wash with water, wash using a microfiber cloth or persists. This not only cleans, but also deodorizes. Baking soda mixed with equal parts lemon juice is also capable of cleaning tarnished fittings in place of brass cleaner that is costly. Use a toothbrush to gently scrub the fittings and also follow up by buffing with a clean cloth.

Cracks and Crevices

Grout and sliding door tracks are both perfect hiding places for mould and mildew. Areas where germs collects with vinegar, then let set for at least 10 minutes and scrub with an old toothbrush. Repeat as required. Think about a solution: bleach if vinegar does not do the trick. The shower track and grout with a solution of equal parts water and chlorine bleach and let it set for many minutes.

See related

The Easy Way To Restore Old Wood Furniture

When you have a piece of old wood furniture sitting in storage, or you also happened across a fabulous thrift-store discover that you would like to restore and use, then look no farther than your favorite wood cleaner and furniture petroleum. As wood ages, its pores open and the natural ingredients in the wood, causing it to dry out. Years and layers of dirt and grime add to that and can create the furniture piece to appear the worse for wear. You may be amazed at what a good cleaning followed with a soaking of furniture oil can perform. For painted hardwood furniture, only clean, sand and repaint.

Begin the restoration of the hardwood furniture with a comprehensive cleaning. Apply a bit of a wood cleaner to fine-grade steel wool. Work with the grain, and rub the surface of the old wood furniture with the cleaner and steel wool. Do not apply an excessive amount of pressure because you don’t want to take out the finish or stain. Most of the time, years of built-up wax turn the surface of the wood dirty and dirty. The steel wool and wood cleaning product cut through these layers. Wipe away loosened dirt and grime with a clean cloth, and allow the piece to dry.

Saturate a soft cloth with oil. Rub with the grain to apply the furniture oil to the wood. Fold the cloth and apply oil to an edge for in detailed crevices or embellishments on the wood. Thoroughly cover the wood furniture with petroleum.

Allow the piece soak overnight to hydrate the wood if it’s extremely dry. After covering the entire piece with furniture oil, then you can put it into operation or decide to follow the upcoming steps, depending upon the level of protection you need for the wood furniture.

Rub the piece of wood furniture with a clean part of steel wool in the direction of the grain. This eliminates any high spots as it prepares the wood for the next measure.

Add a seal coat to keep the wood hydrated, if desired. Implement Tung oil — also known as China wood oil — to the surface of the wood furniture, after the patterned wood grain. After Tung oil dries, it hardens and provides a plastic-like coat on the wood.

Polish the wood furniture with a wax, if desired — but be sure to thoroughly buff the shine after program. Be sure you work in tiny sections, together with the grain.

See related

The Way to Paint a Melamine Bathroom Vanity

Melamine is a man-made substance used to laminate cupboards made of particleboard. This paper-thin chemically infused material is difficult to paint if you use the wrong kind of primer. You will need to clean and mud a melamine vanity before priming or painting to get the paint to adhere. Since melamine is such a glossy surface, unlike wood, it requires a primer developed for plastics, laminates and similar surfaces — otherwise the paint can peel off.

Remove the door in the vanity working with a Phillips head screwdriver. Place the hardware aside in a safe location.

Cover the ground around the vanity with paper.

Clean out the melamine surfaces, such as the doors and the drawer, if any, with a household cleaner and a damp sponge. Allow them to dry completely.

Sand all of melamine surfaces with a fine-grit sanding block to scuff the end. Scuffing makes the melamine more receptive to primer and paint. Wipe the dust away with a wax or wax cloth.

Cover all of the places you do not wish to paint with painter’s tape. If the vanity includes a drawer, remove it or pull it out as far as it will go.

Pour some of this primer into a paint tray. Prime all of melamine surfaces with a paintbrush, allowing the primer to dry completely. If the melamine remains visible through the primer, then apply another coat and allow it to dry.

Pour some latex paint into a paint tray. Paint over all the primed regions with a paintbrush, allowing the paint to dry. Apply another coat, if necessary.

See related

How to Get Rid of Static Electricity in Laundry Without Fabric Softener

Static power and laundry go seem to go hand in hand and the colder and dryer the air outside, the more difficult the static. While some fabric softeners reduce static, they occasionally contain chemicals and chemicals you may not want on your own laundry or skin. Basic supplies from the pantry stop static as well, and may soften the fabric to boot.

Vanishing With Vinegar

White vinegar not only can help prevent laundered items from becoming stuck together from static, it also relaxes them and kills bacteria. Add 1/4 into 1/2 cup white vinegar to the rinse cycle after washing the materials in your usual style, or fill out the fabric softener reservoir using vinegar for a set-and-forget option. Vinegar also will help keep soapy residue from clinging to the clothing through the rinse cycle.

Banish With Baking Soda

Baking soda also helps cut back on static cling problems while keeping whites white and brights glowing. Add 1/2 cup baking soda to the wash cycle together with your favorite laundry detergent. Rinse as usual, or together with vinegar for extra benefit. Baking soda softens the water, which means you’ll need less detergent to get the task done.

Avoid Static Magnets

Particular fibers and fabrics are more prone to static than others. Whenever you can, swap those man-made materials such as polyester or rayon for organic fibers such as cotton or bamboo, that are much less subject to static cling. If some static-laden laundry cannot be avoided, clean all such items with each other to maintain the problem limited to the same load instead of affecting loads with mixed fibers.

Shake It Out

Static cling occurs whenever the items in the dryer become hot and completely dry in an environment devoid of humidity. Stop the load while the items are slightly damp, then shake out each piece to help prevent static cling. Allow items to line dry or air dry the rest of the way. If possible, completely line dry the laundry to avoid static cling altogether. Either way, you’ll cut energy costs and static cling in the exact same moment.

See related

What Tree Has Green Pods With Big Brown Flat Bean-Like Seeds?

Trees featuring green pods full of bean-like seeds are most likely members of the legume family (Leguminosae or Fabaceae). Two trees which unite green seed pods with flat brown “beans” are cotton tree or mimosa (Albizia julibrissin), sturdy in U.S. Department of Agriculture plant hardiness zones 6 through 9, and yellowwood (Cladrastis kentukea), growing in USDA zones 4 through 8. Although the two species have similar pods, their flowers and leaves are different.

Seed Pods

Both mimosa and yellowwood, which can be tightly associated, bear seed pods reminiscent of bean or pea pods. The pods are thin and fragile when young, but age to a leathery texture. Yellowwood pods are between 2.5 and 4 inches long, green, flattened and segmented so that every seed seems to have its own charming compartment. Silk tree bears seed pods which are longer, around 7 inches, full of flat brown seeds. The pods persist on the trees throughout the winter.

Flowers

Aside from the duration of the seedpods, among the most notable differences between mimosa and yellowwood is that the configuration of the flowers. Mimosa trees are summer bloomers, with fragrant brush-like pink flowerheads, borne in fantastic profusion. Yellowwood blooms in late spring along with its fragrant flowers, borne in elongated clusters or panicles, are reminiscent of wisteria. The individual flowers are white with a pinkish tinge and the panicles can be around 15 inches long.

Leaves

Another distinct difference between mimosa and yellowwood trees would be the leaves. Mimosa leaves are dark green, compound, and pinnate or feathery, resembling ferns. They are exceptionally sensitive and curl up when even lightly touched. Yellowwood is characterized by foliage that’s compound, consisting of classes of around eleven leaflets; the person leaflets are oval or teardrop shaped and do not resemble ferns. They are lighter in shade than mimosa leaves and do not share the mimosa leaves’ sensitivity.

Configuration

Using a height of 30 to 50 feet along with an almost identical spread, yellowwood is bigger than mimosa, which reaches 20 to 40 feet with a virtually identical spread. Yellowwood is an upright tree with a wide, rounded crown, while mimosa comes with a vase-shaped division configuration along with a crown that’s somewhat flattened on top. In the fall, mimosa leaves stay green until they drop in the tree, while yellowwood foliage turns bright yellow. Yellowwood is also distinguished by vibrant yellow heartwood.

See related

White Flowers & Black Berries

Some flowering plants and trees also create berry-like fruits. Their blossoms are bright white and their berries are basically black, sometimes with purple overtones. These plants may be shrubs, vines or trees, many with edible berries and others with berries or other plant parts that contain toxic chemicals and should never be eaten.

Trees

Among white-flowered trees with dark berries, the black hawthorn (Crataegus douglasii) is among the very attractive. Covered in white, saucer-shaped blossoms in late spring or early summer, it produces clusters of small, black berries that attract birds. About 8 or 10 feet tall in cultivation, it’s acceptable for U.S. Department of Agriculture plant hardiness zones 2 through 8. The chittamwood tree (Bumelia lanuginosa) is a large tree that may achieve a height of 30 to 50 feet. It also has white flowers, sometimes tinged with grey, and round black vegetables around 1/2 inch in diameter that attract squirrels and other tiny animals. Easy to develop trees that prefer full sunlight, chittamwoods also do well in USDA plant zones 5 through 9.

Bushes and Shrubs

Different shrubs or bushy plants also have white flowers and dark berries. The American elderberry (Sambucus canadensis) is a good instance, growing as a deciduous tree 5 to 10 feet tall in USDA zones 3 through 9. It’s fragrant, showy clusters of small white blossoms in spring, followed by dark purple-to-black, edible berries in late summer. The black chokeberry bush (Aronia melanocarpa) is another deciduous tree with clusters of white flowers that open in mid-spring. It is generally 3 to 6 feet tall with attractive, dark green foliage. Its blackish-purple berries, which are edible but tart and bitter, appear in fall. It is best grown in USDA hardiness zones 3 through 8.

Brambles and Vines

Several plants that grow as vines or thorny brambles also have white flowers and dark berries. The frequent blackberry plant (Rubus fruticosus) is a good example that is called a bramble because it’s many thorny canes that can form an impenetrable barrier. It’s tens of thousands of tiny white blossoms in late spring, followed by berries that are originally red but turn black as they ripen. Several cultivars exist, including several thornless varieties; the crops do well in USDA hardiness zones 3 through 9. The wild grape (Vitis rotundifolia), also called a muscadine grape, which is a good example of a vining plant that can climb trees or seams if left unpruned. Its white flowers open in spring, followed by grapes with dark, thick, purple-to-black skins at summer season. It does best in USDA hardiness zones 6 though 10.

Dangerous Plants

Several plants with white flowers and dark berries contain poisonous substances and should never be ingested. The black nightshade plant (Solanum americanum) is 1 instance that rises as an indigenous, annual plant in all USDA plant zones. It’s star-shaped, white blossoms followed by shiny black berries. Even though the berries aren’t poisonous, the rest of the plant parts contain a poisonous compound known as solanine. The frequent pokeweed (Phytolacca americana) is another poisonous example, growing as a tough, branching, herbaceous annual through the U.S. Its fragile white flowers are followed by hanging clusters of shiny black berries. All parts of the plant, including berries, roots and leaves, are poisonous and may create serious symptoms that might lead to death in extreme circumstances.

See related

The way to Tell If a Hibiscus Is Dead

Tropical hibiscus (Hibiscus rosa-sinensis) thrives in hot regions and grows in U.S. Department of Agriculture plant hardiness zones 9 through 11. Cold temperatures, disease and drought will easily kill this plant. There are certain signs to search for a hibiscus to inform if it is truly dead or when the plant will return when the weather gets better. These signs of plant passing also apply to other woody shrubs and small trees.

Bark

The second layer of bark will tell you in case the division is dead. By scratching just the upper layer of bark off with your fingernail, you expose the second layer. If this second layer is brown and dry instead of moist and green, the division is dead. If you scratched the bark at the base of this hibiscus and see brown underneath, the whole plant is likely dead.

Leaves

The leaves of this hibiscus may indicate whether the plant is truly dead. Consider the color and texture of the leaves. If they’re dry and crispy and still clinging to the branches, the hibiscus will likely be dead. It’s natural for dead leaves to be shed from a plant, but plants which hang onto lifeless leaves have lost the capability to jettison this dead issue. Generally, this occurs because the plant is dead, according to the Lady Bird Johnson Wildflower Center’s Ask Mr. Smarty Plants.

Growth

Hibiscus will resprout in the spring time when the temperatures get hotter. Start looking for new growth on the plant, then both branches and leaves. If the whole plant seems brown and does not begin to regrow at precisely the same time other hibiscuses you own in your yard do, it is likely that the plant is dead.

Bud Drop

Some people see a falling of flower buds as a indication their hibiscus is perishing. This is not an indication of a lifeless hibiscus, but it is a indication of anxiety into the plant. If your plant does not get enough light or in case the watering or temperatures are inconsistent, the plant may lose its flowers as a self-protection response. Return to a normal watering schedule and await temperatures to become more steady and the plant should recover.

See related