Fuzzy Brown Spots on My Staghorn Fern

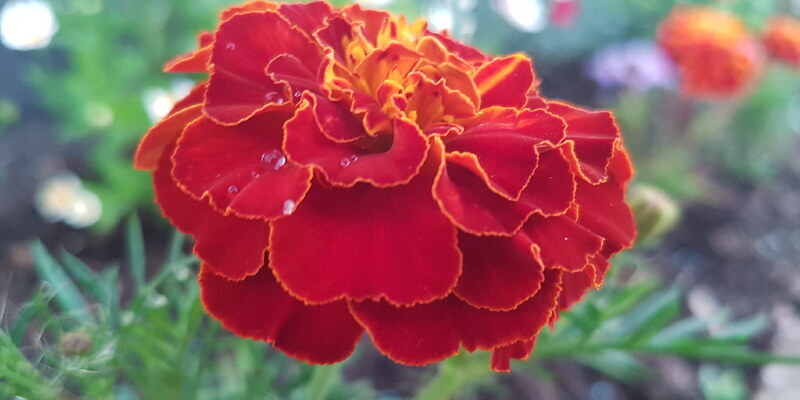
Staghorn ferns (Platycerium bifurcatum) can be difficult to grow. They grow as houseplants or outdoors in U.S. Department of Agriculture plant hardiness zones 9 through 12. Fuzzy brown stains on the fronds might have you worried, but they might be perfectly normal areas of the staghorn fern’s life cycle. An incorrectly watered staghorn fern may also develop creamy brownish spots on the fronds.

Fertile Fronds

Unlike flowering plants, staghorn ferns do not reproduce by seeds. Instead staghorn ferns send out thousands of powdery spores to be carried by the wind. The spores develop on the undersides of their lengthy, pronged fronds that provide staghorn ferns their title. Small across brown bumps, called sporangia, kind across the fronds. They can look or feel fuzzy, particularly when they have opened to release the seams.

Sterile Fronds

The staghorn fern additionally has plate- or shield-shaped fronds. These fronds do not produce seams — their aim is to hold the staghorn fern into the tree. As they age, those fronds develop creamy brownish stains, eventually turning entirely brown and dry. They’ll be replaced by new, green fronds as a natural part of the plant’s growth. These spots should not be a cause for anxiety, and will be the equivalent of dropping old leaves in favor of new ones.

Thirsty Fronds

A badly watered staghorn fern may also develop creamy brownish stains. If the stains are on the tops or tips of the fronds and spread so the entire frond starts to turn brown, then the staghorn fern was under-watered and is drying out. It’s normal for a few fronds to turn brown and die, then be replaced with new fronds. If more fronds are demonstrating brown stains than are completely green the root ball of this fern has to be soaked for several minutes to permit the plant to absorb water.

Wet Fronds

Fuzzy brown spots that turn black indicate the staghorn fern has developed a respiratory disease, most commonly rhizoctonia. Letting the staghorn fern to dry out slightly between waterings may remedy this kind of problem. Removing contaminated fronds can also help stop the fungus from spreading to healthy fronds.

See related

Are Bananas Grown about Bushes?

Bananas (Musa spp.) Are relatively strange-looking fruit that grow on even odder plants. Though bushy in appearance, banana plants aren’t shrubs, but they are also not trees. To make matters more confusing, there’s a plant called a banana shrub (Michelia figo). The bananas you consume are grown on crops that grow in U.S. Department of Agriculture plant hardiness zones 9b during 11.

About Shrubs

Shrubs are generally considered perennial plants that have woody stems or trunks and grow to a last height of less than 13 feet. Stems on shrubs are narrow, usually less than 3 inches in diameter, but the major back could be thicker than that.

Banana Plants

There are numerous explanations for why bananas cannot be classified as shrubs. The most obvious is that bananas aren’t woody. They’re leafy using a pseudostem instead of a woody trunk, which a shrub could have. The real stem of a banana grows up through the center of the pseudostem to afterwards produce the flower and fruit of the plant. The root systems also differ. Unlike the root system commonly found with shrubs, bananas grow from rhizomes underground that spread in the exact same manner as several running grasses. Banana plants are also too tall to match the definition of a shrub. While dwarf varieties reach just 6 ft, standard banana plants can tower to a height of 30 feet. A banana plant is classified as a diuretic.

Banana Shrub

The banana shrub may confuse you into believing that it produces bananas or is a part of the banana family, but this plant, that grows in USDA zones 8 through 11, isn’t associated with bananas. It’s a part of the Magnolia family. The title of the shrub comes in the odor of its magnolialike flowersthat have a strong odor like bananas along with a shade reminiscent of ripe bananas. In general, this bush is little compared to banana plants. The shrub grows up to 10 feet tall and broad, but this growth occurs slowly. While the banana shrub does produce fruit, these aren’t bananas.

Fruits Compared

Bananas and also the fruit out of a banana shrub are completely distinct. Botanically, bananas have been berries that grow in clusters, called hands. These fingers have many elongated fruits on them. They’re edible when green but taste best if cooked in that condition. Yellow bananas are those you’re knowledgeable about. Despite the title and scent of the banana shrub, the small brown fruit that measure less than 1/2 inch aren’t edible.

See related

Floating Plants for Shady Ponds

Floating plants add color to some pond, make shade for fish and other aquatic life and supply food for waterfowl. While most pond plants thrive in full sunlight, some floating trousers grow in full to partial shade. There are 3 categories of floating plants which grow in ponds. Several floating pond plants grow in the warm, Mediterranean-style climates of U.S Department of Agriculture hardiness zones 8 though 10.

Free-Floating Pond Plants

As their name suggests, free-floating plants float across the water’s surface. Wind and water currents move these plants throughout the pond’s surface. Common duckweed (Lena small) and fairy moss (Azolla caroliniana) are among the most frequent free-floating plants, together with duckweed growing most efficiently in shady conditions.

Trailing Floating Pond Plants

Trailing floating plants grow from this pond bed in shallow places and form floating mats on the surface of the water. Plants in this class, including pennywort (Hydocotyle vericillata), favor at least six hours of sun but will grow in partial shade.

Submersed Floating-Leaved Plants

Submersed floating-leaved plants have roots that are anchored to the base of the pond. Their flowers and leaves develop and float on the surface. Common submersed floating-leaved plants include waterlilies (Nymphaea spp.) , spatterdock (Nuphar lutea) and watershield (Brasenia shreberi). While all will grow in shady conditions, spatterdock, also called yellow pond lily, is the most tolerant of reduced levels of sunlight.

Choosing Pond Plants

Choose plants for your pond based on your unique needs, whether it be to include color or provide shade for the fish. For instance, yellow pond lily produces bright yellow blooms, while plants such as duckweed attract and supply food for waterfowl and other aquatic life. Others need regular maintenance to keep them under control.

See related

The very best Persimmon Tree

Persimmons in the United States are classified as either Oriental (Diospyros kaki) or American (Diospyros virginiana). Under these sorts, dozens of cultivars produce trees differing in appearance and fruit quality. That persimmon tree is the best depends on how you would like to use it. Many different flavors are available if your focus is always on the fruit; and if you’re looking for the easiest to grow or the hardiest, your selection will likely be different as well.

Astringent

Astringent persimmons have a very bitter and grainy texture when they are under-ripe. Sensors must break down with ripening in order to make them palatable. Once incredibly ripe and jelly-like, they are sweet, and excellent for baking and cookingsoda. “Hachiya” is perhaps the most readily available of the astringent persimmons and can be eaten directly out of the skin with a spoon after a frost has set it to soften. Like the vast majority of Asian persimmons, it grows best in U.S. Department of Agriculture hardiness zones 7 through 9. The native American Persimmon is also an astringent fruit and is typically harvested after leaf fall.

Non-Astringent

Non-astringent persimmons are often more attractive to the American crowd who is used to firmer fruit. All these persimmons can be sliced and eaten before they turn to your jelly-like substance. The “Fuyu,” grown in USDA hardiness zones 7 through 9, is the most widely eaten of the type. While they can be used for cooking, they are usually enjoyed for off-the-tree eating.

Growing Patterns

All persimmons present exquisite autumn leaf and have smooth bark. Leaves are large and copious, ranging up to 3 inches wide and 6 inches long. Asian persimmons are usually more compact than American, with Americans growing around 60 feet in height in comparison to the Oriental variety’s maximum height of 30 feet. The vast majority of trees have a curved appearance, with spread being half to equivalent to the height. A couple of exceptions to this include the “Great Wall” astringent persimmon that grows tall and conically with pink shades in the fall. The “Passion Crystal” astringent is a compact persimmon that grows tighter and lower than other alternatives. For those looking for a dwarf variety, the “Giant Hanafuya” is among the smallest persimmons, growing only 10 to 12 feet in stature, but keeping fruit.

Easiest Management

Usually, it is always easiest to grow plants that are natives, making the American persimmon the choice for simplicity of care. It needs to be mentioned that persimmons are very adaptable and garden-friendly plants, which makes even non-natives easy to grow. Even though the vast majority of persimmons survive best in USDA hardiness zones 7 through 9, a couple varieties can withstand colder climates. The American “Early Golden” can flourish through Formula 5, although the “Meader” can endure temperatures as low as -30 F. Asian varieties tend to be less hardy, but the astringent “Tam Kam Non” and also non-astringent “Jiro” can equally do nicely as low as USDA zone 6. Most astringent persimmons require a dash of frost to ripen and shouldn’t be grown in subtropical or tropical areas. If you chose to plant American persimmons, it needs to be noted that this species is either female or male and only the females may produce fruit.

See related

How to Pollinate & Grow Peach Trees

Most peach trees (Prunus persica) are recognized as self-pollinators, or plants whose flowers feature both a stamen, the male reproductive organ, and a posture, the female reproductive organ. However, certain varietals, such as “J.H. Hale,” “Candoka” and “Hal-Berta,” aren’t self-pollinators, plus they require another number of peach tree to produce fruit. Although bees commonly pollinate these varieties of coral trees, manual pollination promotes more fruit production, particularly when limited amounts of the pollen-transporting insects are readily available. Peach trees are sturdy in U.S. Department of Agriculture plant hardiness zones 5 through 8 and do best if planted in sandy soil that has reached a temperature of 65 degrees Fahrenheit.

Growing

Soak the whole bare-root peach tree in water for 24 hours prior to planting. Eliminate the peach tree and allow it to air dry. Eliminate any kinked or broken roots using jump hand pruners. Gently pull away any girdled or circling roots from the root ball to separate them.

Pull all weeds and eliminate all vegetation within a 3-foot radius of the proposed planting site to prevent competition for water and nourishment.

Till the soil with a mechanized tiller or garden fork to a thickness of 6 inches and distribute 1 inch of well-decomposed compost above it. Till the ground to incorporate the compost.

Dig a hole in the soil twice as wide and as deep as the root ball of the bare-root peach tree by means of a garden trowel. Rank the peach tree in the soil, making sure the graft union — the top on the back in which the scion combined the origin stock — is between 2 and 4 inches above soil level and facing northeast.

Backfill the peach tree hole halfway with its excavated soil and tamp down gently to eliminate any large air bubbles. Continue filling the hole with the soil line and mound 1 to 2 inches of additional soil around the back. Gently tamp the soil once more.

Irrigate the fruit tree to a depth of 1 foot. It takes 1 gallon of water per square foot to penetrate the soil to a depth of 1 inch, and that means you need about 12 liters of water per square foot.

Dig a 1/2-inch-deep basin slightly wider than the planting hole around the tree for future irrigation. The basin should begin approximately 1 inch away from the back to ensure that the water drains away from the back. In the very first year of planting, add 5 gallons of water to the basin weekly or if the soil feels dry. In following decades, water to a depth of 4 to 6 inches.

Distribute 3 to 6 inches of bark mulch around the tree, then keeping a distance of 3 to 4 inches from the back on all sides.

Use lopping shears to head off the newly planted tree to 18 inches tall to support the growth of lower divisions. Eliminate the weak lateral branches at the division collars so the few left are nicely spaced and distributed evenly around the back.

Move the mulch aside after six weeks and mix 1 pound of 10-10-10 fertilizer with the topsoil using a garden fork, taking care not to damage the main system. Insert 3/4 pound of 10-10-10 in the spring and another 3/4 pound of 10-10-10 in the summers of the subsequent growth years.

Remove all dead, diseased, vertically growing and unhealthy divisions, such as the ones that droop down as the tree grows. Allow approximately 3 years for the peach tree to flower.

Pollinate

Locate a newly opened male flower on a different varietal of peach tree. You may identify a man peach flower by its stamen — a thin cone protruding from the center — by carefully pulling its petals open.

Pluck the male flower from the division and pinch off its outer petals.

Locate a newly opened feminine blossom on the tree. It’s possible to determine a female peach flower by its stance — a group of small spheres in its center — by gently spreading its petals open.

Rub the male flower’s stamen about the female flower’s stigma.

See related

What to Consider When Using Starter Grass Fertilizer

Seeding a new yard requires more than hard work along with some grass seed. Applying a starter grass fertilizer to the soil before spreading the seed gives the plants a boost by helping with root institution. Starter grass fertilizer is high in potassium to gain the main system of the germinated seed. This helps set the grass before the significant green growth happens.

Fertilizer Components

Starter grass fertilizer includes nitrogen, phosphorus and potassium. The tag will show the substances as N-P-K along with the ratio identifying how much of each is in the mixture. Phosphorus is necessary for grass root development and represented as the highest amount in the ratio. Nitrogen promotes green growth and is not required in high amounts until after germination and root development. Potassium can also be low in starter fertilizer and never required in high amounts until the grass begins growing and spreading.

Application Period

Starter fertilizer is effective when applied before seeding so that the active ingredients are available during turf establishment. Insert the fertilizer to the soil before planting by spreading it over the soil and working it in with a shovel or rake into a depth of 2 to 4 inches. Avoid tilling the fertilizer into the soil to stop it from becoming too heavy to get the roots to obtain the nutrients.

Application Rate

The University of California recommends an application rate of 20 pounds of a 5-10-5 starter fertilizer for every 1,000 square-feet of yard or 10 pounds of a 10-20-10 starter fertilizer. Avoid using a starter fertilizer that contains more than 1 pound of nitrogen for every 1,000 square-foot of yard to stop issues with germination. A 5-10-5 starter fertilizer applied at a rate of 20 pounds contains the maximum 1 pound of nitrogen.

Factors

Buy a house soil test kit to help determine the starter fertilizer ratio that best fits the needs of your dirt. The test results will indicate if there are some mineral deficiencies that can be fixed before planting grass seed. Avoid applying starter fertilizer to add nutrients to the soil before completing a soil test, in order to prevent issues with seed germination and growth.

See related

The Best Grass Seed to begin a Yard

With the ideal soil preparation, starting a lawn in a bright, open area that receives full sun can be as simple as binder some grass seed and watering it frequently. In case you’ve got a great deal of sun, live in an area with ample rain and imprisoned on your yard infrequently, maintaining the grass healthy is probably no problem. Many homeowners, nevertheless, struggle to seed and grow a lawn in a yard that’s shady, dry or sees a lot of foot traffic. In these scenarios, it’s important to plant the right type of seed or seed blend. There are lots of options for homeowners who have to seed a problem area within U.S. Department of Agriculture plant hardiness zones 8 and 9. The best grass seed for you can handle the unique conditions found in your yard.

Color

Since most grasses adore sun, it can be difficult to grow seed in nesting areas of the yard. Fine fescue (Festuca) is one of the few shade-loving bud varieties available. These grasses are often utilized in shade-grass blends because they can thrive in very shady locations. Fescues will tolerate warm slopes as well as cold winters, blend well with other grasses and require little in the way of watering or fertilizing. Some specific fescue varieties to search for are creeping red fescue (Festuca rubra), chewing fescue (Festuca rubra commutate) and sheep fescue (Festuca ovina). Other shade-tolerant bud varieties include rough-stalked bluegrass (Poa trivialis), carpet grass (Axonopus affinis), centipede grass (Eremochloa ophiuroides), seashore paspalum (Paspalum vaginatum) and bahia grass (paspalum notatum).

High Traffic Areas

Certain grass varieties are somewhat delicate and don’t succeed in high traffic locations. Lawns that often see children, dogs or sporting actions have to be seeded with grass that may take some abuse and still thrive. Bermuda grass (Cynodon dactylon) and perennial ryegrass (Lolium perenne) both hold up in high traffic locations. A possible disadvantage of ryegrass is that its clumping growth pattern prevents it from spreading as readily as Bermuda grass. This does, however, make ryegrass a lot easier to keep out of flower beds and stone walkways. Another high traffic option is turf-type tall fescue (Festuca elatior). Fescues typically do badly in high traffic areas, but tall fescue is the exception to this rule. Tall fescue does require dense seeding, however, because it also rises in a clumping pattern.

Drought-Prone Regions

If you live in a drought-prone place, then it’s necessary to plant drought-tolerant grass seeds. Otherwise, your lawn is going to be a big brown bare spot each summer once the rain does not come. Although all grasses may battle during prolonged dry periods, planting drought-resistant seed will possess your yard looking green and lush more than lawns with greater water requirements. Turf-type tall fescue, bahia grass, Bermuda grass and seashore paspalum all work well in drought-prone places. Other drought-tolerant varieties include zoysia grass (Zoysia), buffalo grass (Bouteloua dactyloides) and blue grama grass (Bouteloua gracilis).

Low Maintenance

Some people today live for yard work. They discover peace and comfort whilst tending the garden and mowing the lawn. If you’re none of these people, select a very low maintenance grass seed which lets you enjoy a lush, green yard without devoting all of your free time to its maintenance. Most fescue varieties, such as tall fescue, buffalo grass, bahia grass, zoysia and centipede grass are very low maintenance. Another easy-care alternative is St. Augustine grass (Stenotaphrum secundatum). Unfortunately, St. Augustine grass has to be started with plugs or sod, because the plant does not seed reliably and it’s very difficult to locate St. Augustine in seed form.

See related

Should You Prune a Grape Arbor?

Your grape arbor offers shade in the summer together with tasty fruit that you get the satisfaction of growing yourself. Grapevines are rather hardy, but they grow best when pruned once a year, usually in late winter to early spring. Grapes grow on new growth, so pruning helps the plant grow wholesome fruit.

First Year

Pruning during the first year of the grapevine’s life differs than following decades. Plant a grapevine one each side of the arbor for the best results — it’s easier to train two plants up and above the arbor than to depend on one plant to protect the entire construction from top to bottom on both sides. When you plant them in the spring, cut back the stems so that just one — the largest one — comes up in the ground. This will develop into the plant’s back. Cut off most of the offshoots in the back, leaving just three close the top of the trunk, removing the lower ones. This helps guide the plant up so you can train it above the arbor.

Other Years

It takes around three years for many grapevines to develop into older, but also you can start regular pruning in the plant’s second winter. Grapes develop just on new canes, but you want some old development up and above the arbor to assist the plant keep its shape for several years. Allow a couple of chief canes to remain over the arbor, but trim canes that sprout from the key ones down to three or two buds each winter. Together with arbors, you desire the canes on the very best to distribute to the sides and curtain each season, so leave buds that point out rather than up or parallel to the main canes.

Overgrown Vines

In case your grape arbor is no longer producing fruit or looks overgrown, don’t attempt to fix the issue in one pruning. Cut up to old timber — canes that are 3 years old or old — off the vine, leaving one main cane over the top of the arbor. Trim all canes but that one off the primary trunk. The back should sprout new canes through the following growing season. Choose the strongest of those canes and prune off the remainder between January and March, like any piece of the back that goes past the newest cane. Permit this new grin to function as the back, leaving three limbs to train the arbor to reinvigorate the plant.

Factors

Several tools assist you prune your grapevine, including standard pruning shears and a handsaw for bigger canes. Cut the shoots off just above the junction where they attach to the cane, leaving an inch or so of the pruned cane to encourage growth during the following season. Although pruning before the end of March is ideal, you can prune into April. This may lead to excess sap leaking out of their cuts, which may stunt the growth of new shoots marginally for that season. However, it’s unlikely to destroy the plant. To help the plants develop the arbor, use garden twine or pipe cleaners to loosely attach the vines into the arbor every 12 inches.

See related

Varieties of Thornless Blackberry Plants

If the thought of fighting thorny canes is the one thing between you and a summerlong source of homegrown blackberries, you’re in luck. Thornless blackberries first appeared with the 1911 introduction of Californian Walter Cory’s “Cory Thornless.” Now, multiple thornless cultivars supply months of gleaming, ebony fruit for preserves, baked goodies and eating straight away from the cane. Blackberries flourish in deep, mildly acidic, well-drained sandy loam. Cultivars demanding 200 to 800 hours of temperatures between 32 and 45 degrees Fahrenheit function nicely in Mediterranean climates.

Growth Habits

Thornless blackberries develop as erect, semi-erect or trailing plants. Of the three, only semi-erect plants require a trellis or other support. Erect thornless blackberries create canes in their roots and crowns; trailing and semi-erect cultivar canes sprout from the plants’ crowns. Called primocanes within their initial year and floricanes when they flower in their moment, the canes die back after creating berries.

High-Sugar Cultivars

“Navaho” (R. “Navaho”) brings high praise for its exceptionally sweet, late-June-to-August berries. A solitary, 4- to 5-foot “Navaho” plant bears from 8 to 10 quarts of 1-inch blue-black berries. The fruit 11.7 percent glucose content is the greatest among all University of Arkansas blackberry cultivars. Erect, heat-tolerant “Navaho” grows in full sun in U.S. Department of Agriculture plant hardiness zones 6 through 10. Apache” (R. “Apache”) produces hefty, gleaming-black berries on 5, 5- to 8-foot canes. Averaging 10.7 percent sugar solids, the fruit ripens over five weeks starting at mid-June, after its whitened, early-summer flowers open against medium-green, compound foliage. Up to 8-feet broad, “Apache” requires a sunny spot with room to spread. It’s hardy to USDA zones 5 through 9.

Medium-Sweet Cultivars

“Arapaho” (Rubus “Arapaho”), an erect thornless blackberry, produces white spring flowers and deep-green foliage. Its 8 to 10 quarts of 1- to 2-inch berries, desired because of their extremely tiny seeds, are ready for harvesting in ancient to mid-June. Spreading from 3 to 5 feet using canes of variable heights, self-pollinating “Arapaho” does well in partial to full sun. Its strawberries average 9.6 percent glucose content, marginally higher than the bigger, 9.5-percent fruit in “Natchez” (R. “Natchez”), another ancient blackberry. Introduced in 2007, semi-erect “Natchez” stands 4- to 5-feet benefits and high from trellis support. The white-flowering tree enjoys full sun, but does best in cool-summer climates in USDA zones 6 through 8.

Pruning Erect Thornless Blackberries

Properly pruning erect thornless cultivars like “Arapaho,” “Apache” and “Navaho” encourages them to ship lateral branches. Trim each year’s primocanes back to 3 1/2 feet in late summer or early fall. The cut canes become thicker as laterals emerge from their lower divisions, so that they support the growing harvest without aid. Cutting the laterals back to 1 foot in late winter or before they begin flowering in early spring promotes bigger blackberries.

See related

What Tree Has Green Pods With Big Brown Flat Bean-Like Seeds?

Trees featuring green pods full of bean-like seeds are most likely members of the legume family (Leguminosae or Fabaceae). Two trees which unite green seed pods with flat brown “beans” are cotton tree or mimosa (Albizia julibrissin), sturdy in U.S. Department of Agriculture plant hardiness zones 6 through 9, and yellowwood (Cladrastis kentukea), growing in USDA zones 4 through 8. Although the two species have similar pods, their flowers and leaves are different.

Seed Pods

Both mimosa and yellowwood, which can be tightly associated, bear seed pods reminiscent of bean or pea pods. The pods are thin and fragile when young, but age to a leathery texture. Yellowwood pods are between 2.5 and 4 inches long, green, flattened and segmented so that every seed seems to have its own charming compartment. Silk tree bears seed pods which are longer, around 7 inches, full of flat brown seeds. The pods persist on the trees throughout the winter.

Flowers

Aside from the duration of the seedpods, among the most notable differences between mimosa and yellowwood is that the configuration of the flowers. Mimosa trees are summer bloomers, with fragrant brush-like pink flowerheads, borne in fantastic profusion. Yellowwood blooms in late spring along with its fragrant flowers, borne in elongated clusters or panicles, are reminiscent of wisteria. The individual flowers are white with a pinkish tinge and the panicles can be around 15 inches long.

Leaves

Another distinct difference between mimosa and yellowwood trees would be the leaves. Mimosa leaves are dark green, compound, and pinnate or feathery, resembling ferns. They are exceptionally sensitive and curl up when even lightly touched. Yellowwood is characterized by foliage that’s compound, consisting of classes of around eleven leaflets; the person leaflets are oval or teardrop shaped and do not resemble ferns. They are lighter in shade than mimosa leaves and do not share the mimosa leaves’ sensitivity.

Configuration

Using a height of 30 to 50 feet along with an almost identical spread, yellowwood is bigger than mimosa, which reaches 20 to 40 feet with a virtually identical spread. Yellowwood is an upright tree with a wide, rounded crown, while mimosa comes with a vase-shaped division configuration along with a crown that’s somewhat flattened on top. In the fall, mimosa leaves stay green until they drop in the tree, while yellowwood foliage turns bright yellow. Yellowwood is also distinguished by vibrant yellow heartwood.

See related