The Best Grass Seed to begin a Yard

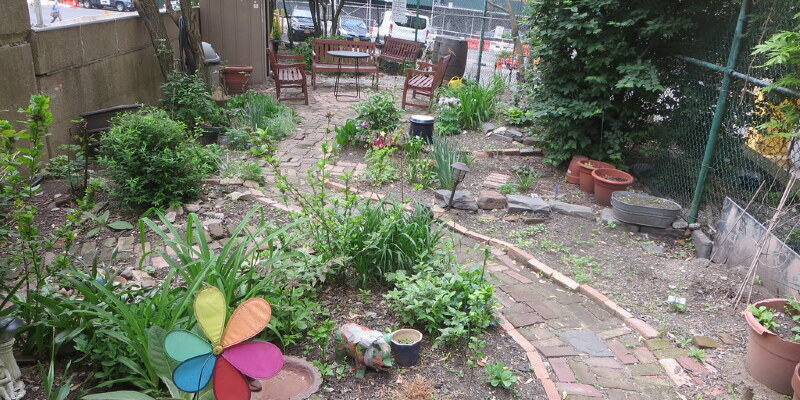
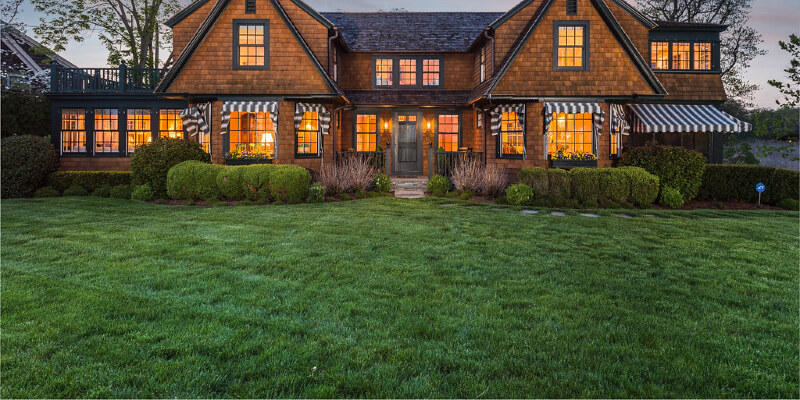
With the ideal soil preparation, starting a lawn in a bright, open area that receives full sun can be as simple as binder some grass seed and watering it frequently. In case you’ve got a great deal of sun, live in an area with ample rain and imprisoned on your yard infrequently, maintaining the grass healthy is probably no problem. Many homeowners, nevertheless, struggle to seed and grow a lawn in a yard that’s shady, dry or sees a lot of foot traffic. In these scenarios, it’s important to plant the right type of seed or seed blend. There are lots of options for homeowners who have to seed a problem area within U.S. Department of Agriculture plant hardiness zones 8 and 9. The best grass seed for you can handle the unique conditions found in your yard.

Color

Since most grasses adore sun, it can be difficult to grow seed in nesting areas of the yard. Fine fescue (Festuca) is one of the few shade-loving bud varieties available. These grasses are often utilized in shade-grass blends because they can thrive in very shady locations. Fescues will tolerate warm slopes as well as cold winters, blend well with other grasses and require little in the way of watering or fertilizing. Some specific fescue varieties to search for are creeping red fescue (Festuca rubra), chewing fescue (Festuca rubra commutate) and sheep fescue (Festuca ovina). Other shade-tolerant bud varieties include rough-stalked bluegrass (Poa trivialis), carpet grass (Axonopus affinis), centipede grass (Eremochloa ophiuroides), seashore paspalum (Paspalum vaginatum) and bahia grass (paspalum notatum).

High Traffic Areas

Certain grass varieties are somewhat delicate and don’t succeed in high traffic locations. Lawns that often see children, dogs or sporting actions have to be seeded with grass that may take some abuse and still thrive. Bermuda grass (Cynodon dactylon) and perennial ryegrass (Lolium perenne) both hold up in high traffic locations. A possible disadvantage of ryegrass is that its clumping growth pattern prevents it from spreading as readily as Bermuda grass. This does, however, make ryegrass a lot easier to keep out of flower beds and stone walkways. Another high traffic option is turf-type tall fescue (Festuca elatior). Fescues typically do badly in high traffic areas, but tall fescue is the exception to this rule. Tall fescue does require dense seeding, however, because it also rises in a clumping pattern.

Drought-Prone Regions

If you live in a drought-prone place, then it’s necessary to plant drought-tolerant grass seeds. Otherwise, your lawn is going to be a big brown bare spot each summer once the rain does not come. Although all grasses may battle during prolonged dry periods, planting drought-resistant seed will possess your yard looking green and lush more than lawns with greater water requirements. Turf-type tall fescue, bahia grass, Bermuda grass and seashore paspalum all work well in drought-prone places. Other drought-tolerant varieties include zoysia grass (Zoysia), buffalo grass (Bouteloua dactyloides) and blue grama grass (Bouteloua gracilis).

Low Maintenance

Some people today live for yard work. They discover peace and comfort whilst tending the garden and mowing the lawn. If you’re none of these people, select a very low maintenance grass seed which lets you enjoy a lush, green yard without devoting all of your free time to its maintenance. Most fescue varieties, such as tall fescue, buffalo grass, bahia grass, zoysia and centipede grass are very low maintenance. Another easy-care alternative is St. Augustine grass (Stenotaphrum secundatum). Unfortunately, St. Augustine grass has to be started with plugs or sod, because the plant does not seed reliably and it’s very difficult to locate St. Augustine in seed form.

See related

Should You Prune a Grape Arbor?

Your grape arbor offers shade in the summer together with tasty fruit that you get the satisfaction of growing yourself. Grapevines are rather hardy, but they grow best when pruned once a year, usually in late winter to early spring. Grapes grow on new growth, so pruning helps the plant grow wholesome fruit.

First Year

Pruning during the first year of the grapevine’s life differs than following decades. Plant a grapevine one each side of the arbor for the best results — it’s easier to train two plants up and above the arbor than to depend on one plant to protect the entire construction from top to bottom on both sides. When you plant them in the spring, cut back the stems so that just one — the largest one — comes up in the ground. This will develop into the plant’s back. Cut off most of the offshoots in the back, leaving just three close the top of the trunk, removing the lower ones. This helps guide the plant up so you can train it above the arbor.

Other Years

It takes around three years for many grapevines to develop into older, but also you can start regular pruning in the plant’s second winter. Grapes develop just on new canes, but you want some old development up and above the arbor to assist the plant keep its shape for several years. Allow a couple of chief canes to remain over the arbor, but trim canes that sprout from the key ones down to three or two buds each winter. Together with arbors, you desire the canes on the very best to distribute to the sides and curtain each season, so leave buds that point out rather than up or parallel to the main canes.

Overgrown Vines

In case your grape arbor is no longer producing fruit or looks overgrown, don’t attempt to fix the issue in one pruning. Cut up to old timber — canes that are 3 years old or old — off the vine, leaving one main cane over the top of the arbor. Trim all canes but that one off the primary trunk. The back should sprout new canes through the following growing season. Choose the strongest of those canes and prune off the remainder between January and March, like any piece of the back that goes past the newest cane. Permit this new grin to function as the back, leaving three limbs to train the arbor to reinvigorate the plant.

Factors

Several tools assist you prune your grapevine, including standard pruning shears and a handsaw for bigger canes. Cut the shoots off just above the junction where they attach to the cane, leaving an inch or so of the pruned cane to encourage growth during the following season. Although pruning before the end of March is ideal, you can prune into April. This may lead to excess sap leaking out of their cuts, which may stunt the growth of new shoots marginally for that season. However, it’s unlikely to destroy the plant. To help the plants develop the arbor, use garden twine or pipe cleaners to loosely attach the vines into the arbor every 12 inches.

See related

How to Cure Orange Tree Diseases

The lush scent of the orange flowers may call to obey tropical lands, but orange trees (Citrus spp.) Are not merely for Florida and the south of Spain. Many orange tree cultivars prosper in U.S. Department of Agriculture plant hardiness zones 9 through 11. Like other citrus trees, orange trees may catch many different fungal, viral, mycoplasma and nematode diseases and while some might be treated, others don’t have any cures. The best defense against orange tree diseases could possibly be good citrus management practices all year round.

Diagnose fungal diseases such as anthracnose and gray mold (Botrytis cinerea) identifying velvety mats of sporulating tissues which induce invading to die back and fruit to come up with ridges and drop. Spray the tree thoroughly with copper and benzimidazole fungicides according to label instructions. Reapply if required. Lower your orange tree’s susceptibility to fungal disease by protecting the tree from mechanical injuries and pruning to enhance air movement.

Treat citrus plant parasitic-nematode diseases by combining a broad-spectrum insecticide/nematicide featuring Oxamyl into the irrigation water provided to the tree. Use according to label instructions, but never apply over the maximum recommended, about 4 quarts per acre per month.

Diagnose psorosis by noting that a gradual decrease caused by flaking of the bark which develops into an infection. Treat it by scraping away the infected bark area with a sharp, sterilized knife and allowing the wound to callus over. Both psorosis and nematode diseases are transmitted by grafts and both can be avoided by buying certified disease-free citrus plants for your own orchard.

Apply a fungicide wash featuring copper sulfate to treat fungus- and mold-based diseases. Mix the fungicide with water in accordance with the label instructions and washing the tree twice per year, in fall and spring. Check your irrigation and drainage system to stop over-watering which may be a element in fungal infections. Orange trees require moist but well-drained dirt to thrive.

Treat black rot, also called Alternaria rot, by removing affected fruit from the site. This fungus grows on dead citrus tissue during rainy weather causing fruit drop and rotten, dark spots on the fruit. Not all the fruit will be affected and you are able to eat those oranges which aren’t. Avoid the disease in the future by applying good cultural practices including good tree maintenance and irrigation. It is very important to prevent all wounds or other harm to fruit that provides the fungus a means to enter the tree.

See related

Varieties of Thornless Blackberry Plants

If the thought of fighting thorny canes is the one thing between you and a summerlong source of homegrown blackberries, you’re in luck. Thornless blackberries first appeared with the 1911 introduction of Californian Walter Cory’s “Cory Thornless.” Now, multiple thornless cultivars supply months of gleaming, ebony fruit for preserves, baked goodies and eating straight away from the cane. Blackberries flourish in deep, mildly acidic, well-drained sandy loam. Cultivars demanding 200 to 800 hours of temperatures between 32 and 45 degrees Fahrenheit function nicely in Mediterranean climates.

Growth Habits

Thornless blackberries develop as erect, semi-erect or trailing plants. Of the three, only semi-erect plants require a trellis or other support. Erect thornless blackberries create canes in their roots and crowns; trailing and semi-erect cultivar canes sprout from the plants’ crowns. Called primocanes within their initial year and floricanes when they flower in their moment, the canes die back after creating berries.

High-Sugar Cultivars

“Navaho” (R. “Navaho”) brings high praise for its exceptionally sweet, late-June-to-August berries. A solitary, 4- to 5-foot “Navaho” plant bears from 8 to 10 quarts of 1-inch blue-black berries. The fruit 11.7 percent glucose content is the greatest among all University of Arkansas blackberry cultivars. Erect, heat-tolerant “Navaho” grows in full sun in U.S. Department of Agriculture plant hardiness zones 6 through 10. Apache” (R. “Apache”) produces hefty, gleaming-black berries on 5, 5- to 8-foot canes. Averaging 10.7 percent sugar solids, the fruit ripens over five weeks starting at mid-June, after its whitened, early-summer flowers open against medium-green, compound foliage. Up to 8-feet broad, “Apache” requires a sunny spot with room to spread. It’s hardy to USDA zones 5 through 9.

Medium-Sweet Cultivars

“Arapaho” (Rubus “Arapaho”), an erect thornless blackberry, produces white spring flowers and deep-green foliage. Its 8 to 10 quarts of 1- to 2-inch berries, desired because of their extremely tiny seeds, are ready for harvesting in ancient to mid-June. Spreading from 3 to 5 feet using canes of variable heights, self-pollinating “Arapaho” does well in partial to full sun. Its strawberries average 9.6 percent glucose content, marginally higher than the bigger, 9.5-percent fruit in “Natchez” (R. “Natchez”), another ancient blackberry. Introduced in 2007, semi-erect “Natchez” stands 4- to 5-feet benefits and high from trellis support. The white-flowering tree enjoys full sun, but does best in cool-summer climates in USDA zones 6 through 8.

Pruning Erect Thornless Blackberries

Properly pruning erect thornless cultivars like “Arapaho,” “Apache” and “Navaho” encourages them to ship lateral branches. Trim each year’s primocanes back to 3 1/2 feet in late summer or early fall. The cut canes become thicker as laterals emerge from their lower divisions, so that they support the growing harvest without aid. Cutting the laterals back to 1 foot in late winter or before they begin flowering in early spring promotes bigger blackberries.

See related

The way to Adjust a Lazy Susan Cabinet Pole

A lazy Susan is a rotating closet add for corner cabinets in a kitchen. The rotating shelves of a lazy Susan function nicely in this type of cabinet because the cabinet can be rather expansive with a small door opening, which makes it difficult to reach the recesses. A lazy Susan is made up of a few shelves that rotate around a center pole, which, if not correctly aligned, can prevent the doors from closing or the shelves from smoothly rotating. It is possible to correct a lazy Susan closet rod in a couple of minutes with a few hand tools.

Remove the items in the lazy Susan shelves. Remove the screws holding the cabinet door onto the cabinet frame using a screwdriver, and set aside the doorway.

Loosen the mounting screws holding each shelf into the rod using a screwdriver. Slide down the shelves the rod and permit them to rest on the ground of the cabinet.

Loosen the screw on the collar in the center of the rod, and slide the upper part of the rod down to the lower part. Lift each shelf above the end of the rod, and pull them out of the cabinet.

Expand the upper part of the rod until it aligns with the upper pivot inside the cabinet, and tighten the collar screw.

Hold a level against the face of the rod to confirm the rod for plumb. If the rod is not plumb, loosen and remove the screws that secure the upper pivot to the peak of the cabinet. Adjust the rod until it is plumb in every direction. Rotate the upper pivot 45 degrees on the rod and mark hole positions for the mounting screws.

Loosen the collar screw, lower the upper part of rod, and eliminate both the rod and the upper pivot from the cabinet.

Drill a 1/8-inch pilot hole through each of the marked hole locations. Insert the upper dot and attach it into the cabinet using the mounting screws through the pilot holes.

Reinsert the closet rod, and extend the upper pole section to meet the upper pivot. Tighten the collar screw and check for plumb.

Lower the upper rod again, then replace the shelves above the rod. Expand the upper rod to the pivot, tighten the collar screw, then reposition the shelves and tighten the shelf screws.

Analyze the lazy Susan to make sure it correctly rotates within the cabinet. Replace the cabinet door, then replace the contents of the lazy Susan shelves.

See related

Trellises As Privacy Fences

Create an intimate garden area using a trellis draped in flowers or even fruit and vegetables if you would like to bring an edible component to your privacy trellis. The trellis can be a timeless lattice weave or be made out of wire, wood or metal material. When creating solitude, a trellis draped in plants is a fun and beautiful accession.

Trellis

A trellis is a construction, traditionally made from wood or metal, designed to provide support for plants. Trellises can be either free standing or secured against a wall. Attaching a trellis to a wall is a means to grow growing plants against the side of a building or other permanent construction. When developing a privacy fence to enclose a garden area or develop a visual barrier, a freestanding trellis is the way to go.

Free-Standing Trellis

Free-standing trellises have to be strong and well secured in order to support heavy plant substances and defy the wind. When constructing a trellis as a privacy fence, construct it as you would any fence using good fence posts set on concrete pads. Between the fence posts, wood lattice or a metal framework creates the trellis impact and provides an ideal structure for growing plants.

Selecting Climbers

When choosing climbing vines for a privacy fence trellis, the first aspect to think about is deciduous or evergreen. Deciduous vines lose their leaves in the fall and remain leafless during the winter. This works if the privacy fence encloses places only used throughout the growing season. Evergreen climbing vines maintain their leaves year, developing a private enclosure in most seasons. Clematis includes woody evergreen and deciduous flowering climbing vines, hardy in U.S. Department of Agriculture plant hardiness zones 4 through 11, depending of this variety. Increasing roses ( Rosa spp.) Make good additions. Based on the variety, roses are hardy in USDA zones 3 through 10.

Edible Privacy

It is possible to create a privacy fence on a trellis using edibles by planting climbing vegetable and fruit plants. Yearly vegetables will die back in the end of this growing season, but they grow rapidly and leaf out rapidly creating solitude early in the growing season. Vegetable plants like strawberries, beans, peas, cucumbers and small melons or squash require a support or they will trail all over the garden. Plant these delicious crops at the base of your privacy fence, and harvest fresh veggies all summertime.

See related

How to Install a Freestanding Bathroom Sink

A freestanding bathroom sink, often referred to as a pedestal sink, which is a standalone unit that is ideal for half-baths or smaller bathrooms in which a vanity could be too large. With a freestanding bathroom sink, the plumbing that is normally hidden under the vanity is exposed, so chrome pipes are set up in place of PVC. It’s possible to put in a freestanding bathroom sink with the help of an assistant in a single day using some common plumbing gear.

Measure from the floor to the mounting brackets of this freestanding sink. Locate the stud behind the wall on every side of this roughed-in plumbing in the bathroom wall using a fireplace, and mark the studs. Then cut a 10-inch-tall part of masonry behind the sink between the centres of the joists centered vertically at the height of the mounting brackets with a utility knife.

Measure the distance between the studs and then cut a part of two-by-eight lumber in that distance using a circular saw. Insert the part of board and attach it to the studs using 3-inch wood screws embedded diagonally throughout the board and in the studs using a power drill.

Measure and cut a piece of 1/2-inch drywall to cover the installed brace and encompassing hole in the wall, and then attach the drywall with drywall screws. Fill the joints with joint compound, and employ drywall tape to the joints using a 3-inch putty knife. Apply additional joint compound over the tape and permit the compound to dry for 24 hours. Then sand the joint compound and feather a second layer of compound over the first using a 10-inch drywall knife. Allow the second layer of compound to dry, then sand, texture and paint the stain to match the surrounding wall.

Place the pedestal sink’s wall-mounting bracket over the wall and then brace in the height you decided earlier, and adjust the angle using a torpedo level. Fasten the bracket to the braced wall section using the bracket’s mounting screws.

Measure the distance horizontally from the mounting bracket on the back of the sink to the middle of this drain. Then align a chrome P-trap using the drain line from the wall so that the vertical coupling of this P-trap is centered at the drain’s distance from the wall. Mark the point on the drain point in which the PVC shoulder meets the elbow and then cut the PVC drain line at that stage using a hacksaw.

Turn off the water main to the house, and turn to a faucet elsewhere in the building to ease pressure. Then cut off the two copper supply lines in 2 inches from the wall using a tube cutter. Slide the wall flange, compression coupler and ferrule of a chrome compression shutoff valve over one of the pipes, then fit the end of the valve onto the pipe. Pull the ferrule to fulfill the nipple, then tighten the coupler to the nipple using an adjustable wrench. Push the flange from the wall to cover the rough-in in the drywall. Repeat the process using the next shutoff valve. Turn the water main and check the valves for leaks.

Remove the coupler nut and washers from a pop-up kit. Apply a bead of plumber’s putty around the drain flange, then set the drain into the sink. Press down to the flange to bench the flange to the drain hole, then place the seams onto the drain nipple at the order they were eliminated, and thread the coupler nut onto the nipple. Tighten using a large pair of slip-joint pliers. Wipe away any extra plumber’s putty.

Remove the mounting nuts from the base of the faucet, and place the base of the faucet onto the back of the sink via the mounting holes. Attach the mounting nuts to the nipples on the bottoms of their hot and cold inlets, and hand-tighten the nuts. Then adjust the position of the faucet and tighten the nuts using slip-joint pliers.

Put the sink onto the pedestal base. Attach the drain tailpiece to the drain nipple throughout the pedestal base, and tighten the joint using slip-joint pliers. Then assess the distance from the floor to the base of the P-trap already set up on the drain line. Install the lower half of this P-trap to the tailpiece from the pedestal sink in this height, and fasten the coupler using the slip-joint pliers.

Slide the end of this pop-up drain pole through the hole at the middle of the back of the sink, and link the pole to the extension by tightening the set screw onto the extension bracket. Then connect the extension to the lift pole using the slide spring. Examine the operation of this pop-up arm along with the stopper in the sink, and adjust the lift pole as needed to ensure proper operation.

Slide the sink and pedestal into position from the wall. Lift the sink slightly to fasten the mounting bracket on the back of the sink to the wall bracket. Combine the two halves of this P-trap and tighten the coupler using the slip-joint pliers.

Mount any floor bolts as required from the base of the pedestal to the floor, by predrilling holes and driving the lag bolts using the adjustable wrench. If no mounts are required, caulk around the base with silicone tub and tile caulk.

Wrap thread seal tape around the nipples of every water inlet valve 2 to 3 times. Measure the distance from the nipple to the hot water supply valve to the hot water inlet on the faucet. Cut a slice of chromed supply tube 1 inch longer than this distance. Add a coupler and ferrule to one end, then connect that end to the distribution valve using an adjustable wrench. Gently bend the tube so that it aligns with the base of the faucet inlet, then add a faucet coupler and ferrule to the end of the tube and then connect it to the faucet nipple. Repeat to your cold water feed.

Turn the two water supply inlets, then turn on the faucet and analyze the operation of this inlets, sink and drain lines.

See related

The way to Screen Coasters to a Wall

Wall art doesn’t have to be a painting or photograph in a decorative frame. If you can put something on the wall, then you may use it as wall art, so long as you arrange it attractively. Collections of coasters may produce a quirky yet creative display; it is an unexpected material which can stick out and demand attention in a room.

Collect

If you haven’t already started, collect coasters to put in your wall. You can purchase coasters in sets, get used ones from websites which auction various collectibles or search for them in garage sales and thrift shops. Among the most rewarding ways to strengthen your coasters is by gathering them from bars and restaurants which you regular or from areas you visit in your travels.

Location

Determine which wall you need to use for your lock screen. An ideal place can most likely be found on your game room, guy cave or near your wet bar. You can also produce a whimsical display by placing the coasters above a fireplace mantle or sofa. Do not be afraid to be playful with them; use them at the kitchen as a edge or plaster the door to your den.

Stick Them

It is possible to mount cardboard, some other lightweight material directly to the wall. Decide how you want to arrange them first; measure the space you want to put them and create a scale diagram on chart paper with each square representing 1 inch. Gauge the coasters and sketch the arrangement to scale back on the diagram. When you’re happy with a plan, mount the coasters directly to the wall according to your plan. Use a ruler to be certain you’re spacing out them correctly and use a level to be certain they’re straight. Mount them with a removable wall mount adhesive so your walls wo not be damaged if you want to take them down.

Frame Them

If you prize your collection, instead of mounting them directly to the wall, then you would be better off placing the coasters in frames to protect them from dust and grime. You can get little, square frames and then put one coaster in every frame. Use a neutral shade background paper in all of the frames to unify the collection, then center a coaster in every frame. Alternately, get large frames and then arrange clusters of coasters at the frames. Hang the frames on the wall within an attractive arrangement.

Shelve Them

Get narrow image shelves used to display lines of family photographs on walls and in stairwells. These shelves will even hold your coasters for you. This is the optimal solution if you have coasters made of ceramic, wood, stone or metal. Hang the shelves in which you want to make the display. If you’re placing one shelf above another, measure the coasters to see how far apart you want the shelves spaced. As soon as you have the shelves mounted, line up the coasters on them. Secure the coasters with museum putty.

See related

The way to Seam the Edge of a Sheer Curtain

The border finish on a sheer curtain is where a professional finish is most evident. Mastering a fantastic edge finish will hallmark you as an innovative home-decor seamstress and elevate your fabrications to the coveted status of custom-made over homemade — even without a professional blind-hemming machine.

Hand Sew

Fold the edge of the curtain over 1 inch, wrong sides together, and press the fold. Fold the border again 1 inch and pin the hem in place. Don’t press the second fold.

Take a little pick-stitch near the peak of the curtain on the next fold of the hem within an anchor stitch.

Slide the needle under the upper layer of fabric of the second fold and run the needle perpendicular to the next fold toward the hem for 1/2 inch. Exit the fold and pull up the thread.

Take a small stitch over the folded hem and into the curtain. Pick as several stitches as you can. Insert the needle under the upper layer of the hem and the next fold for 1/2 inch. Exit the fold and pull up the thread. Take another little stitch into the curtain and over the folded hem. Continue along the folded edge to the bottom of the hem. Back-tack to affix the thread, and cut off the surplus.

Press the finished hem and allow it to cool before moving the curtain.

Fuse

Fold the edge of the curtain over 1 inch, wrong sides together, and press the fold. Again fold the border 1 inch, and pin the hem in place. Press this second fold.

Put 1/4-inch-wide fusible tape involving the curtain face and the second fold. Put a pressing cloth over the fold and fuse based on the manufacturer’s directions. Don’t slide the iron over the fabric as it is fusing, since this leads to ripples in the hem. Lift and transfer the iron, then reset it to the new department to fuse.

Let the curtain thoroughly cool before moving it.

Machine Sew

Fold the edge of the curtain over, wrong sides together, 1 inch and press the fold. Fold the border again 1 inch, then pin the hem in place. Press this second fold.

Position the curtain below the foot of the sewing machine, with the right side of the fabric on the surface, and the hem against the feed dogs. Keep the fabric educated as it goes through the sewing path. Maintaining it taut and sewing using the hem on the underside lowers the take-up of this machine sewing.

Sew near the next fold and press on the finished hem. Let it cool before moving the curtain.

See related

How to Shorten a Window Shade

Roller window shades are relatively easy to shorten. Unlike blinds that involve strings and pulleys, window shades are shortened by cutting the fabric where it attaches at the elbow. When the shade is too long, you can shorten it to pull down to the window sill instead of beyond the sill. Some homeowners may choose the expression of shades that only cover the top half of a window when completely pulled down. Regardless of the reason, the job can be carried out with basic resources by even beginner DIYers.

Pull down the colour and discharge it lightly to place the ant-reverse lock to the roller. Lift the roller on top of the shade out of the brackets and lay the shade flat on a table.

Expand the roller on the shade by palm to unroll the shade completely and expose the tape or staples that fasten the top end of the shade to the roller. Note the way the shade rolls on the roller, such as over the top border or in the underside. After the colour is cut it must be reattached in the roller in the same manner.

Detach the top border of the shade in the wooden roller by pulling the staple fasteners with a desk staple puller. To get a metal or vinyl roller, then lightly cut across the pieces of tape in which these attach the border of the shade on the roller. Put the roller apart.

Measure down from one of the roller brackets on the window frame and notice the dimension that you would like the shade. Add 2 inches to allow enough shade for rolling the top end on the roller. Note the dimension.

Measure from the bottom cord or rib around the colour and mark every edge of the colour in your own measurement. Fold the top part of the shade in your marks and press on the fold to make a seam as a cutting guide.

Cut across the shade from side to side in the folded seam with scissors. Discard the top piece that is cut off.

Check with the direction the shade was rolled onto the roller and place the cut edge of the shade in the top border or underside of the roller, as necessary.

Set up a desk stapler using 1/8-inch staples. Flip the grab on the inner end of the stapler and swivel the foundation away in the stapler’s head. Attach the border of the shade to a wooden roller with fundamentals at 4-inch periods from end to end. To get a metal or vinyl roller, then attach the border of the shade with 2-inch-long strips of 1/2-inch masking tape in 4-inch intervals.

Roll the roller many inches onto the colour. Reset the roller in the brackets at all sides of the window. Pull down lightly on the bottom of the shade to publish the reverse-lock to collect or pull down the shade.

See related