Smart Shopper

In Grandma’s day, newlyweds started their unions using a matching table and chairs. You never had to wonder if the pieces worked together. However, the results were so predictable, they induced nausea quicker compared to tryptophan in a turkey dinner.

Today mix-and-match dining places are in vogue. They are more interesting, but also harder to gather. So before you invest in a set of dining chairs, make sure they’re going to work together with the table, the area — as well as the size of your guests.

MuseInteriors

Design

even though it can be chic to match traditional chairs with a modern table, and vice versa, try to find pieces that share a common design element. If the table has a sinuous leg, start looking for a chair with the exact same line at the leg back, or select upholstery with swirls onto it.

Elad Gonen

If the table is rectangular or square, think about chairs with a rectangular or square chair.

Chango & Co..

Dimensions

Twenty-two inches is a good standard width for an armless dining chair, but it is possible to go bigger than that if your dining table or dining area is especially large and could dwarf a normal-size chair.

Thompson Custom Homes

Avoid chairs that are narrower than 17 inches; they simply don’t offer enough support for the derriere. For maximum relaxation, select chairs which are 20 to 24 inches deep.

Jiun Ho Inc..

Chair Height

Eighteen or 19 inches is an perfect height for a dining chair seat. As a guideline, try to let a minimum of 12 inches between the top of the seat and the top of the table. Dining tables stand 29 to 30 inches high.

Maria DeGange

Portability

try to find a dining chair that’s easy to move in and out of the table. Chairs with a slatted back are easy to grip, because there’s a void on your hand between the frame and the slat.

Mary Cook

A chair with a solid back — or one which is fully upholstered — might be more difficult to grab, so it ought to be light enough to move with no firm hold. (Rings help make the task simpler here.)

Lily Mae Design

Consider the people who will be using the chair: If children or the elderly often dine in the table, ensure that the chair isn’t too heavy or awkward for them to move.

Eminent Interior Design

Upholstery

Sooner or later, someone will spill something on your chairs. How much are you willing to be concerned about it?

For easy care, stick with leather (genuine or imitation), Ultrasuede, cotton blends or a industrial cloth. Steer clear of multilevel fabrics or ones using a thick nap, like chenille and velvet — they will show wear. Manmade fibers such as rayon or polyester are best when combined with natural fibers.

Dustylu

Should you use delicate fabrics, find chairs with removable seat cushions, or so the material can be replaced. And make sure you get extra.

More
How to Buy a Sofa
How to Get a Sleep Sofa
How to Obtain a Sectional
How to Buy a Mattress

See related

Organic Remedy for Bagworms

Bagworms are caterpillars that spin protective sacks and the leaves, twigs and bark of their host plants. The brown, teardrop-shaped bags reach 1- to 2-inches long and generally seem like seedpods or small robes. These voracious eaters can defoliate host plants, causing them to weaken, seem unattractive and even die. Without releasing compounds into the 15, several organic treatments exist to treat bagworm people.

Around Bagworms

Bagworms (Thyridopteryx ephemeraeformis) will feed on about 130 plant species, but their favourite foods will be the junipers (Juniperus spp.) , such as red cedars and Leyland cypress trees, which grow in U.S. Department of Agriculture plant hardiness zones 2 through 9 and zones 6 through 9, respectively. Bagworm men are fuzzy moths using wingspans, but the mature females are flightless, worm-like animals that reach about 1 inch in length and never leave their bags. They set between 500 and 1,000 eggs before perishing inside of the bags. The blackish caterpillars emerge, and the eggs hatch once warm weather arrives at the spring and start feeding on their host plants.

Handpick Bags

You can typically control localized or small bagworm inhabitants by handpicking and ruining the bags, however you must do this no later than early spring to prevent the eggs from hatching. Dip the bags into a pail of soapy water instead of simply letting them drop to the floor. This guarantees that the caterpillars don’t return for their host plants. After you eliminate the sacks, cut the lace bands which attach the bags. This silk can girdle limbs and cause branch dieback in only a few decades, if you don’t.

Bring Natural Enemies

Bagworms have loads including wasps and birds. Bring the predatory beneficial insects by planting daisy and aster family members. Shasta daisies (Leucanthemum X superbum) and Frikart’s asters (Aster x frikartii) both work as attractants while incorporating pops of colour in yards throughout USDA zones 5 through 9. Feeders, Putting birdbaths and birdhouses near trees helps attract birds which will feed on the caterpillars.

Spray With Btk

Control youthful bagworms by using a pesticide containing Bacillus thuringiensis var. Kurstaki (Btk), a natural soil bacterium which makes caterpillars stop feeding and die within just a few days. Once the bags are still smaller than 1/2-inch long, you must start spraying Btk in your plants and the larvae are feeding, generally from May through the end of June. Carefully read and follow the application and mixing directions on the item’s tag. 1 pesticide advocates mixing 4 tsp of product for every 1 gallon of water. With a handheld garden sprayer, thoroughly saturate all leaves surfaces, including the tops and undersides of leaves. Until you achieve control, repeat applications.

Employ Spinosad

Spinosad is a pesticide created from soilborne bacteria. It toxins caterpillars that eat or touch it killing bagworms. Follow the directions on the tag of the manufacturer since instructions will be different. 1 product advocates mixing 4 tablespoons of product for every 1 gallon of water at a handheld sprayer. Spray the tree until you cover the tops and bottom surfaces of the foliage of the host plant. In case bagworm inhabitants persist, apply spinosad solution in seven to 14 days.

A Word of Warning

Spinosad is toxic to honeybees for about three hours after application. Spray in the early morning or late evening to avoid damaging the insects. Btk – or spinosad-based products. Pesticide after a heavy rain. Even these organic ingredients can cause skin or eye irritation although spinosad and Btk offer bagworm control. Protect yourself from exposure by wearing goggles, a facemask shoes with socks, long sleeves and shorts. Maintain out family and pets of the treatment area before the spray dries.

See related

Cheap Ideas for Home Improvement

Well-planned home improvement jobs increase homeowners’ enjoyment and increase the value of the home in the eyes of possible customers. To maximize sale profits, invest in home improvements that have the potential to offer a high rate of return. Try simple jobs utilizing recycled or sale-priced items.

Paint

Utilize paint on the exterior and interior of a home as an inexpensive approach to potentially increase home value or at least increase the attractiveness of the home. A fresh coat of paint onto the outside of a home increases curb appeal. A home that attracts the eye of possible buyers upon first glance creates a good first impression, which leads to more interest and more offers on your home. Interior paint selection is also important. In addition to making the interior living spaces more visually appealing to the homeowners, well-chosen paint colors and techniques are appealing to prospective buyers who are picturing their belonging fitting into your space. Interior and exterior paint is offered by the gallon at discount prices at large home improvement retail shops throughout the nation. The material cost for painting a spacious two-story home can run somewhere around $400 to $600.

Light Fixtures

Rather than having bare bulbs or dull white globes, install new or recycled light fixtures to add character and style to an area. Light fixtures are available in many different styles, shapes and colors like crystal chandeliers, brushed bronze flower shapes and do-it-yourself fixtures using containers. To get a bathroom remodeling job, the entire cost of fixtures is typically between $50 and $200, depending on the type and amount of fixtures. Save money by purchasing fixtures in good condition at flea markets, estate sales and discount merchants. Select fixtures that are trendy but not overpowering and which match the other features of this space.

Extra Storage

Clean out and organize closets to provide the look of storage space when showing your home to prospective buyers. Individuals in the marketplace for a new home wish to be assured their new abode can adapt all of their belongings without being overstuffed. In addition to throwing out unnecessary things, buy cabinet organizing systems for your property. Many home improvement retailers carry closet organizing systems that you can tailor to your own needs and put together yourself. Such systems provide shelving, sticks for hanging clothes and places for shoes and other accessories. Organizing systems are at the region of approximately $100.

See related

Upgrades to a House That Add Value

Renovations can add substantial value to your home. Small upgrades such as granite counter tops, stainless steel appliances and updated bathrooms create a home more appealing to buyers and stand out in the real estate market. Large-scale remodeling can seriously increase the home’s value. Not all upgrades add value to your home, nevertheless.

Kitchen

According to”Home Remodeling” magazine, a remodeled kitchen may add 80 to 100% of its price into the value of the home. That means a kitchen renovation costing $20,000 will include $16,000 to $20,000 to your home’s value. A home that has been appraised at $200,000 could now be worth $220,000. Kitchen renovations include things like brand new counters, wiring, lighting , custom cabinets and state-of-the-line appliances.

Exterior

New siding positions as HGTV’s number-one update to add value to your home. Old and faded or cracked siding severely damages curb appeal and lumps a home into the”fixer upper” category. When potential buyers see a busted and unappealing exterior, they will not expect far more from the interior. Siding boosts curb appeal. Refreshing the lawn with new shrubs and flowers also adds curb appeal and makes your home more marketable.

Bathroom

According to”Home Remodeling” magazine, bathrooms are just another opportunity to improve home value. Bathroom renovations include 80 to 115 percent of the prices into the home’s value. On a $200,000 home, $10,000 in toilet improvements could increase the home’s value to $210,000 or more. When upgrading a toilet, a homeowner can replace fittings and fixtures, retile the floor and put into a large soaking tub. Adding another bathroom to a residence is a great wager, having a 100 percent or more pay off price. According to HGTV.com, toilet improvements don’t have to be costly to add value to your home. Things as straightforward as replacing a dated tub, tile or toilet do wonders. Freshening living room with new linens and lighting fittings also adds instant allure.

Green Improvements

Insulation does not do anything for a house’s visual appeal, but it does much to enhance your home’s energy-efficiency. According to Planet Green, home improvements that boost a home’s efficiency yield 250 percent in their initial investment. Installing efficient heating and cooling system is very good for the environment as well as a home’s value. Geothermal heat pumps and solar heating are green improvements that make a home stand out from others in the marketplace.

Increase Living Space

Adding a deck or a sunroom instantly increases living space and adds value to your home. According to HGTV, homeowners who add a deck to their home can expect to recoup 76 percent of the investment when they market the property. Turning the attic into a bedroom complete, with windows, lighting and custom seating, also increases living area and makes a home more desirable to potential buyers.

See related

Go Tropical the Easy Way With Bromeliads

Step into the fascinating universe of bromeliads and become familiar with a family of tropical plants that can make a stunning centerpiece for the table or a sophisticated decorative announcement elsewhere.

Most bromeliads have dramatic, durable blooms, and some have brilliantly coloured foliage as well. These plants have been praised for their ability to easily adapt to the adverse growing conditions that exist in most offices and homes, due to the low light wants and drought tolerance. So it is no surprise that they have come to be a popular present.

To top it off, not only are bromeliads a beautiful and relatively durable alternative to a costly cut-flower arrangement, but they also release oxygen and eliminate toxins (following dark, like orchids and succulents), making them ideal in bedrooms or combined with additional day-purifying foliage houseplants for naturally-occurring toxin elimination.
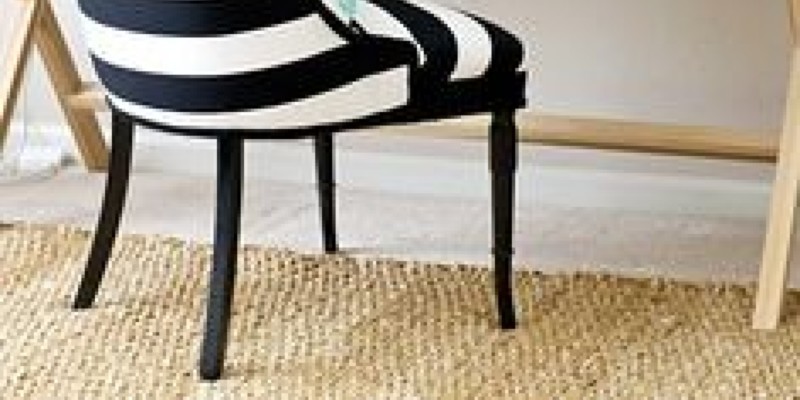
Horst Architects

A single Vriesea bromeliad in blossom with its flat sword-like bract includes a subtle exotic fashion, which makes it the perfect companion to a sculptural red stool in the distance.

Although many bromeliads are epiphytic, meaning that they develop on branches and trunks of trees or on rocks in their native habitat, most could be grown in containers. Unsurprisingly, bromeliads are members of a plant family known as Bromeliaceae, of which the pineapple is the most famous member.

Studio D – Danielle Wallinger

Here the number Aechmea weilbachii, that has a brilliant reddish stem with purple blooms, is a gorgeous complement to the delicate lavender mosaic tiles.

Bromeliad blooms can last from two to three weeks or longer, given ideal conditions. Bromeliads do not rebloom, but as a consolation, they will produce a small “puppy” plant in their foundation within two years of blooming, which can slowly grow to become the next generation.

Charles de Lisle’s Office

Once the bromeliad bloom dies, the plant itself can nevertheless be appreciated because of its long green leaves and rosette growth formation. A black kettle serves as a perfect foil for all these glowing green leaves and ties along a space with other black accents.

Prestige Builders

Bromeliads grouped together in an oblong container bring a timeless taste of the tropics for this streamlined architectural space. The Guzmania rana blooms found here closely resemble that of the ginger plant, therefore despite the plant South American origins, it actually looks very Asian and is a nice complement to this shoji-screen-inspired windows.

Whilst fascination with bromeliads appears to have risen lately, growing bromeliads turned into a hobby at the mid-1800s, often among those with a passion for raising orchids, as collectors couldn’t distinguish bromeliads in the desirable orchids in their natural habitat and mistakenly accumulated both.

ecopacheco

A jaw-dropping living wall of bromeliads is an aspiration for a serious collector. It is possible to do something like a much bigger scale, and even indoors, once you become well acquainted with the needs of this bromeliad species you’d like to feature.

In the meantime, consider combining different types and colors of bromeliads into a single widemouthed and very low pot to produce a stunning arrangement.

Philpotts Interiors

Placed to a side table in a long hallway, one bromeliad is perfectly paired with a sculptural eye pot that brings focus on the wealthy decorative components in its proximity.

Reynlds-Sebastiani Design Services

Bromeliads require only enough dirt to anchor their origins, which means you can make arrangements in odd containers that wouldn’t be suitable for additional soil-loving plants. You can even make a natural landscape look with an arrangement of stones, so that bromeliads appear to be growing between the cracks.

Alpha Design Group

A group of four bromeliad plants at one tapered container is well proportioned and an elegant addition to this neutral dining room. The brilliant red bromeliad blooms balance the red clouds at the painting like the eye dances between the painting and the headboard, creating a subtle sense of activity in an otherwise quiet space.

Grants Gardens

Outdoors, bromeliads are often planted in a bed of stones, a look you are definitely able to duplicate indoors with a large, very low planter. Here, the low-lying blossom of this Nidularium is particularly magnificent amid the apple-green leaves.

Westend Interiors

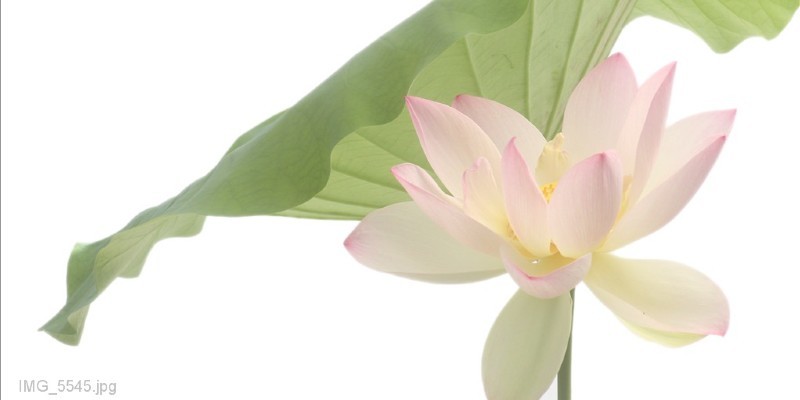
Get creative with bromeliads by combining them with other plants. This Aechmea bromeliad is along with the foxtail fern for striking results. Inside you can use any mixture of bromeliads effectively in the base of a tall tropical shrub of any type, remembering the different watering needs of every species.

The Aechmea is among the most resilient and longest lasting of bromeliads. The big, beautiful plant features a stunning light-pink bract that can last up to half a year, and also the mother plant and her offspring could be relatively easy to keep for several years.

How to Take Care of Your Bromeliad

Infection:
Bromeliads endure a wide range of temperatures, with an ideal range of 55 to 85 degrees Fahrenheit (13 to 29 degrees Celsius).

Light: Bright, filtered or indirect sunlight is best, although the plants are usually tolerant of low-light ailments. Varieties with thick grayish leaves prefer bright light, while those with thin green leaves prefer lower light. The common houseplant varieties, Nidularium, Vrieseas and Guzmania are indigenous to the huge canopies of tropical rain forests and can survive in low-light ailments.

Water: The plants are extremely drought tolerant, though it’s best to keep the soil evenly moist or let it reach mostly dry between waterings. Do not overwater or permit the plant roots to stand in water. Tank-type bromeliads possess a natural reservoir that could hold water from the “cup” in the peak of the rosette or at the leaf axils in the base. To reduce stagnation and mineral salt buildup, should you supply water this way, flush those areas by pouring fresh water within the plant, inverting and filling again. If it seems hard, provide water through the dirt; your plant will not be quite as happy but will receive the water it needs. Water quality is important — use tap water to dirt watering, and rain, distilled or reverse-osmosis-filtered water for the tanks.

Soil: Nonalkaline, but most importantwell-draining, dirt is crucial to prevent root rot.

Feeding: Not necessary, though to speed the development of pups (see “propagation,” below), slow-release fertilizer is most efficient. A half-strength combination of liquid fertilizer can be put into the cup no more than once per month.

General: Blooms will last longest when the temperature is cool and light levels are low to moderate. Not all bromeliads grow well indoors, though many do. Beginners are advised to start with a mature and tolerant variety that is just beginning to blossom. After gaining experience, think about more difficult varieties and start propagating plants.

Propagation: Once flowering is complete, the mother plant will produce small puppy plants around the outer perimeter of its foundation. A bromeliad is a really slow-growing plant. The pups will take about six months to rise to about one-third the size of the mother plant. If the pups reach that dimension, separate them by the mother plant. Permit the young plants to grow for six more months, after that time they might be mature enough to blossom.

Other Factors

Air purification:
While most ordinary indoor plants purify the atmosphere during the daytime, bromeliads release oxygen and eliminate air pollutants during the night time. When combined with foliage plants, bromeliads can help supply indoor air purification round the clock.

Cautions: None. Bromeliads are considered to be nontoxic.

Native environment: South America, from Mexico to Brazil.

Great tip for bromeliad enthusiasts: Bromeliads could be made to blossom by exposing them to ethylene gas. Place your bromeliad in a transparent plastic bag with a ripe apple. Seal the bag nicely and do not open or remove the plant for 2 weeks. The apple will give the ethylene gas, and also the bromeliad should flower in two to four weeks.

See related

Storage Shortage? Make an Industrial-Style Shelving Unit

I’ve been worried to fill a vacant corner in my family room with a industrial shelving unit which matches the other open shelving there. So together with my father, we took a weekend afternoon to make one. A little decorative, but largely functional, this wheeled unit brings additional storage to complement the industrial-farmhouse design of our house.

Julie Ranee Photography

My eye is very attracted to metal metal, with its glossy silver finish, and warm wood tones. One day I would love to fill all the shelves with white dishes, because it seems I can never get enough of white. However, for now I enjoy the choice of displaying food we use regularly in glass jars.

Time: 5 hours plus drying time
Skill level: Moderate
Cost: $150 plus wood (our wood was salvaged and loose)

Julie Ranee Photography

Materials we used:
5 wood shelves(16) 1/2-inch galvanized pipes cut to the desired length and threaded on both ends. We purchased 10-foot pipes in Home Depot; a staffer cut them in to 18-inch bits and threaded them for free. (8) 1/2-inch galvanized floor flanges(12) 1/2-inch galvanized couplings(4) 3-inch industrial casters(32) #12 3/4-inch wood screws (to attach floor flanges)(16) #14 3/4-inch sheet metal screws (to attach wheels)Wood sealerModification: Our apparatus is 80 3/4 inches large (almost 7 ft). You might easily correct the pipe lengths or number of shelves to make a shorter unit.

Julie Ranee Photography

Tools:
Electric sanderCordless drillElectric drill (you can also use this instead of a cordless drill)1/8-inch drill bit (for drilling pilot holes)7/8-inch drill bitHammerCenter punchWrenchTape step

Julie Ranee Photography

Pick and Get the Wood Shelves

1. Pick your wood. We utilized 1-inch-thick salvaged wood which was 42 inches long and 18 1/2 inches broad for our shelves. The wood we used is actually thin strips of wood glued together, which gives it a wonderful striated look.

Suggestion: you can purchase wood in the neighborhood hardware store if retrieved wood is difficult to come by.

2. Sand and seal the wood to ensure a smooth end. I secured our shelves Monocoat, because we had some leftover from another project. However, several coats of a water-based polyurethane will work nicely too. You can purchase it at the local hardware store and follow the directions on the can.

Julie Ranee Photography

3. After the shelves are dry, mark the position of the floor flanges on the base shelf (photo). You may use four floor flanges on the top of the base shelf (one in each corner) and four flooring flanges on the underside of the highest shelf. We utilized a painter’s stirrer to quantify our placement. You can use a tape measure and mark with a pencil if you would like. You want the edges of the flanges to be approximately 1 inch from the borders of the wood.

Julie Ranee Photography

4. Mark the placement of the flanges with a pencil.

Julie Ranee Photography

5. Today it’s time to drill the pilot holes from the shelves. Stack the shelves along with one another (bottom shelf with flange positioning markers on the top) and clamp them together. This is so the holes you’re going to drill will line up — it’s very important!

Mark the purchase and orientation of each shelf. Maintaining them in order will assure the holes will line up.

6. Use the 1/8-inch drill bit and electrical drill to drill pilot holes through the middle of the flange placement marks. Make sure you drill through the first shelf and in the second.

Remove the first shelf, reclamp the shelves and continue drilling through the third and second cupboards. Continue this process until all the shelves have pilot holes drilled through them. This procedure allows you to use a regular-length drill bit and line the holes up.

Julie Ranee Photography

7. Using your pilot holes as guides, catch the 7/8-inch drill bit and drill holes through the second, fourth and third shelves just. These are the only shelves which require big holes, through which the pipes move. We utilized the same stack-clamp procedure as before.

Julie Ranee Photography

Build the Shelving Unit

1.
Center each floor flange above the pilot holes drilled at the base shelf (four holes total). Use a center punch and hammer to make a small indentation where the screws should be put. Use a cordless drill (or electrical drill) and also the #12 3/4-inch wood screws to attach flanges to the wood shelf.

Julie Ranee Photography

2. Once the flooring flanges on the base plate have been screwed in place, screw four 1/2-inch galvanized pipes into the floor flanges.

3. Twist a 1/2-inch galvanized coupler to the peak of each pipe (photo). Set the following shelf on top of the couplers. Take four more plumbing and place them through the holes at the shelf, and twist them in the couplers below. Use a wrench to tighten the couplers. Once you’ve used all 16 pipes, then screw the remaining floor flanges to the tops of their plumbing.

Julie Ranee Photography

4. You are now prepared for the top shelf. Set it on top of the floor flanges, centering the pilot holes with the middle of the flanges. Use a cordless drill (or electrical drill) and also the #12 3/4-inch wood screws to attach flanges to the wood shelf.

Julie Ranee Photography

Attach the Wheels

Turn the device on its side or back. Mark the desired placement of the wheels on the base shelf. Use the #14 3/4-inch sheet metal screws to attach wheels.

Note: If you know you won’t need to move your shelving unit, then you can leave the wheels off and bottom shelf, and twist the floor flanges right into the floor.

For added stability, use L-brackets under a few shelves; attach them to the wall studs.

Julie Ranee Photography

Stand your apparatus vertical and enjoy the end result of your attempts!

Julie Ranee Photography

Here is the finished product in my kitchen.

Your turn: Please show us your industrial-cool DIY project below.

See related

'In Praise of Shadows' Finds Relevance in Today's Architecture

In Praise of Shadows is a classic book on traditional Japanese architecture and layout, composed by Junichiro Tanizaki and published in 1933, subsequently translated into English four decades later; it’s still relevant today. The title clearly shows a taste for dark over light, which equates with traditional spaces and surfaces over bright contemporary ones. Nevertheless Tanizaki’s essay is not only a reactionary stance against changes in his home country; it’s among the clearest articulations of ideology, culturally rooted but professionally human.

His essay has a timeless quality that hits on the romantic connections we have with our items and our surroundings. He rolls on, among other things, tableware, clothes, movies, bathrooms (yes, bathrooms) and buildings. Much of the essay involves the distances of buildings, including houses, where the appreciation and sense of shadows is pronounced. These modern spaces illustrate Tanizaki’s thoughts, providing an opportunity to estimate the writer and discuss his essay in light of today’s architecture.

Enjoy Architecture

“[There] are definite requirements: a degree of dimness, absolute cleanliness, and quiet so complete you could listen to the hum of a mosquito.”

Within this quote, ancient in Tanizaki’s publication, he is not referring to a space like the one envisioned. He’s talking about a toilet, what he calls “a place of spiritual repose.” (Remember he wrote the essay in 1933, when a toilet “in a grove fragrant with leaves and moss,” as he writes, ” was prevalent.) Yet, as the essay continues across its 42 pages, this description may apply to just about what Tanizaki discusses, if in varying degrees of literal and metaphorical terms. It’s easy to feel the silent alongside the dimness and clear orderliness of the space in The Cross House in Japan, designed by Love Architecture, which we’ll also see in next three photos.

Enjoy Architecture

“In making for ourselves a place to reside in, we spread a parasol to throw a shadow on the earth, and in the pale light of the shadow we put together a house.”

Tanizaki contrasts the “parasol” of a Japanese home’s roof to the “cap” of the roofing of a Western house; the latter has a bigger “visor” allowing more sun to infiltrate the interior of the house. Within the heavy eaves required for maintaining driving rain and winds off shoji screen walls, Tanizaki finds the roots of the “Japanese room depends on a variation of shadows, deep shadows against mild shadows — it has nothing,” as he writes. The realities of existence bred an appreciation of shadows.

Enjoy Architecture

“The lighting in the backyard steals in but dimly through paper-paneled doors, and it’s just this indirect light which makes for us the allure of a space.”

Shadows are made not just from the contrast between direct sunlight and also the lack of it ; gentle, indirect lighting creates shadows in which the difference between dark and light exists. In this room we could see soft light coming through a bamboo screen on the window and light being cast down the wall from a skylight. The effect is splendid.

Enjoy Architecture

“We delight in the mere sight of the delicate glow of fading rays clinging to the face of a dusky wall, there to live out what little life remains to them.”

This poetic description of light hitting a wall make us understand a little bit of lighting can be more impressive than a complete wall aglow with light. The stream of light cutting across the wall shown — the brightest part of several subtle shades — is a wonderful case in point.

G. Steuart Gray AIA

Here is another instance where pieces of mild intersect with the arrangement, surfaces and furnishings of an area to develop into another part of the aesthetic assemblage.

Gardner Architects LLC

“Whenever I see the alcove of a constructed Japanese room, I marvel in our comprehension of the secrets of shadows, our sensitive use of light and shadow.”

While this Craftsman teahouse from the Washington, D.C., region is the opposite of Tanizaki’s description of an alcove in terms of light and dark (he talks about dark alcoves), the quality of shadows remains apparent. Indirect light on the walls and sloped ceiling provides the alcove off the bedroom a consistent glow that’s extremely inviting.

Dennis Mayer – Photographer

“We fill our gardens with dense plantings, they distribute a flat expanse of grass.”

Tanizaki sums up the comparison between East and West as being satisfied with one’s surroundings versus the decision to enhance one’s lot, respectively. This backyard in San Francisco exemplifies the cultural cross-fertilization which has happened in the ensuing 80 years since Tanizaki wrote his essay, one which has witnessed Asian sensibilities infuse Western contexts. The aesthetic recognition clarified in In Praise of Shadows is shared by all over the world, but it runs the danger of being a fashion rather than something which permeates thought and experience. Tanizaki provides those prepared an excellent primer for learning to love the shadows of life and light.

See related

Fashion Week Heads Home

Mercedes-Benz Fashion Week kicked off on Feb. 9 to flaunt fashion designers’ ready-to-wear lines for fall and winter 2012. Allow me to just say, I am inspired. I am seeing so much crossover to interior trends, especially from designers who have a foothold in both areas, such as Kelly Wearstler and Diane von Furstenberg.

Because the ranges are for the colder months, we’re seeing a great deal of neutrals and dark colours in addition to saturated hues (like Pantone’s color of this calendar year, tangerine) having lots of texture. But each designer has put his or her own twist on the demonstration of the colours.

Amoroso Design

Touch-me textures. Velvets, silks and other rich textures are all on the runways, and Diane von Furstenberg’s fall 2012 collection is no exception. Rich hues and rich textures — what a mix. This trend will certainly continue to trickle down to insides.

Laux Interiors Berlin

Plumroll, please. Everyone from Kelly Wearstler into Christian Siriano is yanking plum to the mix. Wearstler combines the rich colour with blue to fantastic effect, while Siriano retains it tame with a monochromatic palette and Peter Som ramps it up with a plethora of textures.

Andrea Schumacher Interiors

Knockout color blocking. Make bold colours stick out by giving them equal focus. You can not go wrong using plums, pinks and reds with a pop of yellow or green, as seen in Diane von Furstenberg’s fall 2012 collection.

Camilla Molders Design

Tangerine and turquoise? Why not, asks Kate Spade. I could not agree more.

Lisa Borgnes Giramonti

Tangerine fantasy. Work that color of this year in with a variety of mixes, as Lisa Borgnes Giramonte does in this inside. Fashion label Honor has made it deep and brooding in its fall line, while Kate Spade keeps it fresh and preppy in hers.

Elad Gonen

The sport of risk. Some people just take risks, and Kelly Wearstler is one of these individuals. She surely pushes the limits in her insides, constantly shifting styles and exploring new land. She pushed a limit by simply trying her hand at fashion (it is not always easy to cross over), and while she’s met any resistance, I state forge on, woman. While it’s said that green and blue should”never be viewed,” with all the right mix of colour and saturation, they could actually be quite enchanting.

SFGIRLBYBAY

Neutral land. Perhaps not a daring person? Follow Wearstler’s guide without compromising texture, layers or thickness, as seen in this search for fall 2012. The richness easily translates to the home, as may be seen in SFGirlByBay’s light-flooded, feminine but grounded living room.

Martha O’Hara Interiors

Gray and black never go out of style in my book. Keep staple neutrals new with texture and even some pattern. Thakoon and Derek Lam will inform you.

Niche Interiors

New neutrals. Obviously, neutral does not necessarily have to mean beige, gray or greige. Pinks have a way of feeling neutral, especially when blended with brown, which adds a sophisticated edge to the girly-ness of pink. Joy Cioci and Herve Leger by Max Azria elevate soft pinks with a play of textures, patterns and subtle dark undertones.

Red and brown. If you have got a predominantly neutral palette that drops to the brown family at home, and you’re ready to liven it up but are not certain where to begin, think about following Tribune Standard’s guide by bringing in a healthy dose of red. The appearance will stay neutral but will feel fresh and subtly colorful.

If that idea frightens one to no end, bring into a single reddish element and see how you feel. The reddish Sputnik pendant in Mark Cravotta’s job works superbly without making the room feel overly edgy.

Atmosphere Interior Design Inc..

Blue and black. An often overlooked but absolutely valid mix, black and blue leaves people stop and think. Prabal Gurung employes it to great effect in this fall look, and I think that it translates superbly for the home. If you have already got the groundwork in place (a blue carpet, sofa or drapes ) introduce black accessories or seats and tables with black frames.

Perhaps you have pulled a look in the runway in to your home design? Tell us how you made it work at the Comments section.

More Fashion-Forward Tips:
Gianni Versace Style
Coco Chanel Style
Ralph Lauren Style

See related

Modern Icons: The Paulistano Chair

Architect Paulo Mendes da Rocha designed the Paulistano Athletic Club in São Paulo, Brazil, in 1957, and his attention to detail contained designing this seat because of its living areas. Following that, it was a sight before the design was rereleased by Objekto in 2004. Following Mendes da Rocha received the Pritzker Prize in 2006, the seat became available in the USA for the first time. Keen aesthetes have been snapping it up with enthusiasm ever since, demonstrating its timelessness. The Museum of Modern Art has added the seat to its permanent collection; test it out and see whether you’d like to follow suit.

YLAB Arquitectos Barcelona

Designed through the midcentury modern era, the Paulistano has a thoughtful combination of sling and frame that seems as contemporary as anything else on the market today.

Espasso

Paulistano Armchair | Espasso

The Paulistano seat is created from a single 17-foot-long piece of strong phosphatized carbon steel and a leather match. Both substances age in their unique and stunning ways.

But if treating the seat’s frame with just a little WD-40 each six weeks or so is not for you, it is also available in polished chrome.

Design Within Reach

The easy sling silhouette doesn’t take up much space from front, back or side. It’s uncommon for such a cozy lounge chair to take up so small visual distance. This means it may work well in small spaces and sit facing windows without blocking a lot of the opinion.

Laura U, Inc..

This designer balanced a set of Paulistanos across from a larger upholstered armchair.

Economy Interiors

The seat’s portability means it is a fantastic choice for a room which needs seating versatility; you can move chairs into intimate clusters for conversation while entertaining or set them toward the TV for movie night or the game.

PLACE architect ltd..

Florense USA

Like most chairs in a fantastic permanent set, it can make its way all over the house. Swap it in your bedroom if you want an occasional seat; you’ll want to respect it, so it should motivate you to keep those clothes put away rather than draped on the seat.

Design Within Reach

Paulistano Armchair in Canvas – $1,250

A cotton canvas variant comes in bright colors and lends a more casual look. The Twist is waterproof and stain resistant, so you can use it outside also.

More:
Poul Kjærholm’s PK22 Easy Chair

See related

Have a Rockin' Summer With a Hammock

On a recent trip to Mexico, I had two things in my must-buy list: an authentic mortar and pestle along with a severe hammock. Classic hammocks are a staple in Mexico — you’ll see them in places from the simplest shack to the most luxurious mansion. After viewing the great number of styles, shapes and hangings, I had been determined to snag one of my very own.

After purchasing my hammock, I was thrilled, but suddenly had a great number of questions. Where should I hang it? Does it fit together with my decor? Is there room on the porch for it? Obviously, once I got the barn home, we found an ideal place and now it’s a favourite hang-out space for the whole family. For less than $20, we have an outdoor mattress.

If you’re considering a hammock for summertime, maybe you’re worried about fitting it in your space or your style. No need — here I address the objections you might need to a hammock swinging in the eaves. Can not you join me?

HighCraft Builders

Objection: I do not know how to hang a hammock.

Reality: Hammocks are simple in design and require only two things to work properly: solid supports 10 to 20 feet apart. To approximate the distance you will need, assess the hammock and add 1 or 2 feet to the complete length between articles.

The traditional hammock is hung between two trees from articles in a courtyard, but you can use any service you might have. In this case, a solid tree and a hook attached to the house are utilized. Observe that the duration of this hammock generates the proper sag in the center.

Ike Kligerman Barkley

Blessed with palm trees and a view? You’ve got the ideal location for a traditional hammock.

From the towns of Mexico, we saw hammocks strung from post to post in internal courtyards similar to this one. The curve of this hammock mirrors the arched openings perfectly, and also the courtyard breezes blow through these passageways all day. Layout and function meet to produce the ideal place for a hammock.

Rina Magen

When a traditional hammock isn’t in use, it can be hung on a single post tucked out of the way or simply allowed to hang freely. The cotton weave slips and extends easily to save space.

Aiken House & Gardens

Objection: A hammock does not work with my fairly decor.

Reality: Want a place to relax, but do not want to give your fancy laces and frilly decor? No worries — this attractively designed hammock gets the best of both worlds to you.

Give a nod to the floral designs on the pillow prints by attaching the hammock to a vine-covered post. Clematis is a superb choice, with a vast range of pinks, purples and whites to choose from and also a graceful twining habit. Other blossoms might take over your hammock, but clematis will grow peacefully and stay in its place.

Can’t make it to the shore this summer? No worries. Section out a piece of your lawn for your very own private beach and hang a swinging hammock from a faux palm tree. This setup is ideal for parents who want a little comfort while the kids play in the elongated sandbox.

MCM Layout

Objection: I despise lying down while reading or chatting.

Reality: Dual-seat hammocks and cradle hammocks can be found. Face the hammocks in opposite directions to speak freely with the person sitting next to you without craning your neck.

Objection: I do not have some trees.

Reality: Freestanding hammocks operate just Too. Be certain to plan for shade with an awning or a roof edge to keep from baking in the summer sun.

Inga Romberga (IngaBerga)

Objection: I do not have outdoor space.

Reality: A chair hammock is the perfect addition to your kid’s area instead of a traditional rocker. Ensure that you join the hammock to a secure joist.

Dana Frieling Interiors

Chair hammocks are available in all shapes and sizes; this smaller variant fits well in a corner. Adding a hammock to some room can bring a beach theme to life, without your resorting to stick-on surfboard stickers.

Maybe you have a large space where your kids like to hang out. Maybe you’ve just refinished your loft and have been searching for the perfect couch. Consider a large-scale mattress hammock rather for cuddling and snoozing.

Hayneedle

Objection: Hammocks cost too much.

Reality: It’s correct, hammocks can be expensive. But not all of these. I snagged mine in a Mexican market for a song, but you can also find inexpensive models on the internet. Try a two-person hammock for $25 or a cradle hammock for about $30. Stick with a cotton ribbon and also you won’t be let down.

Whether you want to relax with a novel poolside, cuddle with your newborn in the nursery or create your loft to the kids’ playhouse, hammocks would be the answer. Get 1 today and spend summer time swinging in the breeze.

See related