The best way to Control Wild Grapevines

Wild grape-vines therefore are known to inhabit cities at the same time and are observed in areas. The vines grow trees up and around, trying to get nearer to to the sunlight. This often results in the death of trees like cottonwood and oak, as the vine saps blocks and nutritional elements sunlight. Grape-vines that are controlling inhibits the spread of grape leaf skeletonizer bugs that thrive on the grapes that are wild migrate to vines that are cultivated. Grapevine development may be managed through use of pesticides and cutting.

Cut vines in fall and summer when the herbicide will be successful. Wear work gloves to protect your fingers. The stem of the grapevine using a pruning observed at groundlevel. Coat the floor stump.

Follow the stem over and make another cut at least three feet from ground-level. Herbicide on the cut that is new. Removing the area of of vine will help avoid re- .

Patches of vines on the floor with herbicide used to the leaves and stems. Rip the vines from the ground. With respect to the depth of the roots as well as the age of the vine, ripping out the vines might be a chore.

Remain vigilant. Routinely patrol the region to keep vine development under control.

See related

The best way to Use Rock Salt for Tree Root Problems

Rock salt is a severe chemical compound utilized mainly to melt ice and snow on sidewalks and roadways. Rock salt is accessible in a number of chemical variations sodium chloride, including the most frequent type. The use of rock salt lowers the freezing temperature of water from 32 degrees Fahrenheit to minus 2 5 F. This causes snow and ice when it usually wouldn’t, to melt off. The severe features of rock salt make it a herbicide that is efficient. Its program to places where tree roots have become a problem, like blocking or breaking sewer pipes, can rapidly destroy them, making removal more easy.

Place a couple of rock salt in your bathroom and flush it down once every couple of weeks approximately. For those who have reached your sewer lines or have a tree, they could be breaking their way through the pipe searching of the water-supply within. Flushing a little rock salt down the sewer will eliminate from getting any nearer, while avoiding these near-by any roots which have previously made their way within.

Place 1/2 pound of sodium sulfate copper chloride or in to your toilet bowl. Therefore it clears the bowl entirely flush the salt down the drain. Place another 1/2 pound in to flush again Repeat the procedure until 2 lbs of copper sulfate or sodium chloride happen to be flushed to the sewer where the tree roots have become a problem. Don’t use some water that may drain to the sewer-line for at least 1-2 hrs or the bathroom. In this period, the chemicals will soon be using impact on the roots that are invasive. Repeat the procedure every six months or so to keep the line open.

Locate the location of the root intrusion in your sewer line. Mark the place on the area over the pipe that is under-ground. Use an earth auger to dig a hole to the ground over the clog. Insert a duration of 2 inch PVC pipe to the hole and pour 4 pounds of copper sulfate or salt to the pipe. Pour 5 gallons of heated water to the pipe and enable the combination to gradually drain to the soil where it’ll destroy the roots that are invasive and clear your sewer lines.

See related

The best way to Order Sod

In the event that you insist your buddies drop you off outside as you are embarrassed by your garden or in the event that you reject the concept of hosting the celebration, it is time to get a change. The bare and yellow patches in your garden need not hinder your existence any any more. You require a turf that is new, and sod is the only method to get results that are quick. It is vital to to pay attention when buying it, because laying sod is the most costly method to begin a garden. Ordered sod can effortlessly be a fast waste of funds, particularly in the event that you buy a low quality batch or a range perhaps not suited to your own climate.

Select a species that is turf which is well-adapted to your own climate. Both Bermudagrass and St. Augustinegrass, for instance, are warm-season grasses that tolerate salt, a typical problem along coastal communities.

Sketch a photo of the various aspects of your landscape that need sod out. Then, calculate width and the length of the various places in report and toes. Determine the the exact distance in the event the location is curved. Multiply width and the length of every area. Add them to decide exactly how many square feet of sod you require to-order.

Contact grower or a nursery to buy the sod. Sod that h-AS A3/4- to TO AT LEAST ONE-inch s Oil foundation. Order the quantity of rolls you require to protect the garden. Rolls are usually 8 to 1-0 squarefeet but fluctuate among stores. Order rolls one to to 2 months before you require the sod to make certain its availability. Be prepared to install the sod within two hrs after delivery. If perhaps not, do it a T least within 2 4 hrs, suggests College of California Agri Culture and Normal Sources. This implies your lawn needs to be prepared for installation a T shipping time. As it provides you with adequate time to install the sod in oneday early morning is typically a perfect shipping time.

See related

The best way to Plant Valerian

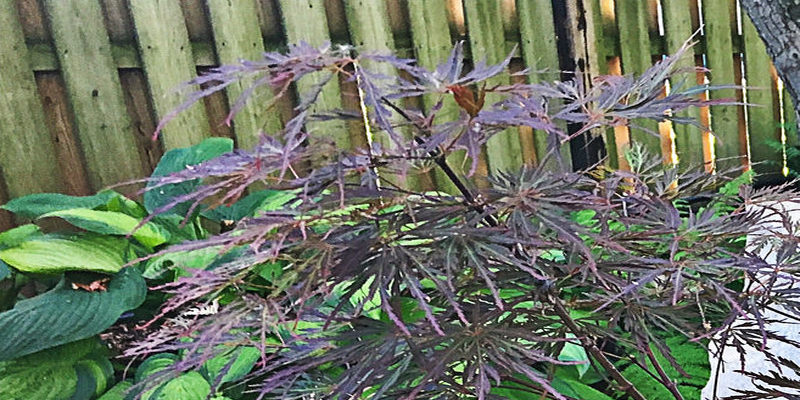
Valerian is a herbaceous perennial that creates fernlike foliage and clusters of white to red flowers that are light. Valeriana officinalis, the indigenous species, is processed extensively in to sleep-aid items and natural sedative. Valeriana sitchensis, a species indigenous to the north-western United States, including parts of California, is getting increasingly frequent as an herbal treatment. Valerian species choose, and do well 1 through 24 sunlight or shade, average to large watering and nutrient- rich soil. Valerian is propagated from seed or root divisions used fall or spring.

Planting Seeds

Till the soil in a garden bed to split up large clods if soil currently is free, or change using a shovel.

Add natural plant matter and compost, including grass clippings and bark mulch, leaves, to improve the humus and nutrient content in the soil. Valerian thrives with high humus content in soil. Potting soils are humus-rich, and that means you can simply perform planting medium to the garden soil.

Till the soil or change using a shovel to to include the soil amendments.

Sow seeds into the soil area spaced 12 to 24 inches. Wait till the soil temperature reaches 68 degrees Fahrenheit. It’s possible for you to start the seeds indoors in mobile packs, utilizing a nutrient-rich, large humus planting medium transplant seedlings when the ideal temperature is reached by the soil.

Press the seeds to the soil with your fingers to make sure appropriate contact is made by the seeds with the soil. Because valerian seeds need light to germinate don’t cover the seeds. Seeds germinate within one to to 2 months using a rate of 60 to 70-%.

Water the soil often to keep seedlings and the seeds moist. Valerian generally grows so it’s more tolerant of excessive water than several crops.

Plants using a phosphorous- fertilizer, after the package label for software guidelines. Valerian crops need high amounts of phosphorous for development that is greatest.

As they become crowded divide crops or out-grow their region that is growing. Valerian could overwhelm other crops and becomes invasive if maybe not split.

Planting Divisions

Cut the s Oil throughout the plant using a shovel several inches away from your plant, then use the shovel as a lever elevate it out of the floor and to to interrupt the roots from your soil, leaving as a lot of the root ball in tact as feasible.

Shake the plant gently to remove excessive s Oil from the root ball.

Break the root ball in to about four sections using the blade of the shovel. Therefore the root ball is simpler to divide inspect the plant crown and root ball visually for normal separations among the crops in the clump.

Pull the sections aside in to smaller sections to generate as numerous new crops as wanted. Look in the roots where division is easiest to discover locations. Should they they don’t really come aside effortlessly with your palms cut the roots aside using a knife or backyard shears.

Plant divisions 1-2 to 2-4 inches aside to the sam e planting depth as the first plant in the backyard mattress. Return a division to the planting area that is initial.

Water the crops seriously and and sometimes to keep the s Oil moist.

A high- fertilizer, after the package label for software directions and particular frequency.

See related

Purple Spring Bulbs

Some crops have fleshy buildings belowground bulbs that are called. Bulbs include nutrients that are saved when they start developing the next time that crops use. Many plants with bulbs are perennials that begin developing in spring when temperatures rise, creating flowers and leaves of colours and several types. Plants with flowers can make a style statement that is particularly powerful in your landscape, particularly when paired with vivid, contrasting colours like yellow or red.

Hyacinths

Hyacinths (Hyacinthus orientalis) are perennials that grow from bulbs in early- to mid-spring, reaching a peak of approximately 8″. Long, straplike leaves appear across the middle of the plant, accompanied by by fleshy stems bearing tiny, fragrant, bell shaped flowers. The flowers come in lots of colors. As an example, the range “Atlantic” has deep purple flowers, while these of “Delft Blue” are a medium lavender. Hyacinths do well in well- drained soil in an area that receives at least several hours of sunlight each day. Plant the bulbs in fall, in a hole at least 3 times deeper than it’s broad. Give a great start to hyacinths and promote flower production by incorporating some fish emulsion or a granular -phosphorous fertilizer to the hole when the bulbs are planted by you.

Alliums

Alliums are decorative members of the onion family that grow in the spring from bulbs at different occasions, with respect to the variety. Some are called drum-stick alliums because their round, globular flowers, which appear in the conclusion of a tall stem. Although alliums are available in lots of colors, several are purple, ranging from medium- shades. These contain Allium aflatunense Allium ampeloprasum, Allium giganteum and many others, all complete to partial sunlight and well-drained soil. Plant the bulbs deep as they’re broad and water avoiding continuously moist soil that may promote fungal illness.

Tulipa

Tulips (Tulipa) come in hundreds of colors and flower types. They develop from easy bulbs in the spring, some showing early with the others building in spring that is later. Tulips usually endure only a time or two, a failure to re-appear in the spring although perennials. Their blooms have several various styles. Some with a cup that is conventional form while the others are double- round and petaled. Some have striped petals or petals with fringed edges and many forms are accessible in purple hues, including a selection called “Passionate” and still another called “Royal-Purple.” All type-S choose modest quantities of fertilizer and lots of sunshine. They advantage from being planted to the soil, a a technique that safeguards them from mice and other vermin that consume the bulbs in a wire basket sunken.

Muscari

The genus Muscari includes about 40 species of bulbs indigenous to the Mediterranean location. Most of the types that are cultivated generate purple flowers in springtime. As the flowers are bellshaped, on a stem and similar to blooms, they’ve been commonly called hyacinths. The selection “Darkish Eyes” h AS deep, bluish-purple flowers while “Latifolium” h AS two-toned, darkish and gentle purple blossoms. Muscari therefore are perennial and are easy to increase in virtually any sunny spot, every spring reappearing and spreading from recently made, tiny bulbs.

See related

The best way to Create a Planter

Container gardening provides several advantages, particularly for the gardener who handles Bay Area climate vagaries. Veggies herbs or flowers in a planter lets you add to terraces, balconies or roof-tops in the downtown locations. With regular fog and winds to deal with with, gardeners can rapidly transfer little containers indoors or to a more sunny or more location as the climate demands. Instead of investing in containers, hold to plastic or wooden crates and change them into planters that are tough.

Drill holes spaced around the underside of the crate to permit sufficient drainage. Wash the crate with water to eliminate any dirt or particles and disinfect it using a a combination of 1 part bleach to 10 parts water. Allow the crate to dry totally.

The whole area of wood crates with two coats of a water-proofing sealant, enabling the crate to dry between coats. Allow the crate to dry over-night.

Line the sides of crates with holes in the sides by stapling sheets of landscaping material to them using a heavy duty stapler. Lining the crate retains in while allowing excess water to drain soil.

Fill the crate to an inch under the the rim using a blend of equal parts potting soil, perlite and moistened peat moss. Water the soil combination before the leaks in the bottom and enable the soil to accept several minutes. Top the crate with an increase of soil mix and plant seedlings off in the same depth they were planted within their containers that were previous.

See related

The best way to Propagate Pink Creeping Thyme

In the event that you adore the scent of herbs and want an easy-to-treatment-for plant in your backyard, creeping thyme will be the best option. Creeping thyme (Thymus praecox arcticus), also called Mother-of-Thyme, is a difficult, evergreen groundcover that will withstand moderate foot traffic. Because of this, it’s planted between stepping-stones when trod upon, where its fragrance is introduced. Also ideal for rock gardens and slopes, this herb can increase up to 3-feet tall and wide. In the spring, they bloom in shades of lavender and pink. The most easy methods to propagate thyme that is pink are through division, from seed and by cuttings.

Dig or pull-up a little patch of thyme in the spring, making certain it’s development and wholesome roots. This patch may be no more than one stem having several roots connected and is is called a slip. Plant slip or the patch to the same depth. Plant several slips 12 to 24 inches or patches. Grow thyme in a well- draining location.

Scatter creeping seeds — which are collected from seed heads or available at nurseries — overtop of moist, well- . Do this in the spring following the frost. Water frequently to maintain soil problems. Subsequent to the seedlings develop, take out the weaker stems therefore one plant that is vigorous stands every 6 to 12″.

Cut 3 to 4 inches off the very best of a flourishing creeping thyme in the spring. Cut by way of a set of leaf or leaves node. Remove the leaves in the bottom half of the cutting that is thyme. Insert the cutting in a little pot filled with coarse sand moist, or a great potting mix. Three or insert two sticks or pencils across the cutting and protect it using a plastic bag. Move the pot into a location that is warm, but perhaps not in-direct sunlight. Keep the medium moist for one to 8 weeks. Once roots have shaped, it could be planted out doors.

See related

The best way to Grow Bromeliads in a Tree

Bromeliads provide a a colourful addition to your own lawn or garden, plus they develop nicely in plant-hardiness zones 9 to 12. Most types of bromeliad do not require soil to increase; their roots’ primary function is to cling to rocks or tree-bark. By attaching bromeliads to your own trees, add interest to the area in your backyard. As-is taking care of the crops Attaching them is easy; water them through the very best of the flowers broms, twice or once a week for the greatest outcomes. They grip the bark of the tree but aren’t parasites, therefore your tree should n’t be harmed by developing bromeliads in your trees.

Select wholesome crops with strong root systems. Many kinds endure nicely including Billbergias Tillandsias and Vrieseas kinds. Choose plants with leaves that show no signs of edges.

Place your plant in a hollow or in the fork of a tree branch or dip in the bark of the tree. While the roots are developing around the crevices in the bark select an area that gives some leverage.

Tie your plant on the tree. Use nylon panty hose or fishing line, and tie it in several locations along each aspect of the plant, securing the root structure. Tie it tight enough to to keep it in the wind, however do not cut in to the tree branch or the roots. In the event the root-system is also little to to install securely, include several drops of a glue that isn’t silicone-based, to the base of the plant, like the adhesive of a carpenter. The glue will not damage the plant, and the adhesive can be grown around by the roots till they’re lengthy enough to grip the bark and support the the plant in place.

Cover the root-system with landscape moss or peat moss. This provides another aspect that is tropical to your own garden while making an attractive covering for your ties as well as the roots.

Fertilize the bromeliad -strength fluid plant fertilizer onto the leaves of the plant. Apply fertilizer about every six months or once a month throughout the spring and summer. Do not spray fertilizer inside the colourful brom; fertilizer burn up new leaf progress and can build up there. Rinse the plant completely by spraying it using water should you observe a buildup within the brom or newer leaves that change brown around the edges before fertilizing, and wait a T least 8 weeks.

See related

Coin Plant Care

The coin plant is a golden yarrow (Achillea Filipendulina “Gold Dwarf Coin”), is a European perennial that functions bright-yellow compact flowers atop dark-green stalks that may reach heights of 36-inches. These deer- and rabbit-resistant crops perform properly as ornamentals on hillsides and slopes or in a butterfly garden, as coin crops are attractive to butterflies. Coin crops do best-in U.S. Department of Agriculture plant-hardiness zones 3 through 9 and need little care once established. If not preserved, this perennial might become invasive.

Soil and Mild

Coin crops do best in soil that’s loamy or sandy, and drains properly. Soil pH ranges that are optimal is acidic to alkaline, while soil temperature that is favored is between 60 and 65 degrees Fahrenheit. Execute a soil test if uncertain of your soil’s pH. This drought-tolerant plant doesn’t do well in soil that’s dense or overly moist and needs soil to flourish. Richer soils produce a more floppy model of the plant. Coin crops also need full-sun, meaning they do when they obtain at least six hours of sunlight per day.

Watering

Though this drought-tolerant plant doesn’t do well in soil that is moist, it nevertheless needs watering, particularly during the first two years. The first year after planting is the most crucial when it comes to watering. Water the plant seriously once a week instead of watering it several times a week, which decreases the chance of over-watering.

Fertilizing

The coin plant doesn’t need extreme fertilization, in reality it’ll do better with fertilization. Use an organic fertilizer like fish emulsion to fertilize coin crops. Follow the maker label instructions for best results. If utilizing a managed, slow release fertilizer, one program per year is enough.

Pruning and Propagation

Once their blooms have wilted, which could result in a 2nd of the plant in the spring or drop depending on when you prune prune coin crops by reducing them back to about about 50% their original dimensions. Propagate coin crops by dividing those in the spring or drop. Do this every two years, that may help keep the plants a-T dimensions that are affordable and prevent them from overtaking your garden or lawn.

See related

Information On The Best Way to Increase Peanuts From Seed

A member of the legume family indigenous to South America, the peanut, makes a delicious, protein-rich snack. Peanuts, as pods, develop unlike other typical kinds of nuts that grow on trees. Hardiness differs somewhat depending on the range, but in common, peanuts are hardy to U.S. Department of Agriculture zone 3 and above. Plants require a growing period of 110 to 130 frost free times to make a crop that is healthy. Select the selection that fits your location to effectively develop peanuts, prepare the garden website and provide the treatment to the plants they require to prosper.

Choose a Selection

Gardeners have four principal types from which to select, of peanuts. Early Virginia range or the Jumbo Virginia has the biggest nuts of all types. This can be a standard roasting range that wants 130 and between 120 times to make a crop. Valencia peanuts are usually roasted or boiled and sweet. This selection creates even more or three nuts per pod, plus it requires between 120 and 130 times to attain maturity. Peanuts are frequently employed to make candy and peanut-butter due to their greater oil content. The selection that is Spanish creates little nuts having a brownish red skin. Peanuts require about 90 to 130 days for maturity. Runner peanuts are the range dominantly made for sale in in the USA. The range matures in 125 to 165 times.

Site Planning

Choose a website with light, sandy soil amended with compost and other natural materials. Peanuts don’t develop well in bad or clay -draining soil. If required, perform 2 to 4″ of compost to the soil in a depth of approximately 6″. Rake the website to eliminate rocks, weeds and other particles. You could choose to have. Ideal s Oil pH ranges between 5.8 and 6.2. In case your s Oil has a pH that is low, elevate it having a little lime. Calcium is also needed by peanuts, in case your s Oil h AS an absence of the mineral therefore amend the s Oil with gypsum.

Planting

Plant your peanuts after the last frost day, when the s Oil temperature is above 65 levels Fahrenheit of your area’s. Peanuts will increase in case you plant the shell, but eliminating the seeds in the shell speeds germination. Peanuts with seed coats wont develop, s O it’s finest perhaps not to plant them. Plant peanuts in mounds, sowing four peanuts in every single mound. Sow the 1 1/2 In the event you’d like rows of peanuts, area the rows 24-inches apart. Until the s Oil feels moist water completely. Germination generally happens within five to 1 days, and within 2 5 to 4 times after sowing, flowers that are yellow kind. Upon flower pollination, crops deliver pegs on to the soil. The peanuts develop on these under-ground.

Peanut Plant-Care

Peanuts need a little care through the entire growing season to create a crop that is excellent. When peanut crops develop to about 1 foot-tall, mound 6″ of s Oil throughout the underside of every plant. This process gives much more and drainage room to increase. Put three to four inches of compost between peanut crops after hilling. Peanuts purchased from nurseries are handled using a nitro Gen-repairing microorganisms that enables the crops to make their own nitrogen. Such crops don’t require added fertilizer. In case your crops weren’t handled, use 1 pound of 20-0-0 or 16-16-16%0 20-0-0 or 16-16-16 fertil for fertilizer 20-0%0r plants were not treated, apply 1 pound of 20-0%0-0%0r plants were not treated, apply 1 pound of 20-0-0 or 16 16 16 every 100-square feet crops. to of peanut Water peanut plants one to two inches of water weekly is generally sufficient, except in the climate when mo-Re may be needed by plants. Crops are affected should you water irregularly.

Pests and Weeds

Peanuts develop below floor, guarding them from several bugs. Some insects, nevertheless, do appreciate nibbling on their leaves as well as peanuts. Wire worms, cut worms, military worms, aphids and thrips are prospective pests. Animals that burrow under Ground, including mice, may possibly consume the peanut pods. You may possibly require to use a pesticide to destroy these pests. Setting traps out deters other pests that are huge and mice. Use up to 3″ of mulch around peanut crops as a protecting barrier if weeds are an issue in your garden. The mulch stops several weeds from developing.

Harvest

It’s time to time to pull them up when the peanut plant’s leaves commence to to show yellow, an average of around your location first frost day. Leave the peanuts and enable them to dry for two or one months. Subsequent to the original period that is drying, pull the peanuts off the crops and spot them. Let them dry for two or three months mo-Re. A humidity le Vel below temperatures under 9-5 degrees Fahrenheit and 70-percent are perfect for drying. If preferred, roast the peanuts in the oven a T 350 levels Fahrenheit for about 1 3 to 18 minutes. Put the peanuts within an air-limited container and refrigerate them for six to 1 2 months. Consume un-refrigerated peanuts within one month.

See related