White Flowers & Black Berries

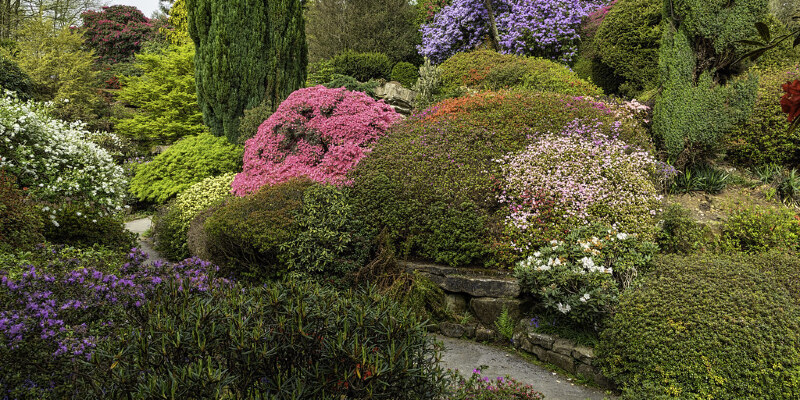
Some flowering plants and trees also create berry-like fruits. Their blossoms are bright white and their berries are basically black, sometimes with purple overtones. These plants may be shrubs, vines or trees, many with edible berries and others with berries or other plant parts that contain toxic chemicals and should never be eaten.

Trees

Among white-flowered trees with dark berries, the black hawthorn (Crataegus douglasii) is among the very attractive. Covered in white, saucer-shaped blossoms in late spring or early summer, it produces clusters of small, black berries that attract birds. About 8 or 10 feet tall in cultivation, it’s acceptable for U.S. Department of Agriculture plant hardiness zones 2 through 8. The chittamwood tree (Bumelia lanuginosa) is a large tree that may achieve a height of 30 to 50 feet. It also has white flowers, sometimes tinged with grey, and round black vegetables around 1/2 inch in diameter that attract squirrels and other tiny animals. Easy to develop trees that prefer full sunlight, chittamwoods also do well in USDA plant zones 5 through 9.

Bushes and Shrubs

Different shrubs or bushy plants also have white flowers and dark berries. The American elderberry (Sambucus canadensis) is a good instance, growing as a deciduous tree 5 to 10 feet tall in USDA zones 3 through 9. It’s fragrant, showy clusters of small white blossoms in spring, followed by dark purple-to-black, edible berries in late summer. The black chokeberry bush (Aronia melanocarpa) is another deciduous tree with clusters of white flowers that open in mid-spring. It is generally 3 to 6 feet tall with attractive, dark green foliage. Its blackish-purple berries, which are edible but tart and bitter, appear in fall. It is best grown in USDA hardiness zones 3 through 8.

Brambles and Vines

Several plants that grow as vines or thorny brambles also have white flowers and dark berries. The frequent blackberry plant (Rubus fruticosus) is a good example that is called a bramble because it’s many thorny canes that can form an impenetrable barrier. It’s tens of thousands of tiny white blossoms in late spring, followed by berries that are originally red but turn black as they ripen. Several cultivars exist, including several thornless varieties; the crops do well in USDA hardiness zones 3 through 9. The wild grape (Vitis rotundifolia), also called a muscadine grape, which is a good example of a vining plant that can climb trees or seams if left unpruned. Its white flowers open in spring, followed by grapes with dark, thick, purple-to-black skins at summer season. It does best in USDA hardiness zones 6 though 10.

Dangerous Plants

Several plants with white flowers and dark berries contain poisonous substances and should never be ingested. The black nightshade plant (Solanum americanum) is 1 instance that rises as an indigenous, annual plant in all USDA plant zones. It’s star-shaped, white blossoms followed by shiny black berries. Even though the berries aren’t poisonous, the rest of the plant parts contain a poisonous compound known as solanine. The frequent pokeweed (Phytolacca americana) is another poisonous example, growing as a tough, branching, herbaceous annual through the U.S. Its fragile white flowers are followed by hanging clusters of shiny black berries. All parts of the plant, including berries, roots and leaves, are poisonous and may create serious symptoms that might lead to death in extreme circumstances.

See related

The way to Tell If a Hibiscus Is Dead

Tropical hibiscus (Hibiscus rosa-sinensis) thrives in hot regions and grows in U.S. Department of Agriculture plant hardiness zones 9 through 11. Cold temperatures, disease and drought will easily kill this plant. There are certain signs to search for a hibiscus to inform if it is truly dead or when the plant will return when the weather gets better. These signs of plant passing also apply to other woody shrubs and small trees.

Bark

The second layer of bark will tell you in case the division is dead. By scratching just the upper layer of bark off with your fingernail, you expose the second layer. If this second layer is brown and dry instead of moist and green, the division is dead. If you scratched the bark at the base of this hibiscus and see brown underneath, the whole plant is likely dead.

Leaves

The leaves of this hibiscus may indicate whether the plant is truly dead. Consider the color and texture of the leaves. If they’re dry and crispy and still clinging to the branches, the hibiscus will likely be dead. It’s natural for dead leaves to be shed from a plant, but plants which hang onto lifeless leaves have lost the capability to jettison this dead issue. Generally, this occurs because the plant is dead, according to the Lady Bird Johnson Wildflower Center’s Ask Mr. Smarty Plants.

Growth

Hibiscus will resprout in the spring time when the temperatures get hotter. Start looking for new growth on the plant, then both branches and leaves. If the whole plant seems brown and does not begin to regrow at precisely the same time other hibiscuses you own in your yard do, it is likely that the plant is dead.

Bud Drop

Some people see a falling of flower buds as a indication their hibiscus is perishing. This is not an indication of a lifeless hibiscus, but it is a indication of anxiety into the plant. If your plant does not get enough light or in case the watering or temperatures are inconsistent, the plant may lose its flowers as a self-protection response. Return to a normal watering schedule and await temperatures to become more steady and the plant should recover.

See related

What sort of Roots Do Dwarf Banana Trees Have?

Bananas (Musa spp.) Are a small group of herbaceous perennials bred out of one pair of species to the variety of crops currently available. Both dwarf and standard-sized bananas share a root system uncommon among fruit-bearing plants: They’re fed and reborn yearly from a fibrous root system that facilitates a reproductive rhizome.

Fibrous Roots

Plants typically have one of two different kinds of roots: taproots or fibrous roots. A taproot system includes a main root that grows straight down, binder and sending off side hairs as it grows — the most frequent taproot in the garden would be the carrot. Fibrous roots, on the other hand, develop a comparatively shallow mat, occupying the upper layers of dirt rather than penetrating deeply, leaving plants at a possibility of toppling in high winds or drying out during drought conditions.

Rhizomes

Rhizomes are specialized constructions similar to runners, but they develop underground. These modified stems can grow horizontally forever under perfect circumstances, but are generally confined by other crops and accessible nutrients. Nodes on the rhizome finally arise to form new banana stalks, which are frequently mistaken for brand new plants, but are only new stems on precisely the exact same rhizome as the mother plant.

Rhizomes along with the Banana Lifecycle

Bananas are frost-tender, but a lot of ornamental species may survive freezing temperatures due to their rhizomes. An individual stalk will die back to the ground in many locations, but the following spring, a fresh stalk will replace it. The rhizome works somewhat like a bulb in this fashion — provided that a rhizome has youthful buds forming as well as its length, the plant will continue to return every year. Even in places where frost is not a problem, banana stalks die back after fruiting. The plants that emerge close stalks with ripening bunches are replacements for the stalk that will shortly be spent.

Banana Propagation

Although a lot of dwarf ornamental bananas, like pink fruiting banana (Musa velutina), are easily grown from seed, you might want to have an specific copy of your mom plant. In that case, the rhizome of a potted banana plant may be cut into several sections when the foliage dies back, each containing three to five budding nodes, and replanted into different pots. The spreading nature of banana root systems also means a landscape stabilizer could already be sending new plants when you’re prepared for brand new members of this landscape — only sever the rhizome cleanly between the mother plant and the shoot with a pointed shovel, making sure you dig up a few roots to support the new plant.

See related

What Is Vertical Mowing?

One aspect of a routine lawn-care regimen entails searching for and addressing problematic buildup of thatch. Thatch is the layer of dead and living stems, roots and other plant components between the soil surface and the bottom of the green portion of grass blades. Utilizing a thatching rake may adequately tackle a thatch layer in small grass areas, but utilizing a vertical mower, also called a verticutter or dethatcher, is warranted for larger websites. Properly operating a vertical mower and also caring to the turf region well ensures that the machine’s effectiveness and also minimizes the dependence on vertical mowing later on.

Realizing its Need

A thatch layer that is too thick can keep air and moisture from reaching grassroots and leaves lawn exposed to scalping and stress damage. When a turf place feels spongy underfoot, has dry stains, appears sheared after mowing and suffers from increased disease or pest activity, suspect it’s a thick thatch layer. Digging up a small wedge of dirt and turf is the perfect way to identify whether grass needs dethatching. In case the brownish thatch layer between the ground surface and the green grass blades is over 1/2-inch thick, subsequently dethatching, or vertical mowing, is warranted.

Timing Dethatching

The ideal time to use vertical mowing for lawn maintenance is when the grass is actively growing and able to recover fast from the disruptive procedure. Both warm- and also cool-season grasses may defy mid- to late-spring vertical mowing. Cool-season grass species also recover well from vertical mowing in early fall. Generally, attempt to period vertical mowing for when at least 45 more days of positive grass-growing weather are anticipated. If vertical mowing is performed in conjunction with other annual maintenance tasks, such as aerating or herbicide program, then the vertical mowing should occur first to optimize the benefits of each task.

Operating the Machine

Prior to vertical mowing, turfgrass is mowed slightly lower than normal, and the soil surface is moistened gently. If the grass species has a creeping habit, place the vertical mower blades so they are approximately 1 inch apart and will cut 1 inch to the ground; if the lawn has bunching grasses, you may place the blades higher and further apart. Run the vertical mower over the entire lawn in 1 direction then again in a direction perpendicular to the initial direction. The last job is to rake the loosened thatch and debris away from the lawn.

Minimizing its Need

Good lawn maintenance can decrease the need for vertical mowing. Excessive fertilizer program, improper pesticide use, shallow and frequent irrigation, and compacted soil conditions may lead to excessive thatch buildup. Mowing the lawn in order that no greater than one-third of each grass blade is removed in a single cutting and spreading grass clippings evenly or removing clumps of grass clippings can limit thatch. Grass species plays a role in the demand for vertical mowing. Creeping grasses such as bentgrass and Kentucky bluegrass have a tendency to require annual dethatching, and bunch grasses such as tall fescue may require vertical mowing only once every few decades.

See related

Maple Sapling Looks Dead

Maple trees (Acer spp.) Are deciduous ornamental trees that mainly grow in U.S. Department of Agriculture plant hardiness zones 7 through 10. They climb to a height of about 30 feet, though some species are somewhat smaller. Maples need lots of water until they have been established. Newly planted trees frequently show initial signs of anxiety, so there may not be any cause for alarm. In the fall and winter, maples lose their leaves. No leaves at this time of year is regular. If the maple doesn’t have leaves in the summer or spring within a year of planting, then it isn’t going to recover.

Check Before Purchasing

An examination of this maple before purchase can help save you difficulties in the future. The divisions ought to be marginally flexible and unbroken. Damaged branches can indicate poor health and also may leave healthy trees accessible to disease. The origins should feel heavy and strong, not mushy. Leaves on the tree shouldn’t have patches, yellowing, insects or other signs of disease. The tree may smell such as dirt, but there shouldn’t be any foul odors or rotten smells.

Check the Branches

Bend each division slightly to analyze for flexibility. Healthy branches will spring back. In case a division breaks, or feels dry and brittle, it is dead. If just the tip of this division is brittle, but a component closer to the back bends, clip the dead component. Cut back to healthy wood only outside a grass. Evaluation for alive wood by cutting a small sliver of bark in the division; 1/4-inch ought to be broad enough. The wood under the bark ought to be green or white, indicating surviving tissue. If each one the divisions are dead and there are no buds on the back, the tree is gone.

Check the Trunk

Check the trunk. Should you squeeze the tree, the wood should feel powerful, not brittle or hollow. Cut a sliver in the back just like you did for the divisions. If the wood is white or green but not dry, then the back is still alive. Take a look at the crown of this tree. The crown shouldn’t be buried. If you can’t see the crown, then dig a little from the dirt next to the back. Feel the wood you’ve uncovered. If it’s mushy or falls, the tree will die soon. If it feels healthy, leave the crown uncovered so the back won’t decay.

Check the Roots

If the tree roots are dead, then there is absolutely no way for the tree to recuperate. Maples can regrow leaves or branches, but not if the origins are no longer providing it with nutrients in the ground. Carefully remove the dirt from a part of buried root. When the uncovered origins are slimy and dark, then they’ve rotted, probably from overwatering, and the tree will soon be dead if it isn’t already. When the roots are dry and brittle, the tree didn’t get enough water to live.

See related

Everything You want to learn about Fig Tree Growth

Native to western Asia and the eastern Mediterranean, figs (Ficus carica L.) function well in home gardens where you are able to enjoy their big leaves, gnarly trunks and sweet fruit. Fig trees perform best in U.S. Department of Agriculture plant hardiness zones 7a through 11, along with well draining soil and long high temperatures. Overall, the trees are fast, letting you plant them in containers or in the ground.

Height

While figs can grow up to 50 feet tall, nearly grow between 10 to 30 feet wide and high. But in colder climates, the timber can freeze, causing the trees to be smaller. Planted in containers and maintained pruned, figs grow to just about ten feet tall. “Mission” grows into a large tree, “Improved Brown Turkey” provides a small garden tree, while “Black Jack,” provides an easily pruned container tree.

Development Habits

Big fig trees often spread wider than the height of this tree, thanks partly to their habit of growing with multiple branches in case you let them go without pruning. Branches are generally low-growing unless you prune them to be greater. As the trees age, their bark gets more and more gnarled, with big tumors forming where branches have fallen or been eliminated. Figs are deciduous and lose their big, 4- to 9-inch deeply-lobed leaves in the winter.

Fruit Growth

Most home-grown figs make two fruit crops per year, with the spring or early summer crop growing on the previous season’s branches and the second crop maturing in the fall on new growth. Fig trees that make figs for eating new don’t need pollinating to produce fruit, while trees that produce figs for drying, such as “Calimyrna” or “Smyrna,” need both male and female trees to produce figs. Commercial fig growers maintain trees to get 12 to 15 decades, but dwelling growers can keep on harvesting smaller crops once the trees are more than 50 years old.

Growing New Trees

You can develop a fig tree from the seed of a dried fig, but you’ll be more confident of success with a plant from your nursery. Figs make fruit within one year from planting. It’s also simple to begin new trees from cuttings or by notching low-growing branches and letting them form roots where the notch touches the ground, a process called ground-layering. Home growers often find “volunteer” fig trees sprouting up unexpectedly near to an existing tree.

See related

Recommended Fertilizer to Tina Crabapple

The Tina crabapple (Malus sargentii “Tina”), also called the Sargent Tina, is a small ornamental tree with a mean height of just 5 feet. The bright red buds open into white flowers and create one-quarter-inch red fruit. The Tina crabapple has exceptional resistance against all significant disorders and, when put in full sun, grows well in U.S. Department of Agriculture plant hardiness zones 4 through 8. Young Tina crabapples gain from annual fertilizing, but mature trees might not require additional nutrients.

Major Nutrients

The first year that the Tina crabapple tree is planted, fertilization is not suggested, but for the following three years that the young tree will benefit from annual fertilizing. Applying 1 pounds per 100 square foot of a 10-10-10 fertilizer or other ratio that will deliver one-tenth pounds of nitrogen per 100 square feet is appropriate for the young trees. Mature crabapple trees might not require fertilizing because of their extensive root system. But if the new increase is less than five inches or leaves were yellow in mid-summer, use a fertilizer with a high ratio of nitrogen, such as 20-5-10, and deliver one-fifth pounds of nitrogen per 100 square feet.

Micro-Nutrients

It is not required to supply other minor nutrients to Tina crabapple trees unless they show signs of lack. Chlorosis, a yellowing of the leaves while the leaf veins remain green, can be the effect of a lack in many of the micro-nutrients. If the yellowing begins on older leaves first, this might be a magnesium deficiency. If the leaves start to show yellow first, then this could function as an iron or calcium deficiency.

Ancient and Late Season Fertilizing

Fertilizers should be implemented before the tree requires the nutrients as opposed to in the middle of the growing season. Slow release fertilizers must be applied in the late fall after deciduous trees have dropped their leaves. The origins will likely continue to grow, absorb and store these nutrients following other development has stopped. Soluble, quick-release fertilizers must be applied in the early spring, several weeks before the buds start to grow. This will allow for quick absorption so that the roots can get the nutrients since the new growth begins. Trees fertilized in the fall don’t have to be fertilized again in the spring.

Fertilizing the main System

The feeder roots of the Tina crabapple can stretch two to three times the radius of the area below the tree’s branches. For example, if the distance from the trunk to the tip of their divisions is 3 feet, the roots can extend up to 9 feet away in the trunk. Utilize a broadcast fertilizer and spread it evenly on the surface of the ground over the whole root system. Don’t re-fertilize over regions of the roots that stretch in the lawn or other regions that have already been fertilized. The Tina crabapple will profit in the fertilizers given to the lawn and other plants, so that amount can be subtracted from the total fertilizer delivered to the tree.

See related

Topping Off and Pruning Arborvitae

Evergreen arborvitae (Thuja) shrubs and trees are members of the Cypress family members and thrive in U.S. Department of Agriculture plant hardiness zones 3 through 9. Even though these refined and elastic trees maintain their normal contour as they mature, regular pruning maximizes their longevity and improves their overall look. Arborvitaes create an abundance of vertical limbs which have a tendency to shade lower branches. Pruning allows air and sunlight to penetrate all parts of the trees. The best time to prune arborvitaes is in early spring before new growth appears. Topping arborvitaes, however, affects the trees’ growth.

Selecting and Cleaning Applications

Without proper pruning tools, a simple pruning job can quickly turn to disaster. Clean pruning cuts are crucial to maintain the integrity of plant tissue. Torn or crushed flesh invites diseases and insects. The best pruning tools are manufactured of tempered steel and have a sharp edge. Pruning tools must be the correct size for the job. Hand pruners are best for cutting branches that are far less than 1/2 inch in diameter while lopping shears should be used for branches which are between 1/2 and 1 inch in thickness. If branches are larger than 1 inch thick, a pruning or bow saw is the best tool. Ideally, pruning tools must be cleaned after every cut is made. Following that procedure helps to protect against the spread of disease. If cleaning tools after each cut is too onerous, clean them before and after each pruning occupation. The best way to sanitize a tool is to dip its sharp edge in a solution of 1 part bleach and 9 parts water. Apply a thin layer of petroleum to every tool blade once you finish pruning to keep every single blade from rusting.

Thinning

Arborvitaes are narrow-leafed evergreens with random branches which respond best to selective thinning cuts instead of complete shearing. Thinning cuts eliminate branches for the point of origin. Upper branches which shade lower branches must be thinned to permit sunlight to reach the lower branches. Do not ever trim a branch back to bare wood because it won’t create new growth; growth happens at the branch tip. Although thinning individual branches back to an upward growing side branch is time-consuming, it is worth the attempt.

Removing Diseased, Dead and Damaged Wood

Even though arborvitae trees are not susceptible to diseases, it is imperative to eliminate their diseased timber immediately after it is found. Cut diseased branches back to the main trunk, and dispose of them immediately. Branches which are dead or were damaged from heavy snow or other extreme weather have to be eliminated in exactly the exact same manner.

Topping

Topping is often done when a tree height becomes problematic. When the very top of the arborvitae is cut off; however, it leaves a very flat and unsightly leader. No new growth will happen once the upwards growing branch tips have been cut. No proven horticultural benefit is for topping an arborvitae. The only time that topping may be beneficial is in an emergency once the very top of the arborvitae tree has been damaged.

See related

Strawberry Plants Because Perennials

Strawberry plants aren’t relegated to a short fruiting period during the spring. These sweet fruits may be perennials when they’re educated and strategically chosen due to their specific cultivar’s growing habit; all the 3 primary strawberry varieties fruit at different times during the growing season. The key to growing strawberries practically year-round is with the runners, or daughters, as brand new fruiting extensions to raise your crop volume.

Plant Distinct Varieties

Your perennial strawberry garden requires June-bearing, day-neutral and everbearing varieties. Depending upon your garden’s size, each cultivar requires its own dedicated row to develop and fruit. June-bearing varieties produce fruits during a short, two- to three-week period in the spring after flowering, while day-neutral strawberries fruit between spring and late autumn with good soil and climate conditions. Everbearing cultivars tend to fruit at the spring and autumn. Combining these different varieties into your lawn produces an almost ceaseless strawberry harvest.

Encourage Runners

Runners are daughter plants which extend from the first plant looking for nutrients and moisture. June-bearing strawberries produce more runners when compared with everbearing and day-neutral varieties. A brand new strawberry plant requires extensive runners to build a fantastic fruit source and removing the initial flowers in the plant encourages runner growth for all strawberry varieties. Patience is key when establishing runners because the fruit volume doesn’t appear until the following growing season. After building a powerful runner program, the perennial strawberry garden has a greater chance at fruiting consistently.

Eliminate Weeds

Weed control is essential when establishing a perennial strawberry garden. Weeds stunt runner growth by invading moisture and nutrients in the soil. Successful weed control begins before you plant any strawberries. Cultivating the soil using herbicide and covering it with black plastic mulch can help to eradicate the weeds before planting the strawberry seedling transplants. After the strawberry plants have a chance to grow and spread during the initial growing season, bud issues become a problem because the exposed soil is shaded with foliage and weed seeds can’t germinate.

Mulching for Protection

Well-maintained perennial strawberry gardens are generally viable for a few years. You don’t have to add new seedlings unless you can find weak plants growing within the strong strawberry row. During the winter, cover the strawberry crowns with natural mulch to protect the main plant body for potential spring development. Any frost or cold weather damage to the crown invites pest damage and pathogen penetration. Once spring arrives, the plants regain their vigor using all the warmer soil and climate for another successful growth year.

See related

How to Grow Perennials With Cedar Mulch

Like Mary Poppins’ magical medicine which adjusts its taste to please the individual carrying it, mulch offers benefits according to the plant’s profile. For annuals, planted to last 1 season, a layer of mulch keeps down weeds and cools the ground. Perennial plants — including many flowering favorites in addition to shrubs and trees — last at least a few years from the garden and obtain far more advantages from mulch. A natural, impartial mulch such as cedar chips keeps the cold from chilling perennials’ origins in the winter and leads nutrients to the soil as it decomposes gradually. Reasonably priced and simple to employ, chipped cedar is also a present to your perennials that keeps giving.

Apply a layer of cedar mulch to the root zones of plants that are perennial, or cover the dirt throughout the flower bed. Use 3- to 5-inch layers; this is going to settle to some level of 2 to 4 inches. For container plants, use 2 ins for quart pots and 2.5 ins for gallon containers.

Apply 4 to 5 inches of mulch around the base of shrubs or trees. Boost the amounts slightly if you select large-size cedar chips. Cover the whole root area of the tree or tree, typically the region directly under the plant’s canopy.

Move the mulch away from the foundation of perennial plants, including the trunks of trees. Keep the mulch about 3 inches from flowering plants and about 6 inches away from a tree trunk. Mulch mounded against the plant can cause basal decay.

Examine the mulch layer every year. When it is reduced by about 2 inches, replenish it. Put new cedar chips right on top the existing layer, but maintain the whole quantity of mulch in the guidelines.

See related