How Window Film Can Make Your House Look Better

Most people view window cleaning as a way to increase their home’s privacy and scarcely consider this addition as a way to increase the property’s curb appeal as well. In fact, there are different types of window tint for you to choose from that you can use to enhance your home’s aesthetic appeal.

Most residential window tints are made from PET, and while some tints are dyed with metals or pigments to reduce the amount of light that comes through, others are layered for extra strength. You’ll be glad to know that window tint is typically very durable and scratch proof, and is mostly applied on the window interior instead of the exterior.

Read on to learn more about the different types of window installation and how you can use them in your home.  

Types of Film

Decorative Film: This type of film is very thin, yet effective at blocking out light and providing discretion. Most homeowners use it to embellish their doors, and for many it’s the better alternative to replacing a window when desiring a stained glass.

Solar Film: Solar film is much thicker, as it’s made from certain dyes and metal, and it provides different benefits from decorative film, such as cutting glare, reducing heat gain, insulating the windows, balancing out hot and cold spots, as well as insulating windows and blocking harmful UV rays for up to 99%. The best part about solar film is that it automatically regulates the internal temperature of your home, while saving energy through reduced heat gain and better insulation. Also, with less UV ray penetration, your rugs and furniture won’t fade out as fast.

Security Film: Of all the three types of film, security film is the thickest. It’s very durable and is mostly used to transform the windows into safety glass. Due to its strength, security film doesn’t shatter when the glass is broken but forms a spider web that delays intruders while making it extremely hard for them to enter your house.

Installation and Curing

Installing window repair is fairly easy; however, it’s best to hire a professional for the job so that you know the installation comes with a warranty.

Prior to the installation, the windows have to be cleaned and the film glass sprayed with an application solution. Then, you have to wait for the film to cure, keeping in mind that thick and dark tints take longer to cure than thinner and lighter ones. During this process, you might also see some haze or bubbles forming on the tint, which is an indication that the light-blocking and insulation qualities of the film are working.

Cleaning Window Film

Cleaning window film is just like maintaining regular windows. All you need to do is use your regular window cleaner and a squeegee and microfiber cloth.

How Long Do Window Films Last?

Residential window tint for interiors is quite durable, which is why it comes with a 10 to 15-year warranty. The lifespan of exterior window replacement, on the other hand, will depend on the usage.

Sensibility and senses Produce a Melbourne Patio Magical

Equipped with a blank slate at the rear of their residence, Australian architects Dominic and Marie Bagnato chose to make an outdoor wonderland for their family. Having a playful and entertaining area was significant with two children in your home, but they wanted a calm spot adults could enjoy, too. Dividing up the area by activity, using plants that are appealing to all five senses and getting creative with storage and seating solutions created a lavish space that retains both kids and grown-ups in mind.

Patio at a Glance
Who lives here: Dominic and Marie Bagnato and their two children
Location: Melbourne, Australia
Size: 580 square feet
Price: $31,000

Bagnato Architects

The living room opens out to the Bagnatos’ 22-foot-wide patio. Together with the children in your mind, they divide the area with a paved area for riding bicycles along with a small grassy spot for playing.

They constructed 9-foot-high fences on each side of the patio for more privacy. “We didn’t want the fences to be all the same, so we created themes,” says Dominic. The fence on the right is lined with a horizontal pattern of Merbau timber from Southeast Asia.

Bagnato Architects

The opposite wall is coated with layers of cement planks cut at a random pattern. Dominic completed himself. The paint includes iron fiber that reacts to an acid coat; it’s applied in layers. Only after he finished painting, a rainstorm hit, providing the remedy extra wear.

The Bagnatos incorporated plants that smell, taste, look or texture interesting for their children to encounter. Four kinds of fruit trees, pots full of planters and blossoms with succulents pleasure the senses.

Bagnato Architects

“We sought to make a series of outdoor spaces for our family to enjoy, like you would plan the interior of your house,” Dominic says.

Low planter-box walls at several heights make more seating for kids and adults — pleasant to have around the dining room. A complete barbecue cooktop is hidden on a stage behind the stacked stone wall. Here the adults can cook dinner and watch over the kids. A garage with direct access to a rear road sits just behind the grill. Five 9-foot-tall pine posts help differentiate the garage area from the entertaining zone.

Bagnato Architects

The patio extends down the side of the house, finishing at a red lime-wash-painted wall. The characteristic wall highlights a DIY garden ornament that’s visible from inside the house. Wall lighting makes the garden texture magical at night.

Bagnato Architects

Above the patio an extra room in addition to the garage functions as an office and press room. It has a crystal clear view of the house out of its Juliette balcony. On top of that, it’s accessed from the ground by a pull-down ladder, giving it a playful feel.

Have you generated an wonderful outdoor room? We would really like to find a photograph below!

See related

6 Ways to Help Your Dog and Landscape Play Nicely Together

Dogs and spaces go naturally. However, with their penchant for digging holes, dividing runway paths worthy of an international airport and eating plants, some dogs can make a mess of landscape design. Knowing what a few of the most frequent problems are and how to overcome them will maintain the peace between you and your dog, and leave you both having a gorgeous lawn to enjoy.

Here is what to keep in mind.

G. M. Roth Design Remodeling, Inc

1. Know Your Dog

When you’ve ever struggled with keeping your landscape together when your dog appears to have other ideas, look at replacing your furry friend with this particular dog statue. Just kidding! There are means.

Every dog is unique, however various strains tend to have different traits. Terriers will dig, beagles will attempt to escape and golden retrievers will dip into water. What’s more, every dog has its own special personality and character traits, too.

Understanding how your dog approaches life — will he or she be eagerly exploring the lawn and checking out what’s new, or just settling back and seeing things go by? — can help you become aware of issues that may come up.

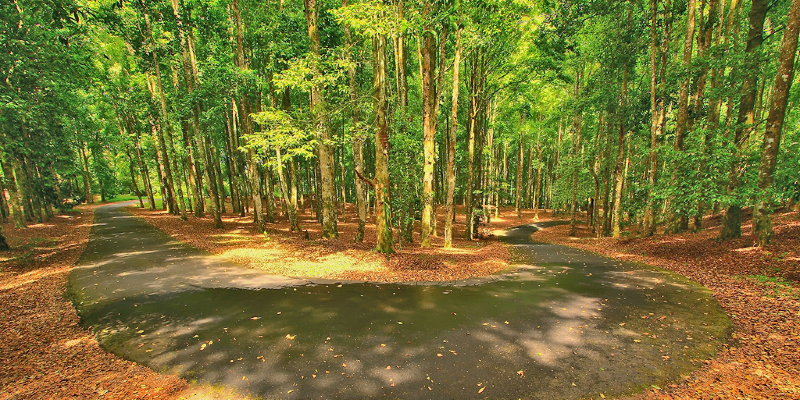
Envision construction & design pty ltd

2. Install Paths

Dogs feel it’s their job to patrol the perimeters of the lawn. As opposed to fight this instinct, include a working area at or near the border of your lawn and add a clearly designed route to get to it. Make the route straight or softly curving; your dog will probably cut the corner instead of make a 90-degree turn.

Kaufman Construction Design and Build

If your pet has already produced a path through your lawn, you can attempt to retrain him or her by creating new paths and blocking the old route. In the long run, though, it may be easier to give in and go with what’s established. Use paw-friendly materials to turn it out of a dirt trail to something that is inviting to everyone.

Concrete, brick, flagstone, smooth river stones and smooth gravel are all great for dog paws. Employing fine bark for a mulch works too, but not cocoa mulch — ever. For smooth-coated puppies, thicker mulch is great; for puppies with longish fur, you might want to prevent even small mulch, because it will attach to your dog and end up around your house.

Wayne Windham Architect, P.A.

3. Setup Barriers

It would be fine if dogs realized that which plants are fragile and which places are off limits. But that is not going to occur. Alternatively, you ought to create physical reminders that will ensure it is disagreeable, but not dangerous, for puppies to reach certain areas.

You can achieve this with hardscaping, such as walls, fences or perhaps pieces of timber, but to get a softer appearance, consider using plants, such as rosebushes, tall decorative grasses, hedges or thick shrubs. Just be certain they aren’t poisonous or won’t physically damage your dog.

4. Safeguard Your Plants

Brinkley (shown here) is almost two, and that he absolutely loves peaches. He is also quite fond of ripe tomatoes, strawberries, spinach and lettuce. If he had been a toddler, I’d be thrilled. Since he’s a cocker spaniel and his preferred feasts are the veggies and fruits in my garden, I am much less happy. I’d really like to harvest the crop for myself.

Earth Mama Landscape Design

If your dog also loves the bounty of your garden, you’ve got choices. The timeless set-aside vegetable garden, complete with a weapon, will always work, but it might not be necessary. A low fence round a vegetable garden could be sufficient to keep even larger dogs out. They may have the ability to jump over it, but it may not occur to them.

Bird netting can conserve lettuce, celery, spinach and strawberries, and cages around taller plants can keep dogs at bay. Hedges, meanwhile, can create a border, and tomato cages can protect trees and shrubs.

Pet shops have bitter orange and apple sprays to use on plants. The flavor discourages nibbling. They might not work completely, but they can help mitigate damage.

Your obstacles may not even have to be permanent. Recently planted seedlings or annuals and perennials can be quite tempting — they are new and fun to pull out of the ground. Maintaining these plants off limits just until the novelty wears off and the plants have had a opportunity to establish themselves may be sufficient.

Paul Farinato

5. Deal With Digging

Dogs dig, and a few dig over others. Consider yourself blessed if you don’t have to contend with some digging.

Before you condemn all digging out of hand, keep in mind that puppies frequently dig for a fantastic reason — to make a cool place to lie or to bury a bone. They may also dig to escape, to alleviate boredom or just because that is what their breed has been bred to perform.

When a dog is trying to escape, then add chicken wire or boards at or below the soil line. If your pet is digging in other areas of the garden, consider placing down chicken wire or installing little, round wooden bets vertical just below or in ground level to generate digging uninviting.

Colors Of Green Landscape Architecture

A compact planting along a fence line can also be a hindrance. Maintain the bed comparatively narrow and check periodically to make certain your dog has not found a means through the space.

Laara Copley-Smith Garden & Landscape Design

You can also cause a designated digging place with sand or gravel. Think of it as the equivalent of a kids’ sandbox. Bury some treats or toys to encourage your dog to dig there and offer praise for using that area. And just like with a sandbox, you’ll probably require a cover to keep out cats.

Pedersen Associates

6. Maintain Matters Green

as a yard is among the most comfortable surfaces for puppies and people to drift on, a frequent problem when you’ve got a dog is brown stains, on account of the nitrogen in pet pee. Maintaining the lawn well watered and the blades marginally long can help dilute the urine and conceal the browning. Additionally, there are products available to help prevent or lessen the burn.

Grounded Landscape Designs

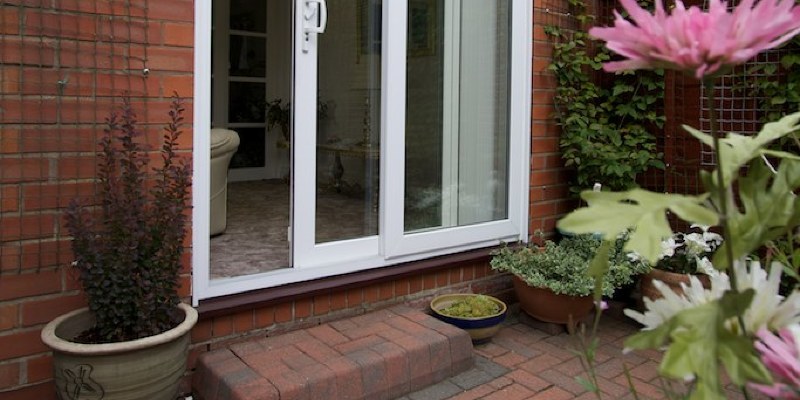
Better is to designate a bathroom area for your pet. It requires some work, but is likely to train dogs to go in just one or two areas in your lawn. The ingenious locale revealed this is concealed behind a fence. Another option for a bathroom spot is a gravel patch that can easily be hosed down; puppies frequently prefer gravel to bud anyway.

For male dogs, look at adding a marking post. Certainly your dog needs a personal fire hydrant.

More: 8 Backyard Ideas to Delight Your Dog

So You Are Considering Getting a Dog

See related

How to Save Boring Box of a Room

It would be fantastic if all of us lived in architecturally advanced rooms with lovely angles and huge windows and amazing ceilings. But in reality many of us have a one boring space to contend with. You know the type: low ceilings, blah windows, zero molding, regular closet.

But starting out with a boring, boxy room does not mean you are doomed. There are ways to turn such spaces into amazing, artful, comfy spaces with plenty of style. But you are likely to need to take a few opportunities.

A few rules for turning uninspiring rooms to amazing chambers:
Think play. Drama can run the gamut from sparse and all white to lavish, textured and stuffed. But a boring box of a space will benefit greatly from a large vision. Enjoy your walls. Paint them wallpaper them or add imitation moldings; just do not leave them flat. Go mad with drapes. Extra-long drapes can do a squat, boring window a world of good and include some much-needed drama. Changing out a boring closet door for a lovely curtain adds texture and colour. A curtain behind a bed acts as a headboard and provides texture, colour, pattern and play (even if it’s beige). Let there be light. Whatever you do, do not be satisfied with a boring flush-mounted ceiling lighting. Go large, go daring, go bright. Lighting — the fixture and the quality of light it casts — may completely transform a room.These 13 instance of boring gone beautiful will help lead the way. And please, show us your amazing boxy rooms.

Create an awareness of age and structure with salvaged pieces hung on the walls. This old doorway adds a whole lot of attention to the tiny box.

The Painted Room

This classic mantel and fireplace surround include architectural detail when there is absolutely no real fireplace.

Jerry Jacobs Design, Inc..

You can create moldings like this with cheap cut-to-order pieces of trimming from the hardware store, tack nails and some paint. I love the beams.

Nicole Lanteri Design

Replace boring old sliding cupboard doors with a lovely curtain. Not only will it be pretty, but it will enable you to see within your complete closet at once.

Tobi Fairley Interior Design

A plain, pleated curtain hung beneath the headboard gives this low-ceilinged space a sense of opulence and plushness.

Tobi Fairley Interior Design

For a little studio, a curtain wall is a fantastic idea. Not only does this provide a sense of privacy, but it also adds softness, texture and some interesting lines.

Tip: Crisp pleats make a curtain seem completed and appropriate and prevent that college-dorm look.

Kati Curtis Design

Be brave with colour and texture. Bright walls are one thing, but they’re much more interesting when layered with patterns and textures and colours. The main thing to get a look just like this to go all of the way. If you want lush and layered, go to it with gusto.

Mikey Fuller Interiors

This is another edition of lush and layered. The design of this room is not anything special, but the decorator has produced a one-of-a-kind, high-drama appearance by choosing a style (English countryside–meets–Shabby Chic) and heading to it in a big way.

Tip: Artwork and mirrors hung floor to ceiling make the walls seem taller.

LUX Design

This room employs all of the tricks: extra-long drapes, a dramatic light fixture, a wallpapered wall for colour and pattern.

Tip: In tiny spaces symmetry really can make the room seem completed. The nightstands, lamps and pillows give this little space a crisp, put-together appearance.

Weego Home

Another fantastic use of texture and symmetry.

Flea Market Sunday

This resembles a boxy apartment bedroom, full with window. But look at how much life it’s thanks to the drapes, wallpaper, replicated colour scheme and dramatic bed.

Tamar Schechner/Nest Pretty Things Inc

Can’t put up background? Use double-sided tape to hang background accents on cupboard doors, headboards, bookshelves and tabletops.

Croma Design Inc

This high-drama lamp will be the focal point in this otherwise pretty, plain space. Imagine the room without it. Meh.

See related

Pop Culture Watch: 12 Home Trends in the'80s Are Back

Rev up the DeLorean and set the first capacitor to 1983 — the decade tendencies come back in a big way, from night soaps into a Top Gun 3-D Imax release; from classic Ray-Bans to brass floor lamps. On TV we have a young Carrie Bradshaw navigating Manhattan within her first pair of Manolos at The Carrie Diaries (8 pm Mondays on the CW Television Network) and Russian spies straight from The Charm School assimilating as D.C. suburbanites during the height of the Cold War at The Americans (10 p.m. Wednesdays on FX).

Recently whenever Hollywood runs out of film ideas, it gives an old’80s TV show a reboot, such as Charlie’s Angels, Miami Vice, The A-Team and 21 Jump Street (personally, I am keeping my fingers crossed for a Truth About Life film ). While some’80s tendencies — such as triangle silhouettes and neon socks — might make us shudder, others — such as wood-paneled station wagons and kitchen tables — deserve another chance. Here’s a peek at a dozen’80s tendencies designers have embraced and freshened up for today.

1. Little kitchen islands. As we watch on the collections of The Americans, the’80s marked the start of the utilitarian island trend. Kitchen islands started small. (Recall those chunky square butcher block–topped islands you could slip in and out for meals prep?) They kept rising and so are now are frequently the biggest elements in the room, including microwave drawers, dishwashers, another sink and breakfast bars. But as many try to live in smaller spaces, small islands are making a comeback.

See small kitchen islands

Side note: This is in fact a fairly recently designed wallpaper by Graham & Brown, called Drama Boheme, and it also showed up in the 1970s period show Swingtown. Yes, I understand, I watch way too much TV.

2. A conventional kitchen table. Rather than sidling around a kitchen island to consume meals, the Americans at The Americans pull up seats into a kitchen table, eating their cereal and waffles collectively in their PJs, linking and planning their days while fretting about the nuclear arms race.

1980s kitchens nearly always had space included to your kitchen table, and there has been a separate formal dining area. Today we’re more inclined to see kitchen island tables, breakfast nooks and open programs where the kitchen is right adjacent to the dining area, however the kitchen table is beginning to make a comeback.

10 Reasons to Bring Back the Humble Kitchen Table

3. Pattern. The fire stitch pattern with this 1980s-style sofa from The Americans includes a bit of everything that’s been so well known in cloths for the previous few years — it’s some chevron, a few bargello plus a little an ikat look. Today we’re more inclined to combine the fire stitch with other patterns; for example, we would not have yards and yards of matching draperies right behind it.

The Flame Stitch Fires Up Home Interiors

4. Brass. Another’80s trend seen in the previous picture that is back is brass. Today’s brass looks are antiqued or burnished, however, whereas’80s brass was exceptionally polished.

Cristi Holcombe Interiors, LLC

5. Warhol. While The Americans occurs at the stoic D.C. suburbs, the lighthearted Carrie Diaries occurs during the height of this lush pop art’80s at Manhattan.High-school-age Carrie meets a fabulous friend who works at Andy Warhol’s Interview magazine, and fashion and nightlife experiences ensue.

Scott Sanders LLC

6. Brights. In this modern-day show house cabana, daring Andy Warhol lithographs are surrounded with interesting colours, Palm Beach-y style and’80s decorative elements arranged in a new manner. While the colours are very bright, they stop short of this obnoxious blinding neons of the’80s.

Natural Balance Home Builders

7. Technology. As iPods get tinier, nostalgia for’80s large-component technologies is back. I overlook boom boxes, and I have never seen one seem sexier than in this hot contemporary den.

Alison Mountain Interior Design

8. Record albums. Likewise, these framed record albums on the wall create a trendy compostion. I don’t know about you, but I have never been able to throw my albums, though I have not had a turntable at at least 20 decades. Who could toss out Never Mind the Bollocks, Here’s the Sex Pistols, Rio, or Big Lizard in My Backyard? Not this girl.

Glenn Gissler Design

9. Big window treatments. Draperies from the’80s had all of the drama of sudsy prime-time soaps such as Dallas and Dynasty. This huge swoop of cloth creates an whole accent wall.

Jennifer Ashton, Allied ASID

10. Southwestern style. Throughout the’80s Southwestern style spread across the U.S. quicker than Chi-Chis franchises. It was usually a common formula of navajo blanket plus skull plus gratuitous usage of apricot paint equals”Southwestern.”

Today Southwestern style is as popular as ever, however, the kitschy theme-y-ness has been replaced by subtler interpretations of Spanish colonial desert fashion.

Eduardo Raimondi . Fotografia de Arquitetura

11. White-hot Miami style. While pastel T-shirts worn under lace matches with pushed-up sleeves are out, but the trendy white modern glass house fashion of Miami Vice has proven staying power.

Bonus: Revisit Jan Hammer’s rockin’ keyboard motif song.

Panache Interiors

12. Red, white and black. And chrome. This room is the apparel of Nicolas Cage’s character in Valley Girl turned into interior design. I mean that as the maximum compliment.

Inform us: Are there some’80s tendencies you’d like to see return? How about those you pray will never return? Let us know in the comments section!

See related

Budget-Friendly Decorating Updates for a Fantastic Room in Texas

After residing in their ranch-style house for three decades, Reed and Jennifer Wilcox decided it was time to give their living room and dining area an update. Working on a small budget, they decided to skip the remodel for now and instead incorporate smaller, more affordable updates. The couple enjoyed the help of decorator and friend Whitney Weigand to assist them produce a concept, plan a layout and decorate the entire space for less than $5,000.

in a Glance
Who lives here: Reed and Jennifer Wilcox; their kids, Hayes, Eloise and Cliff; and their dog, Keo
Location: Lake Highlands area of Dallas
Size: 2,000 square feet; 3 bedrooms, 2 bathrooms

Sarah Greenman

Jennifer likes mixing contemporary and antique furniture, but recently she’s been transferred by contemporary finishes and metals. In the dining room, metal café seats are paired with an antique table and an upholstered sofa.

Living seats: Lyle Side Chair, Crate & Barrel

Sarah Greenman

The Wilcoxes originally expected to background the accent wall behind the dining set, but after viewing the $900 price tag, they picked for a do-it-yourself approach. They painted the wall a dark version of Analytical Gray by Sherwin-Williams, subsequently used a stencil and metallic paint to create a pattern. The total cost for the accent wall came in at just under $65.

Sarah Greenman

The largest splurge for the household was re-covering that this 100-year-old French-style sofa and chair. They had purchased the set in its original state in the gentleman in Louisiana; the fabric was formerly a dark flowery. Jennifer had the bits re-covered in cream linen and subsequently detailed the woodwork with metallic paint. “I could have purchased three sofas for what I invested to re-cover the one, but I love this bit,” she states.

Sarah Greenman

“I love walking at the front doorway,” says Jennifer. “From that vantage point, I can see several of my favourite things in my property.”

Sarah Greenman

Weigand helped the few pair their existing furnishings with new rugs rugs, task lighting, pillows, textiles and art. “We designed the room with the kids in mind,” Jennifer says. “Nothing is off limits, but my rule is not any sneakers on the cream sofa!”

The lights on both sides of the leather sofa appear similar, but their origins couldn’t be more distinct. The lamp on the right is an expensive designer bit, and the one on the left was discovered in bulk garbage. Jennifer painted the foundation metallic and replaced the shade.

Sarah Greenman

The re-covered French seat and an antique armoire share a quiet corner of their living room. “I love the history, charm and significance behind antique furniture,” says Jennifer. “We have many pieces in our house that have good stories behind them”

Sarah Greenman

The kitchen, upgraded by the previous homeowners, appreciates bright light from a large skylight. Bar stools wrap around the staircase, and an image window over the sink allows the few to keep an eye on their kids in the backyard.

White vase: ceramic, Home Goods

Sarah Greenman

The kitchen is open to a cozy family room, complete with a hearth and flat-screen TV. French doors provide access to the back patio and yard.

Sarah Greenman

In 2011 the Wilcox house was featured on the Lake Highlands Area Early Childhood PTA residence venture, which was followed by an auction that raised several thousand dollars for educational and other programs. “It was a wonderful way for us to give back to the community that has supported us in so many ways,” Jennifer says.

Sofa: Silhouette Sofa, Crate & Barrel; cushions: Target

Sarah Greenman

A mounted shelf with hooks provide space for school supplies, jackets and knapsacks. The couple is constantly attempting to keep things neat and easily accessible for their kids. “It is all about space management,” says Jennifer. “We do a great deal of purging in our house.”

Sarah Greenman

The master bedroom is painted in a dark sable gray and contains oversized warm wood furniture. Plush drape panels and toss pillows make for an inviting and cozy atmosphere.

Sarah Greenman

The wooden bed frame was a wedding present in Reed’s parents. Jennifer hung a trio of framed images from an old book about Louisiana on the headboard. The photographs are a sweet reminder of where the family got their beginning.

Sarah Greenman

The couple commissioned local artist Jessica Mandala to sketch images of their children’s christening gowns and Jennifer’s wedding dress. They hang together over a working antique Singer sewing machine that belonged to Jennifer’s grandmother.

Sarah Greenman

Sarah Greenman

Since the household had been on a decorating budget, they adopted their hallway bathroom’s original pink tile and painted the walls with flat gray stripes. Jennifer provides this advice to other married homeowners:”A happy marriage is created when husband and wife have different baths. It has worked for Reed and me for the last 10 decades!”

Sarah Greenman

The girls share a well-appointed bright blue bedroom filled with toys and books. Letters spelling out their names hang over the beds, suspended by ribbons.

Bedding: Pottery Barn Kids

Sarah Greenman

Many of the kids hang next to their original art. “I just can’t seem to eliminate my kids’ art — it’s creating congestion in my closets,” says Jennifer.

Sarah Greenman

Cliff’s bedroom occasionally doubles as a guest room for Jennifer’s mother, who visits frequently. Since it’s tough to sleep three adults and three kids, the couple plans to redesign their floor plan in the coming years. They would love to add another story and update their existing bathrooms also.

Sarah Greenman

Each spring around dusk, the household can see bats flying around the back patio just before the sun sets. “It is rather amazing,” says Jennifer. “After we told our neighbors regarding the bats, they left a bat sound amplifier so not only could we see that the bats, but we could hear them also.”

Sarah Greenman

The Wilcoxes snuggle up for a photo in their garden. “We walk our kids to school; we walk to the grocery store; we stroll to the local park and pool; and live in one of the biggest cities in the U.S. — that is the very best of both worlds,” Jennifer says.

See more photographs of the house | Show us your Property

See related

Storage Shortage? Make an Industrial-Style Shelving Unit

I’ve been worried to fill a vacant corner in my family room with a industrial shelving unit which matches the other open shelving there. So together with my father, we took a weekend afternoon to make one. A little decorative, but largely functional, this wheeled unit brings additional storage to complement the industrial-farmhouse design of our house.

Julie Ranee Photography

My eye is very attracted to metal metal, with its glossy silver finish, and warm wood tones. One day I would love to fill all the shelves with white dishes, because it seems I can never get enough of white. However, for now I enjoy the choice of displaying food we use regularly in glass jars.

Time: 5 hours plus drying time
Skill level: Moderate
Cost: $150 plus wood (our wood was salvaged and loose)

Julie Ranee Photography

Materials we used:
5 wood shelves(16) 1/2-inch galvanized pipes cut to the desired length and threaded on both ends. We purchased 10-foot pipes in Home Depot; a staffer cut them in to 18-inch bits and threaded them for free. (8) 1/2-inch galvanized floor flanges(12) 1/2-inch galvanized couplings(4) 3-inch industrial casters(32) #12 3/4-inch wood screws (to attach floor flanges)(16) #14 3/4-inch sheet metal screws (to attach wheels)Wood sealerModification: Our apparatus is 80 3/4 inches large (almost 7 ft). You might easily correct the pipe lengths or number of shelves to make a shorter unit.

Julie Ranee Photography

Tools:
Electric sanderCordless drillElectric drill (you can also use this instead of a cordless drill)1/8-inch drill bit (for drilling pilot holes)7/8-inch drill bitHammerCenter punchWrenchTape step

Julie Ranee Photography

Pick and Get the Wood Shelves

1. Pick your wood. We utilized 1-inch-thick salvaged wood which was 42 inches long and 18 1/2 inches broad for our shelves. The wood we used is actually thin strips of wood glued together, which gives it a wonderful striated look.

Suggestion: you can purchase wood in the neighborhood hardware store if retrieved wood is difficult to come by.

2. Sand and seal the wood to ensure a smooth end. I secured our shelves Monocoat, because we had some leftover from another project. However, several coats of a water-based polyurethane will work nicely too. You can purchase it at the local hardware store and follow the directions on the can.

Julie Ranee Photography

3. After the shelves are dry, mark the position of the floor flanges on the base shelf (photo). You may use four floor flanges on the top of the base shelf (one in each corner) and four flooring flanges on the underside of the highest shelf. We utilized a painter’s stirrer to quantify our placement. You can use a tape measure and mark with a pencil if you would like. You want the edges of the flanges to be approximately 1 inch from the borders of the wood.

Julie Ranee Photography

4. Mark the placement of the flanges with a pencil.

Julie Ranee Photography

5. Today it’s time to drill the pilot holes from the shelves. Stack the shelves along with one another (bottom shelf with flange positioning markers on the top) and clamp them together. This is so the holes you’re going to drill will line up — it’s very important!

Mark the purchase and orientation of each shelf. Maintaining them in order will assure the holes will line up.

6. Use the 1/8-inch drill bit and electrical drill to drill pilot holes through the middle of the flange placement marks. Make sure you drill through the first shelf and in the second.

Remove the first shelf, reclamp the shelves and continue drilling through the third and second cupboards. Continue this process until all the shelves have pilot holes drilled through them. This procedure allows you to use a regular-length drill bit and line the holes up.

Julie Ranee Photography

7. Using your pilot holes as guides, catch the 7/8-inch drill bit and drill holes through the second, fourth and third shelves just. These are the only shelves which require big holes, through which the pipes move. We utilized the same stack-clamp procedure as before.

Julie Ranee Photography

Build the Shelving Unit

1.
Center each floor flange above the pilot holes drilled at the base shelf (four holes total). Use a center punch and hammer to make a small indentation where the screws should be put. Use a cordless drill (or electrical drill) and also the #12 3/4-inch wood screws to attach flanges to the wood shelf.

Julie Ranee Photography

2. Once the flooring flanges on the base plate have been screwed in place, screw four 1/2-inch galvanized pipes into the floor flanges.

3. Twist a 1/2-inch galvanized coupler to the peak of each pipe (photo). Set the following shelf on top of the couplers. Take four more plumbing and place them through the holes at the shelf, and twist them in the couplers below. Use a wrench to tighten the couplers. Once you’ve used all 16 pipes, then screw the remaining floor flanges to the tops of their plumbing.

Julie Ranee Photography

4. You are now prepared for the top shelf. Set it on top of the floor flanges, centering the pilot holes with the middle of the flanges. Use a cordless drill (or electrical drill) and also the #12 3/4-inch wood screws to attach flanges to the wood shelf.

Julie Ranee Photography

Attach the Wheels

Turn the device on its side or back. Mark the desired placement of the wheels on the base shelf. Use the #14 3/4-inch sheet metal screws to attach wheels.

Note: If you know you won’t need to move your shelving unit, then you can leave the wheels off and bottom shelf, and twist the floor flanges right into the floor.

For added stability, use L-brackets under a few shelves; attach them to the wall studs.

Julie Ranee Photography

Stand your apparatus vertical and enjoy the end result of your attempts!

Julie Ranee Photography

Here is the finished product in my kitchen.

Your turn: Please show us your industrial-cool DIY project below.

See related

9 Ways to Make Dreamworthy Rooms

It would be nice if we all lived in our fantasy homes with our wraparound decks and views of the sea and ideal, large kitchens. But the majority of us don’t. We reside in the homes we could afford in the regions where we reside. Which doesn’t mean our houses can not be inspirational and beautiful and comfortable. It just may take a bit more effort and imagination to get them there.

The fantastic news is, small, inexpensive changes actually can make massive impacts in a distance. A new coat of paint, the couch in a different place — these things could be transformative. Listed below are a few tiny things you can do in a weekend using a tiny budget. Go ahead and create your dream home.

Lisa Petrole Photography

1. Paint an Accent Wall

It adds thickness and color, and it makes art look about a hundred times better. Additionally, if you don’t like it, you can simply paint it back.

Obtaining the Accent Wall Right

BEFORE: The wall in my den was too dark for the size of the room, and after some time it felt gloomy. The area turned into a repository for what I didn’t know what to do with. In other words, it had been majorly cluttered, and not in a nice way.

AFTER: I painted a dark brown wall a bright green (Benjamin Moore’s Basil Green in 150 percent), got rid of some clutter and voilà, a cheerful place I love to be in. I also replaced the hanging light and moved some furniture around a bit. The distance is totally transformed, and I love it.

2. Hang Some Curtains

You can create drama, feel and color by hanging curtains in unexpected places. Here they turn an ordinary bunk bed into a private fort. Additionally, they hide clutter.

Nicole Lanteri Design

I replaced boring sliding closet doors with long curtains, and I love the look. It’s pretty, possibly even a little glamorous, but the best part is I will sweep the drapes aside and watch that the entire closet at once.

The Virginia House

3. Paint Your Cabinets

Can you have hideous, outdated cabinets in your kitchen? Paint them. Sure it requires some time and effort, but it costs a fraction of what replacement them would price, and you end up with the exact color scheme you want.

Studio Sarah Willmer Architecture

These cabinets were not dreadful, but they are so bright and beautiful in these colors. Nobody else has this exact kitchen.

Before Photo

Bella Tucker Decorative Finishes

Consider what a massive different a few cans of paint created within this kitchen.

How to Paint Kitchen Cabinets

Ninainvorm

4. Get Rid of Some Stuff

Here is how you do it Clean the room. Then sit down and calmly look around. Get rid of whatever catches your attention in an annoying way. I like a good deal of stuff, but even when you’re a maximalist, you want only the stuff that gives you pleasure. Too much of a fantastic thing is still a lot.

Less is more: When there are fewer things, the things you enjoy get detected.

Declutter Your Bookshelves

Jeri Koegel Photography

5. Paint the Insides of Your Own

This works in every area, in built-ins or standalone pieces. It’s a terrific way to upgrade and personalize old furniture, and it works for renters, who might not have the ability to paint walls.

Mary Prince Photography

You don’t need to go high contrast or supercolorful. A subtle change in color will add interest and depth.

Dick Clark + Associates

6. Rearrange Your Furniture

You can create whole new areas — a reading corner or another TV area — just by rethinking the furniture.

Arrange a Room for Entertaining
Go Rogue With Furniture Arranging

A few things to think about when rearranging furniture:
Go for it. Move it around. If it doesn’t work as you thought, move it again. Make sure everything is not just pushed against the wall. Here is the most common “error” in decorating.Think about producing intimate spaces inside an area instead of setting up a whole room.What is the focal point? You can have over one.When you are standing in the entry to the room, is it inviting you?

Caitlin Wilson Design

7. Change Your Throw Pillows

Switching accent cushions can change the entire mood and look of a room. This mishmash of colors and textures adds playfulness for this otherwise formal area.

Supon Phornirunlit / Nude Decor

All these Queen Elizabeth silhouettes set the tone for this whole room. I would call it cheeky elegance.

Little Black Door Designs

8. Create a Gallery

select a wall, a tiny room or a corner and create a repository for all those things you love but don’t have wall space to get. Hang art, posters, family photos and prints of various shapes and sizes. Some folks are extremely meticulous about planning out what to hang where. I do mine (in other words, lazily), and it has always turned out nicely.

Elizabeth Metcalfe Interiors & Design Inc..

It is possible to create a different look by with an organizing principle such as size or frame color. All these have large white mats, that tend to make everything look gallery-worthy.

Guide to Creating a Gallery

Don Harris

9. Swap Out the Lighting Fixture

When we moved to our home, every room had those square foot, flush-mounted House Depot ceiling fixtures that simply scream “rental.” Through time we have slowly swapped them out for announcement pieces we adore. Our bedroom features a nassa shell chandelier; our hallway and dining area have clear globe lights; our den has a Moroccan goatskin and henna light (I kid you not).

Kelton Mack Designs

A single, stunning light like this Maskros pendant can be the primary characteristic in a room and adjust the look of the entire space. It doesn’t need to be costly.

See related

Borrow From the Bauhaus for a Modernist Landscape Design

Garden layout wasn’t taught at the powerful Bauhaus design school founded by Walter Gropius in 1919, but the popular Bauhaus notion of bringing art, art and technology into one total work, the Gesamtkunstwerk, afterwards found its way into houses and landscapes. We see expressions rooted in these Bauhaus notions in our houses — as integrated living systems between home and garden, combined with functional layout without decoration.

Elad Gonen

The Arts and Crafts movement influenced several features of the Bauhaus school, including the value of quality craftsmanship and materials, though its strong use of decoration was reversed. Early gardens created after the edicts of the Bauhaus movement were built by modernist architects, maybe not anglers; Walter Gropius designed only one garden, at England’s Dartington Hall, from the 1930s.

Modernist houses in the 1920s and 1930s were built based on geometric shapes having a watch to form following function. Gardens began mirroring the home layout as part of the general site layout, becoming more than simply a decorative element enclosing the home.

We can see that this implemented from the modern case revealed here.

Nixon Tulloch Fortey Architecture

Economy of layout. Bauhaus pupils were taught that beauty was to be found in economy of form and in how materials were utilized.

Here we see a layout which has economy of design, with materials linking the construction and garden — the timber siding on the home links with the garden decking, along with the concrete patio links with the board-formed concrete on the home.

Huettl Landscape Architecture

This doesn’t indicate that landscapes must avoid crops, using only hardscape and bud to replicate the geometric contours of their structure.

This planting has been carefully selected to enhance the general design without being too decorative. The planting layout is functional — equally economical in its use and functional in its low maintenance.

West Architecture Studio

Integration of house and garden. This home and garden are a terrific illustration of the Bauhaus concept of Gesamtkunstwerk — or “complete work.”

The garden is essential to the overall design of the building and cannot be separated from it. The formality of the planting inside the geometrically shaped raised beds averts any softening or portion of the general layout.

BAAN layout

This space is the ultimate integration of house and garden. Does it seamlessly connect the inside to the surface, but it embraces the use of new technology and materials to create a seamless connection — so loved from the followers of the Bauhaus movement.

Dean Herald-Rolling Stone Landscapes

Bauhaus layout ideas work well in the design of smaller outdoor spaces. Here we see that the ideals of rationality, functionality and using simplified forms brought together in a modernist courtyard garden.

Cultivart Landscape Design

Functional layout. Functional layout is a keystone of Bauhaus design used widely today in garden design. Instead of hardscaping and plant selection used purely for decorative purposes, characteristics inside the garden work for their keep in addition to being visually pleasing.

The attractiveness of the seating space is the careful selection of two materials — concrete and timber — which creates quite a simple layout, one which is not diluted by the strong planting.

Christopher Yates Landscape Architecture

Each bit of the garden has a single use, but they come together to create a complete design. The barbecue and dining set are functional and clean, not ornamental, fitting with the ease of the plot. The concrete wall has been carefully selected, making an almost industrial feel.

These features follow the preference of Bauhaus designers for products which could be industrially produced yet were aesthetically pleasing.

Matthew Cunningham Landscape Design LLC

In hardwood decking, the most fundamental of modern garden design features, we can see the effect of Bauhaus design fundamentals.

Both the decking and wire fencing here fulfill their function without using extraneous decoration; they’re simple and inexpensive, and yet the type follows the function.

See related

Tote Your Songs

Sixty decades ago, the advertising term “hi-fi” was used to market big stereo systems that played 33 1/3 rpm vinyl records and FM radio, instead of the lower-quality 78 rpm records and AM radio. Today few people still listen to records at home, as well as traditional radio is being replaced by digital music files downloaded from Web sources.

Music lovers buy tracks or albums from Apple’s iTunes and its equivalents, such as Google Play and Amazon MP3. Another common choice is streaming music websites, like Pandora and Spotify. These fundamental alternatives for finding music are only a couple of the hundreds. Along with the alternatives for listening are increasing.

Leslie A Wood

Music is usually discovered, purchased and controlled with computers, tablets and, above all, our phones instead of having anything related to retail stores or conventional radio.

At the hi-fi age, speakers needed to be physically connected by cables to a central receiver, which served as an amplifier — a box capable of getting over-the-air radio and enter from a tape or record player — and also a control panel, where the user can switch inputs, change the volume and decide on the music.

Now most of this is achieved within an program. However, if you want booming, high-quality home sound, you still need amplified speakers. However, you don’t need a receiver. And you do not have to transmit music over wires. You need Wi-Fi hi-fi. Good sound, no cables.

One of the most significant things about Wi-Fi hi-fi is its portability. You can just pick it up and take it into a different room, the garden — or a different home.

store.sony.com

Sony SA-NS510 Wireless Speakers – $299

The Sony SA-NS510 is notable because of its traffic-cone-like form and the fact that it runs on rechargeable batteries for approximately five hours. It’s a handle for easy portability. It has no front or back and blasts music 360 degrees about it — ideal for an outdoor party or picnic. Like the other systems within this ideabook, it streams music in your phone or tablet — in this case, either an iOS or Android device by means of a dedicated mobile program. It also supports Apple’s AirPlay technology, streaming music from any Apple telephone, tablet or pc directly into the speaker system over the atmosphere.

Crutchfield

Bowers & Wilkins A7 Speaker System – $799.99

The Bowers & Wilkins A7 has a 6-inch Kevlar-reinforced subwoofer, a Nautilus tubing aluminum tweeter, a 3-inch midrange speaker and five dedicated audiophile class-D amplifiers. Reviewers praise the A7’s noise, even in low volumes. In addition to streaming via Apple AirPlay, you can also decide to join over routine Wi-Fi or an Ethernet cable.

Philips

Philips Fidelio Wireless Hi-Fi Speakers

Reviewers have lauded the Philips Fidelio Wireless Hi-Fi as a great-looking and great sounding wireless sound system. Constructed from Apple’s iOS or the Android mobile program Philips AirStudio, the Fidelio approaches the convenience of just playing music via earbuds, but with great speaker sound.

There’s no dedicated remote controller unit. On the other hand, the speakers do have five buttons that operate like car-radio presets. You pick an Internet radio station for every one, and that allows you turn on the speakers and play a station without using the program on a telephone or tablet.

Sony

These and many other sound options can bring your house’s sound system from the time of cables into the flexible, interactive and mobile age of Wi-Fi hi-fi.

See related